Diferencia entre revisiones de «G-Backup-Infinite-EN»
| Línea 1: | Línea 1: | ||
| − | The following manual describes in a simple way the first steps of setting up your G-Backup Infinite. In case you need help with any of these steps, please contact our support department. | + | <pre style="background-color: rgba( 87, 218, 42, 0.1); border-top: 3px solid #37c207">The following manual describes in a simple way the first steps of setting up your G-Backup Infinite. In case you need help with any of these steps, please contact our support department. |
· The solution is compatible with any Windows 10 x64 or Windows 11 x64 computer (Home, Pro, or Enterprise) with an internet connection (a minimum upload speed of 100 Mbps is recommended). | · The solution is compatible with any Windows 10 x64 or Windows 11 x64 computer (Home, Pro, or Enterprise) with an internet connection (a minimum upload speed of 100 Mbps is recommended). | ||
| Línea 9: | Línea 9: | ||
· The initial system scan requires the computer to be turned on and can take several hours depending on the CPU, disk type, available RAM, and internet upload speed. As a reference, it is estimated that a computer with a 200 GB SSD, 8 GB RAM, 4 CPUs, and 1 Gbps internet will take less than 3 hours. We recommend performing this initial system scan when the computer is not in use. | · The initial system scan requires the computer to be turned on and can take several hours depending on the CPU, disk type, available RAM, and internet upload speed. As a reference, it is estimated that a computer with a 200 GB SSD, 8 GB RAM, 4 CPUs, and 1 Gbps internet will take less than 3 hours. We recommend performing this initial system scan when the computer is not in use. | ||
| − | · While the system is running, the computer can be used normally. | + | · While the system is running, the computer can be used normally.</pre> |
==Product activation== | ==Product activation== | ||
Revisión del 17:18 4 jun 2024
The following manual describes in a simple way the first steps of setting up your G-Backup Infinite. In case you need help with any of these steps, please contact our support department.

· The solution is compatible with any Windows 10 x64 or Windows 11 x64 computer (Home, Pro, or Enterprise) with an internet connection (a minimum upload speed of 100 Mbps is recommended).

· It is necessary to configure network devices (Firewalls & Routers) for the connection from the network where the devices to be backed up are located, allowing incoming and outgoing connections between both addresses to: [http://g-backupinfinite.gigas.com/ g-backupinfinite.gigas.com] using standard port 443 for SSL.

· The initial system scan requires the computer to be turned on and can take several hours depending on the CPU, disk type, available RAM, and internet upload speed. As a reference, it is estimated that a computer with a 200 GB SSD, 8 GB RAM, 4 CPUs, and 1 Gbps internet will take less than 3 hours. We recommend performing this initial system scan when the computer is not in use.

· While the system is running, the computer can be used normally.
Contenido
Product activation
Once we receive the ticket with the confirmation of provision of the product, we can access our customer panel to activate it. In the following link we show you how to recover access to your panel if it is the first time you do it: Recovery panel access
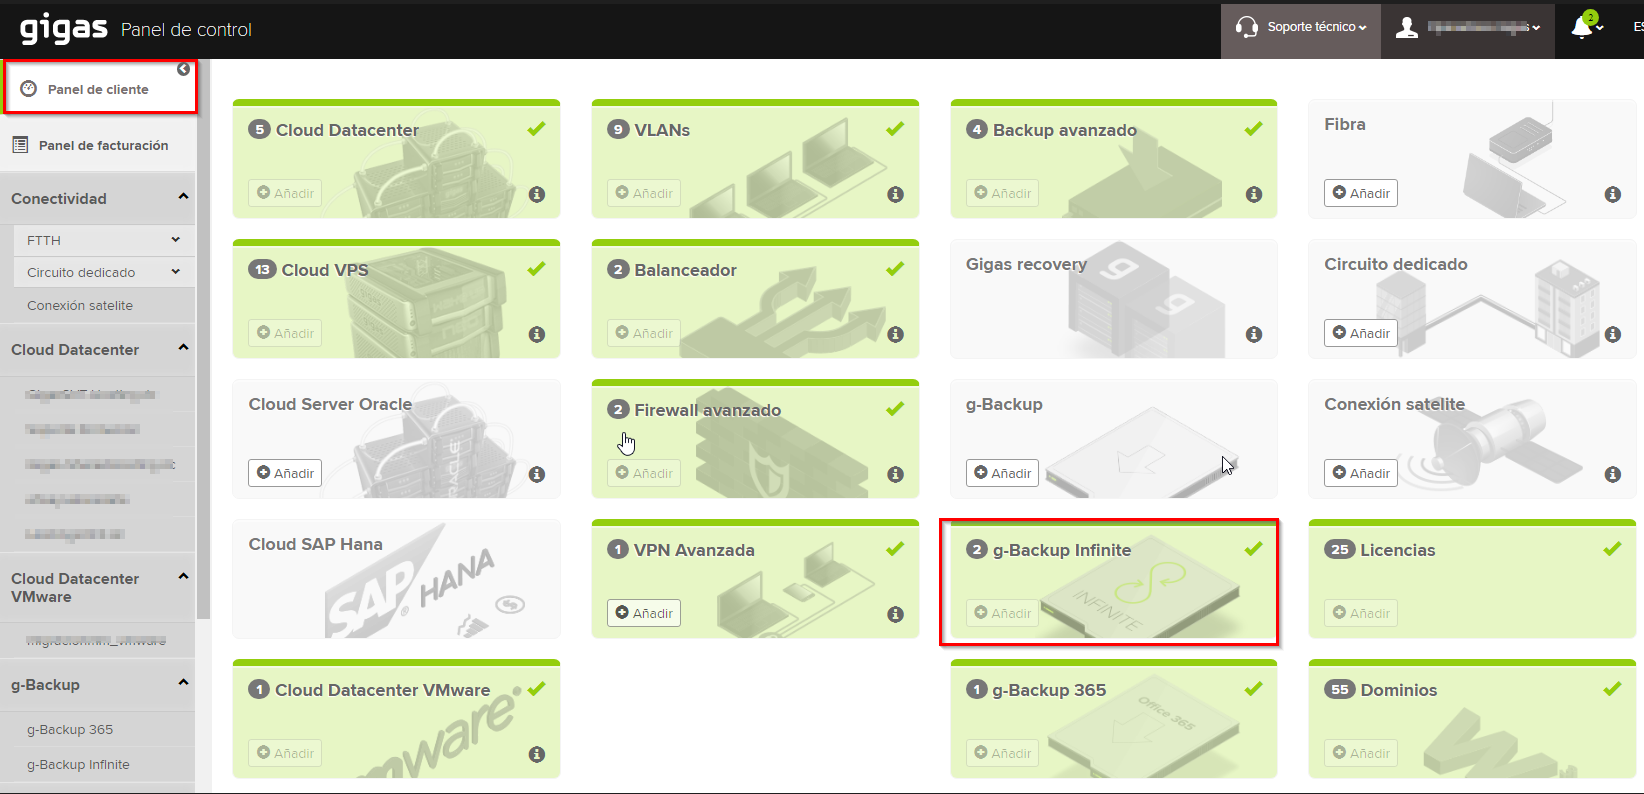
Once we have accessed the panel, we go to the G-Backup Infinite product box.
Agent Download
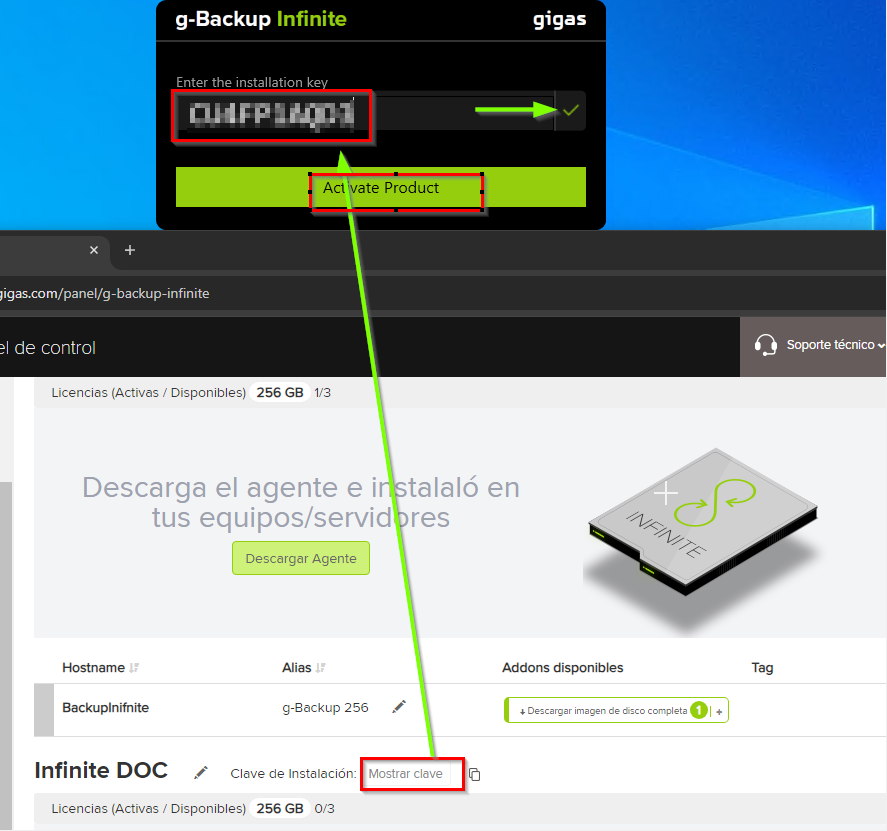
We download the agent for its subsequent installation on the server to be protected. You can copy the installation key or return to the Gigas panel to make use of it when appropriate.
The computers on which the G-Backup Infinite agent can be installed:
- 1. Windows 10/11
- 2. Windows server 2019/2022. There is compatibility with Windows server 2016 but the new updates of the certificates can give error in the installation of the agent, so it is recommended that this updated to the latest version.
Installing the Backup Agent
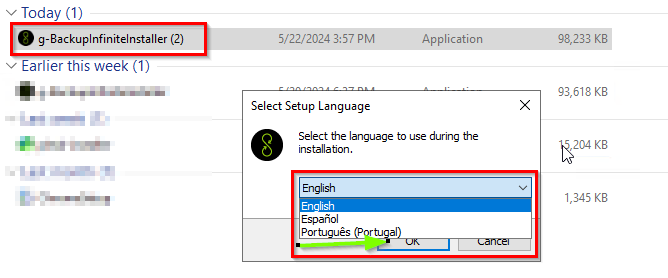
The installation process follows the default settings (product policy, start of installation and end of installation).
- 1. The language we are asked is for the installation process, in which we can choose between Spanish, English or Portuguese. In the management of the tool, the language that takes is the default language in the system.
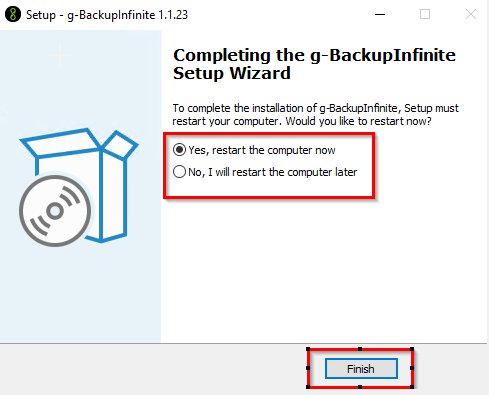
- 2. After finishing the installation, it will ask to restart the computer, the restart is optional, but until the system is restarted, the backup service is not activated, so it must be applied manually to start the infinite copy.
Activating license in the backup client
When the server finishes restarting, we login with our Gigas credentials. A popup will appear to enter the license key, which can be copied from the client panel, as shown in the image below. If the key is not correct, the check will not be green, so you will have to validate the key in the Gigas panel.
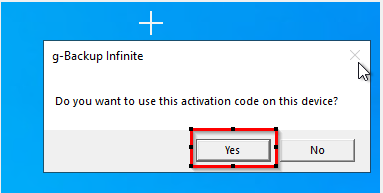
When the key is confirmed and "Activate Product" is clicked, a popup will appear so that, for the last time, you can validate that you want to install the agent on the device.
The password can be reset at any time from the panel.
Access to the tool's management panel from the backup client
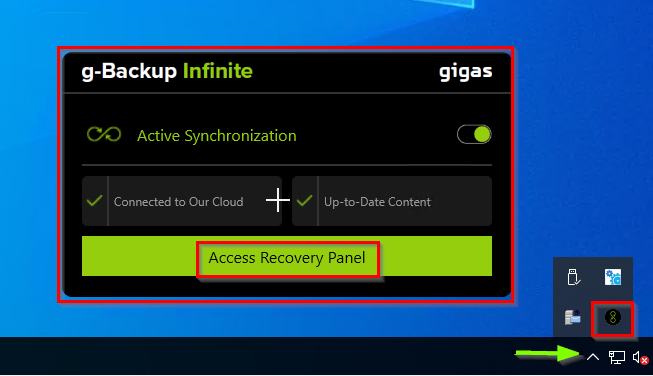
Once the installation of the backup agent is finished, you will be able to see it in the taskbar in the lower right corner.
Step 6. Log in to the tool's dashboard with the same login credentials as the Gigas dashboard.
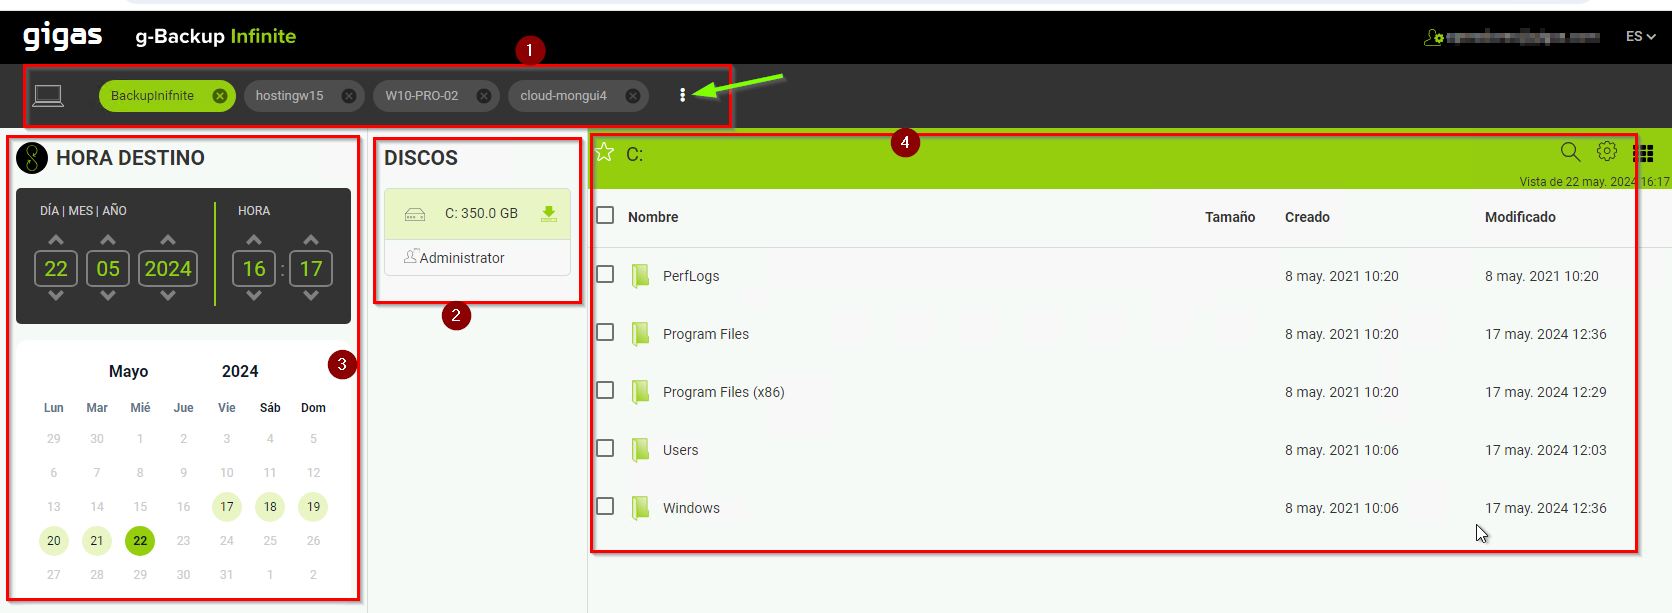
- 1. Machines that enjoy the product. Up to 6 machines can be displayed in this section. Always from the three points you will be able to see all the servers associated with the product.
- 2. Disks protected with the G-Backup product in relation to the server, -1, that you have selected. It also shows the current users on that server to make it easier to locate the file(s) to be recovered.
- 3. You can locate the status of the disc by date, day, hour or minute. You can locate the exact time either by the calendar or by setting the date manually.
- 4. Availability to browse through the different files or path and download the desired file/folder. If the document is in a readable format, its content can be viewed before downloading. If the document, an executable for example, is not readable, it will only give the option to download.
