USER GUIDE FOR COLD DISC RESISES
COLD RESIZE OF THE FILE SYSTEM
After the 1st part consisting of the disk resize externally from the Gigas Panel, we will now resize the internal file system that has the disk.
As we said, we will need to mount the ISO of the SystemRescueCD on the server which the recently resized disk is connected, configure the server to boot the said ISO, start it and use the gParted tool to stretch the filesystem until the end of the new size of the disc.
NOTE: This file system resize procedure using gParted is perfectly applicable to both servers installed with Linux or Windows operating systems.
To correctly resize the file system and not have data loss / corruption problems, we must execute the following steps in strict order:
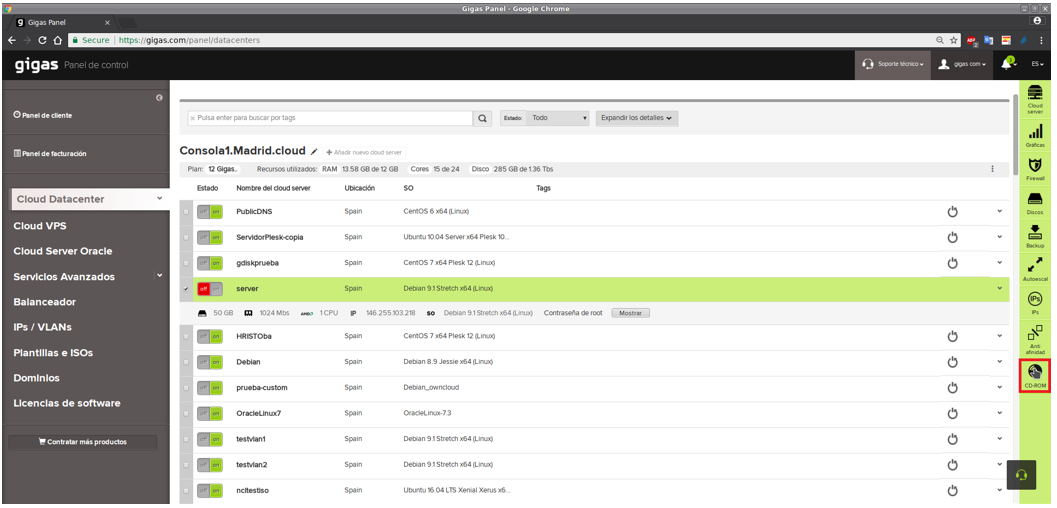
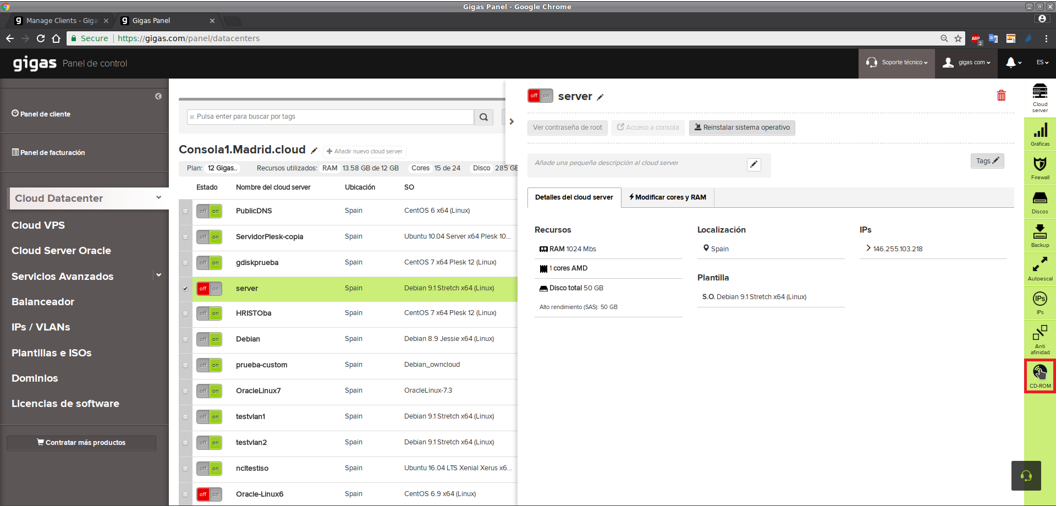
1. With the server off and from the list of servers, we select it in green and click on the "CD-ROM" section of the right vertical menu:
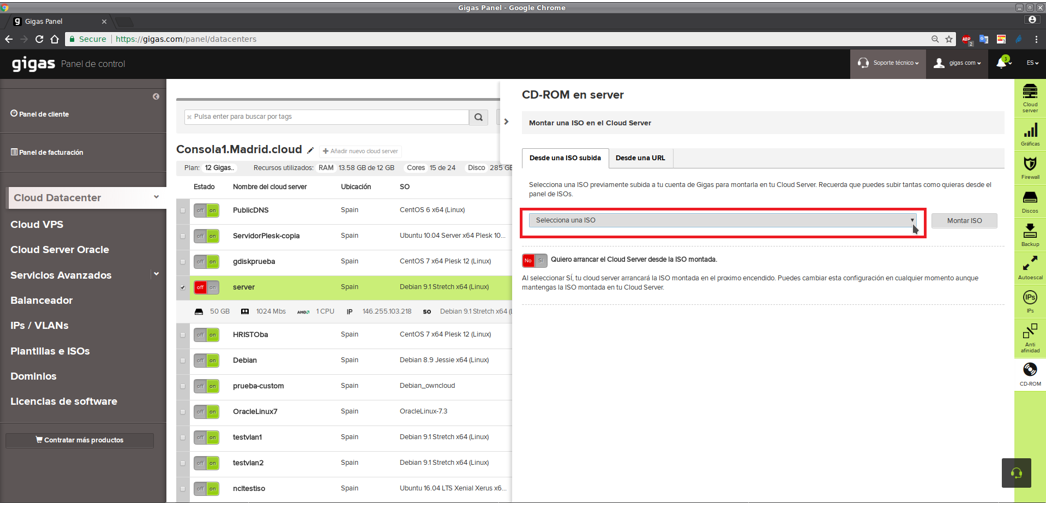
2. Now we will click on the dropdown that contains the ISO images:
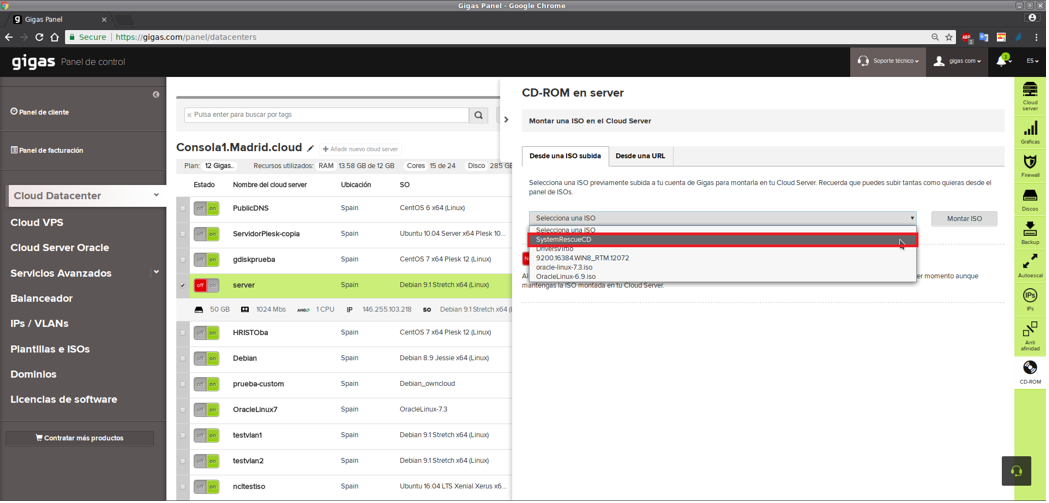
... and we will select the ISO image called "SystemRescueCD":
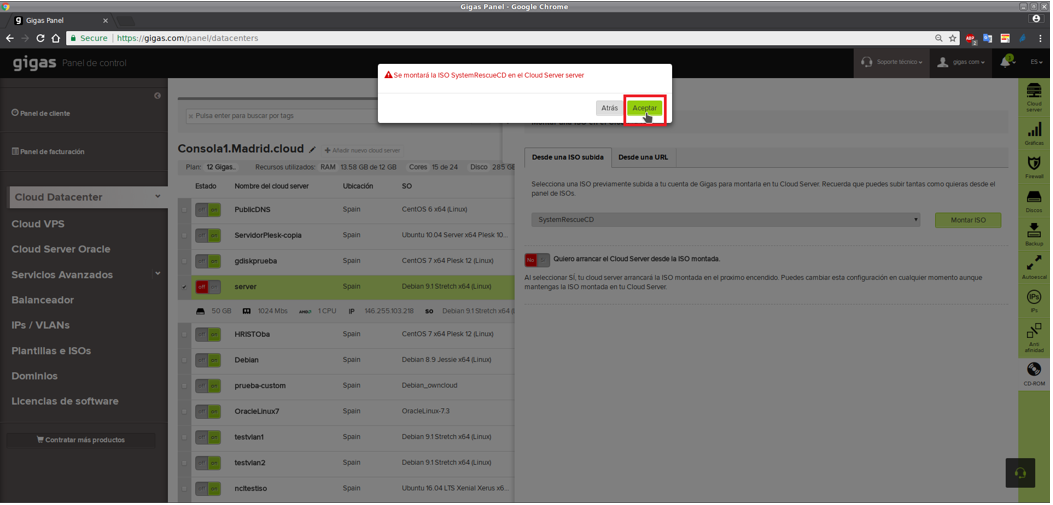
3. After selecting that ISO image and accepting to save the changes, the Panel will ask us to confirm if we want that ISO image to be actually mounted on the server ...
Accept If everything is ok:
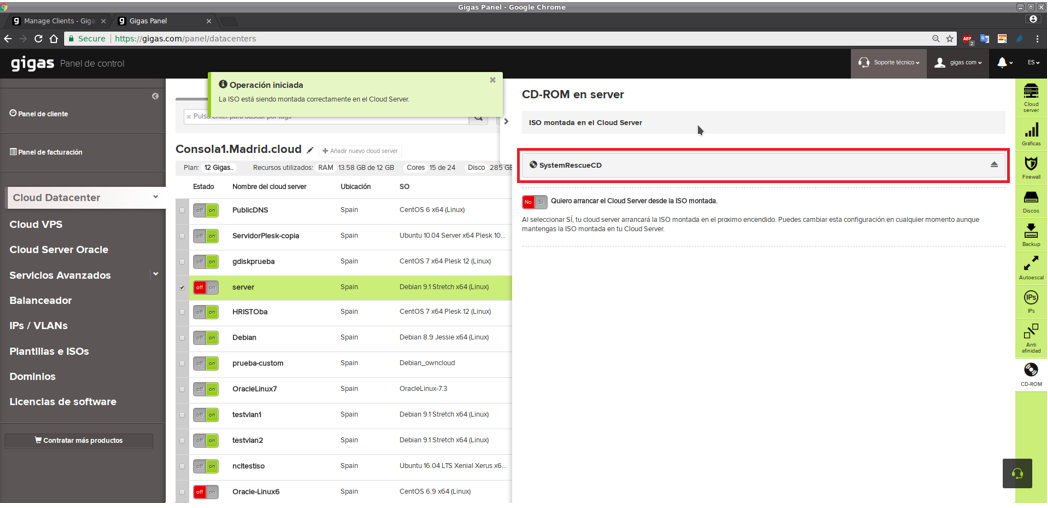
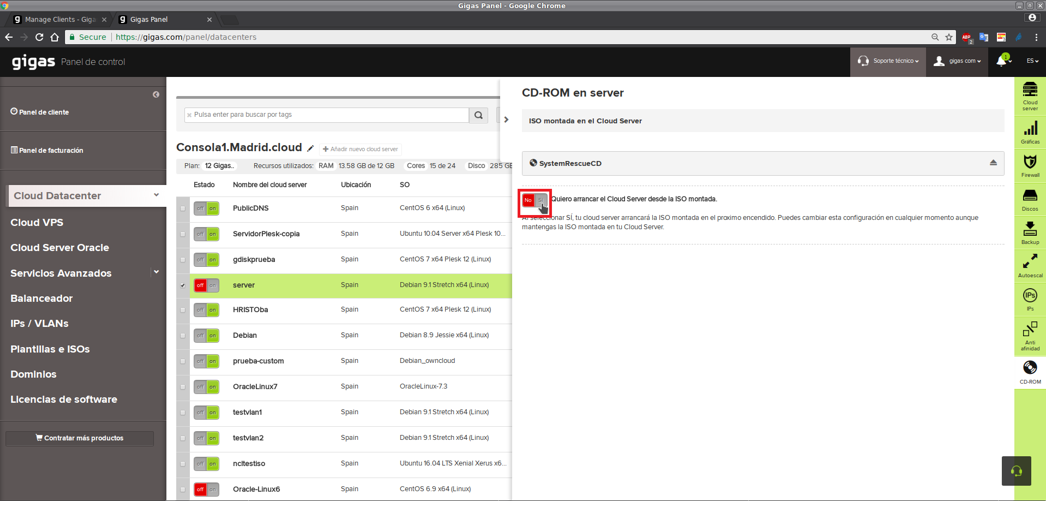
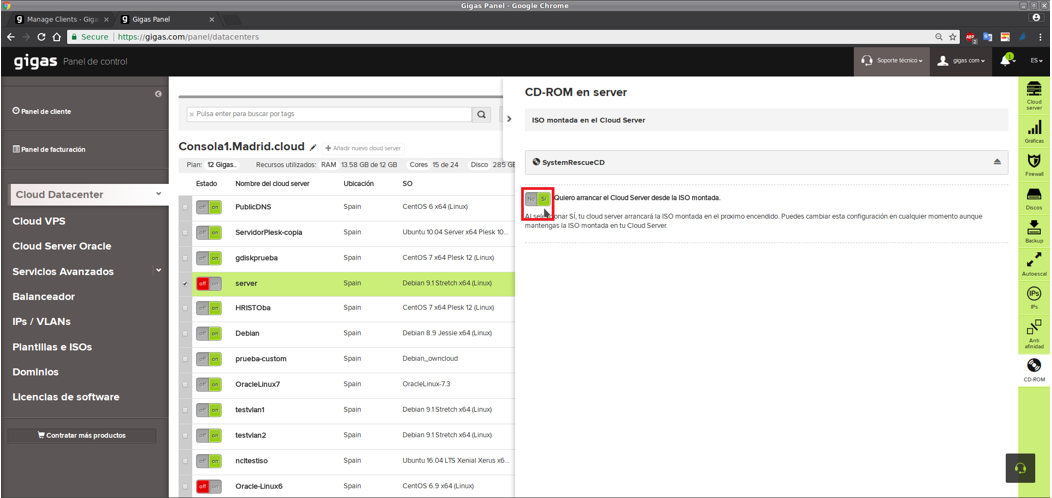
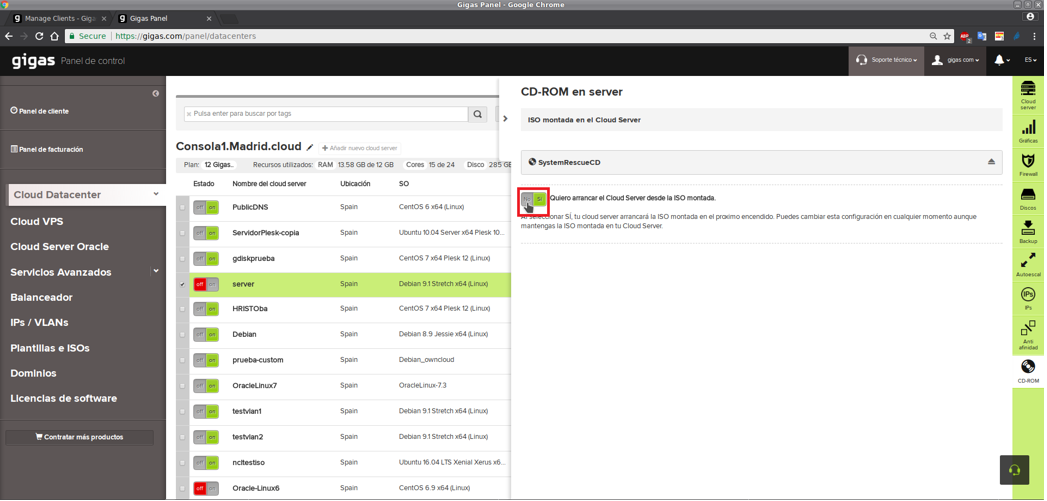
4. When the image has been mounted correctly, we will now specify the Panel that we want to start on our server with it. For this we will do it by checking "Yes" in the following button of the Panel:
When we click on the "Yes" button to start the server from the selected ISO image, the Panel will show us 2 important announcements consecutively.
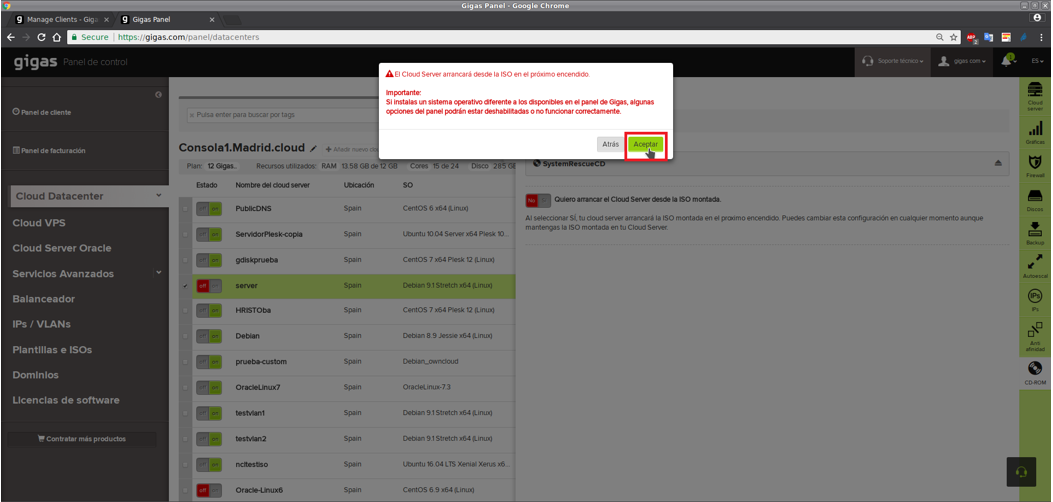
The first notice will warn us of an important issue, that although this guide will not be treated, it is necessary to take into account since the message appears whenever any ISO image is going to be mounted.
The message of the first warning is that if instead of specifying the image of the SystemRescueCD as is the case of this guide, we would specify the one of a CD / DVD of installation of an operative system and decided to finally install it in our server, some of the functions of the Panel may not be available or not work properly since it is not an operating system template created, maintained and supported by Gigas.
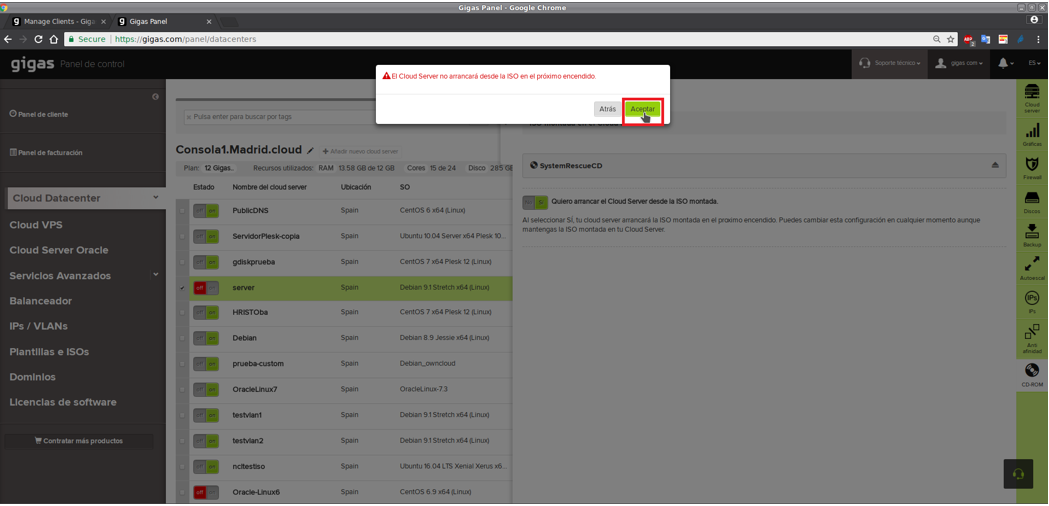
In our case, we will simply click on the "Accept" button when the first warning appears, as indicated in this screenshot:
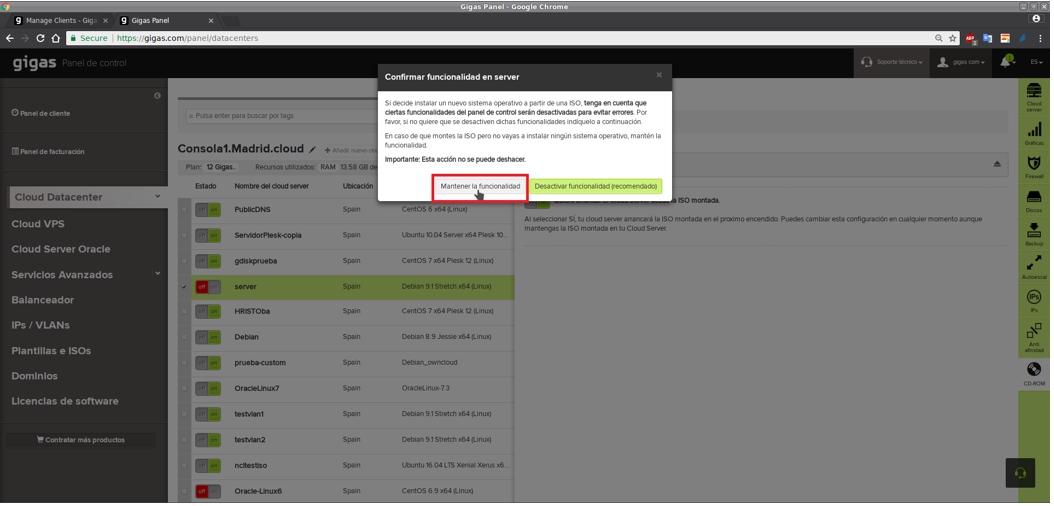
After this first warning message, a second will appear asking us to confirm that we are aware that if the assembled ISO image is that of an operating system not officially provided by Gigas, there may be some Panel functionalities that may not work properly depending on the version or type of operating system indicated, and in that case the most advisable thing would be to deactivate some of those non-compatible functionalities of the Panel to avoid possible problems.
As in the case of this guide, the ISO image specified is not that of an external operating system, and we only want to use SystemRescueCD to mount the external hard disk of our server and resize the file system of it, we will click on the "Keep functionality" button, as indicated in the following screenshot:
After answering the question of the second warning message, we will see how, after a few seconds, the status of the mounting button of the ISO image selected on our server has changed to "Yes" in green:
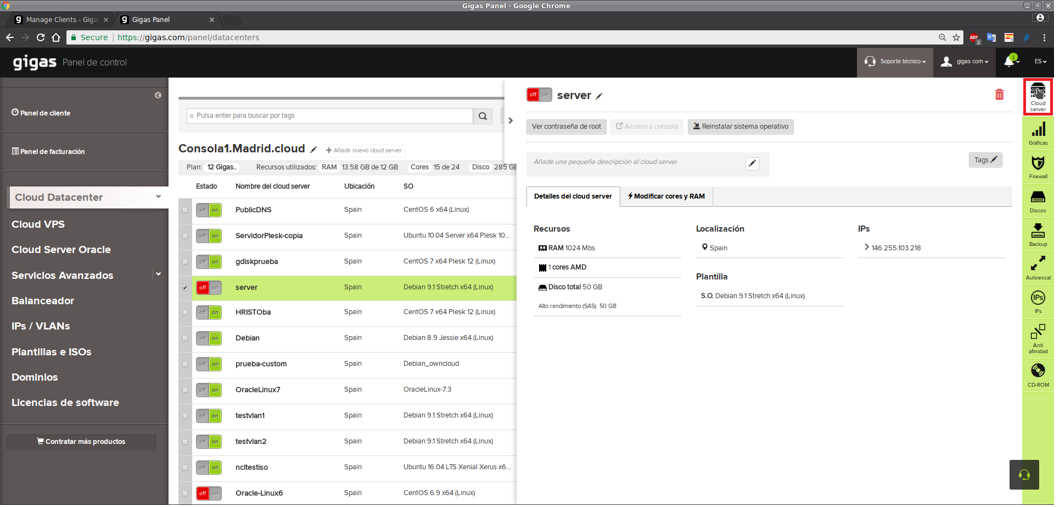
5. Now, we will click on the "Cloud Server" section of the right side menu ...
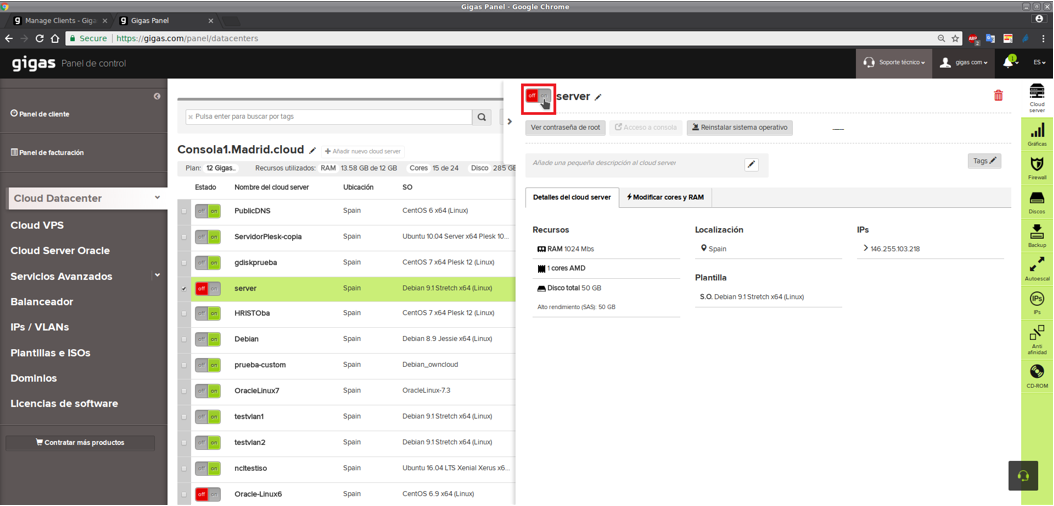
... and we will turn on our server by clicking on the "On" button that is indicated in the fol lowing screenshot:
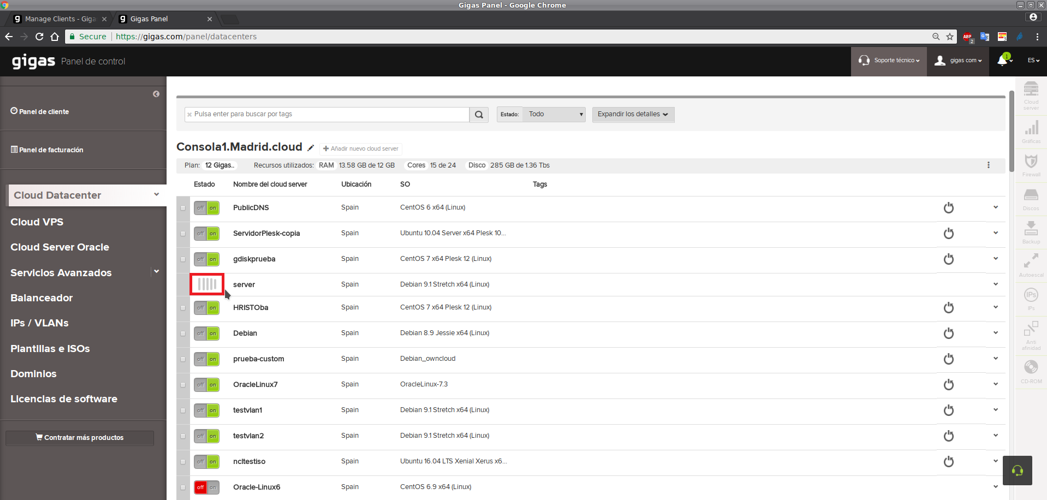
Our server will start from the selected ISO image, and while it finishes booting, it will be displayed in the Panel as follows:
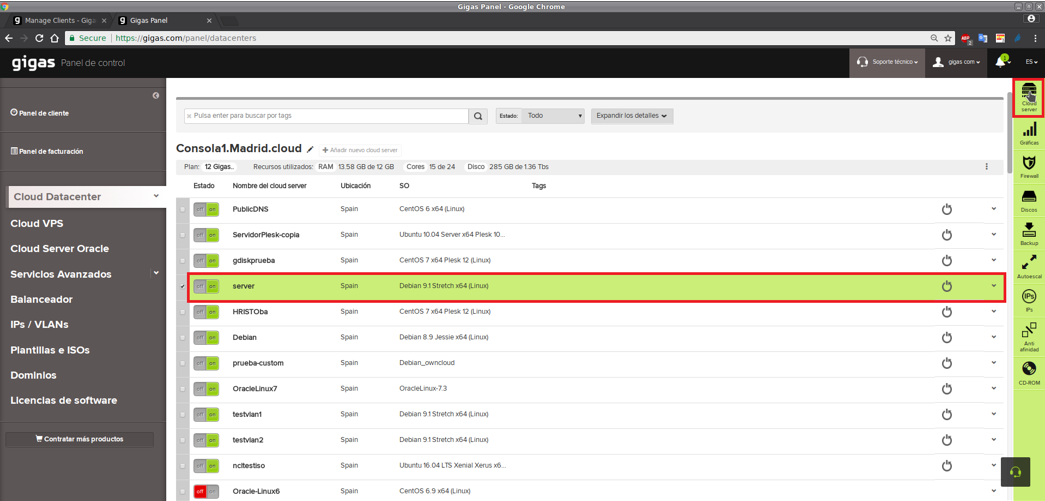
6. When the server has been fully restarted and shown on the server list, we will select it again in green and we will click again on the "Cloud Server" section of the right side menu ...
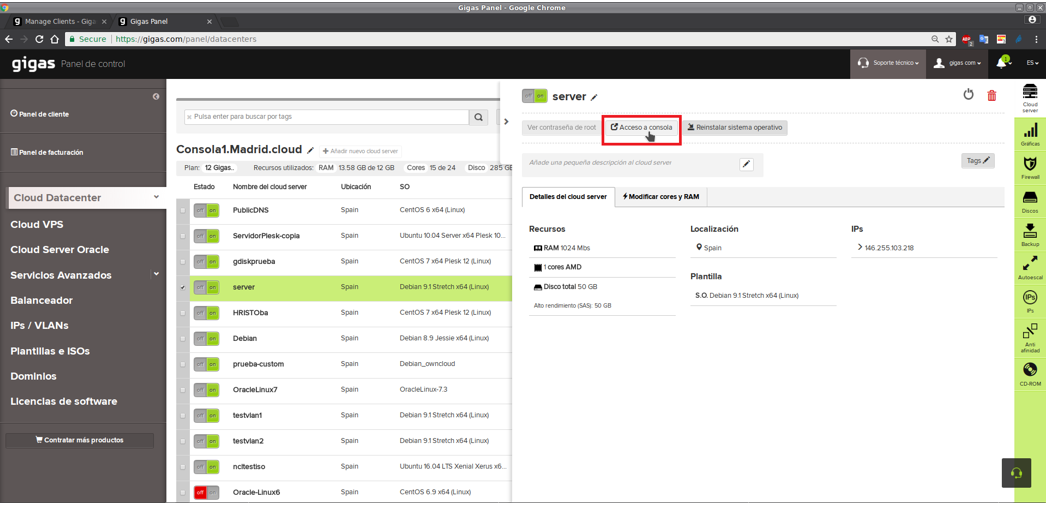
... and we will access the server console by clicking on the "Access to console" button as you can see in this capture:
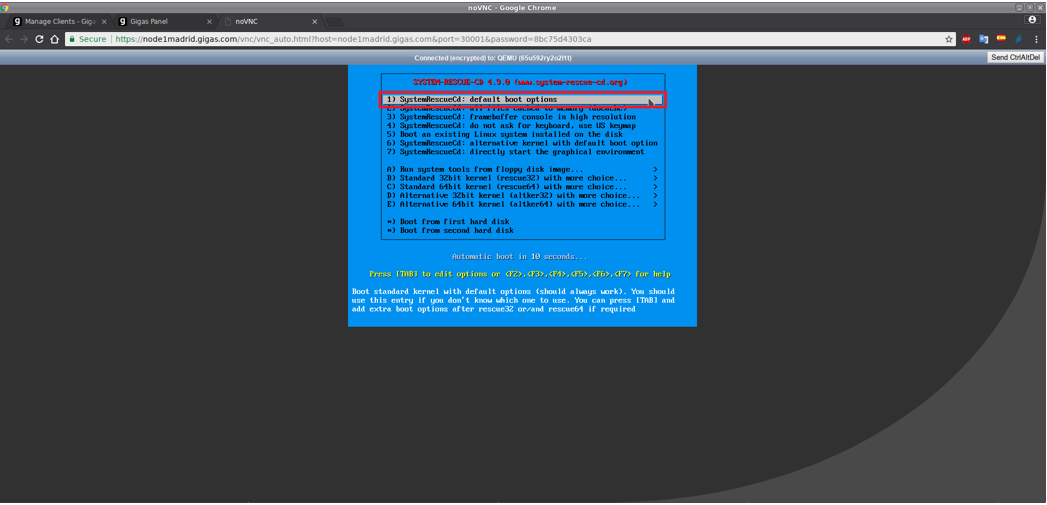
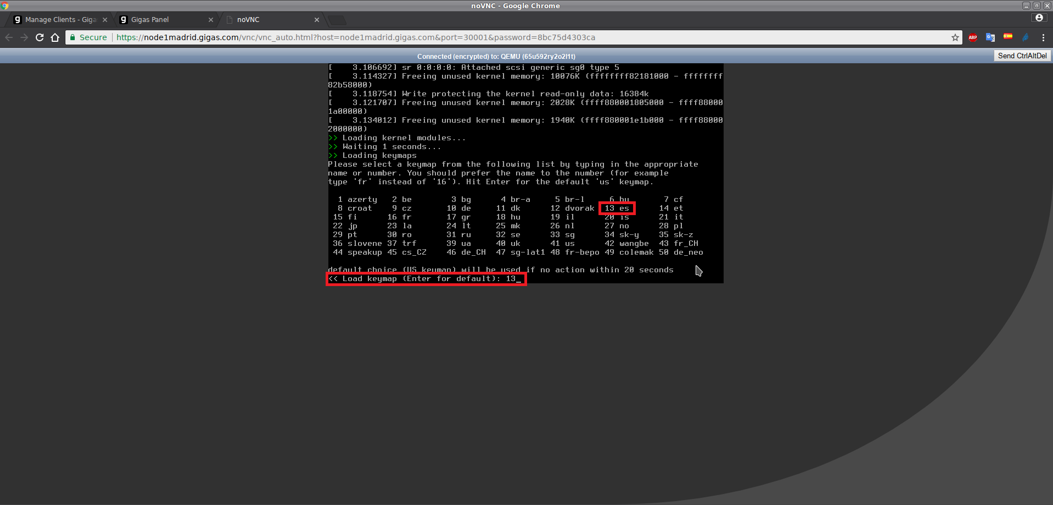
7. When the VNC console of the server is displayed, we will see how the ISO image of the SystemRescueCD has started correctly, and the following menu appears, which we will simply have to press ENTER to start with the first option that is the default ...
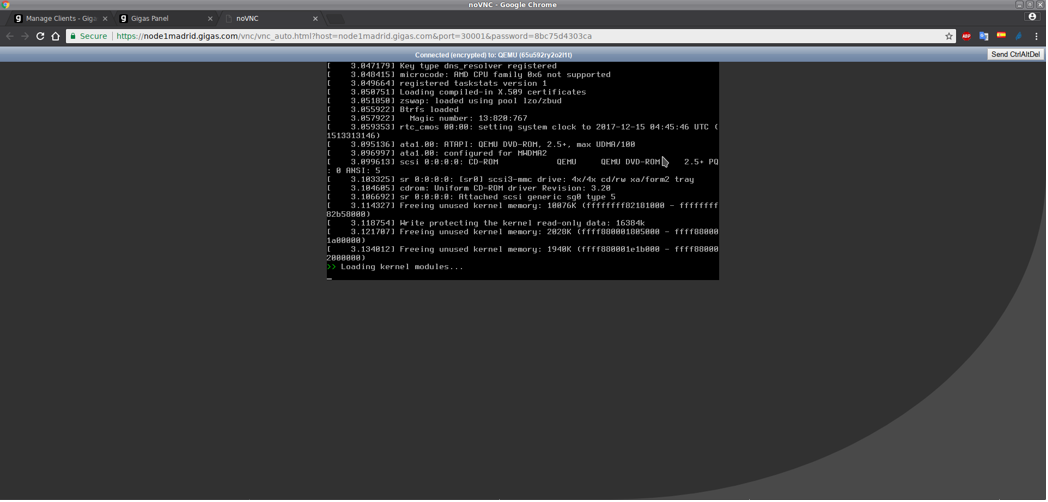
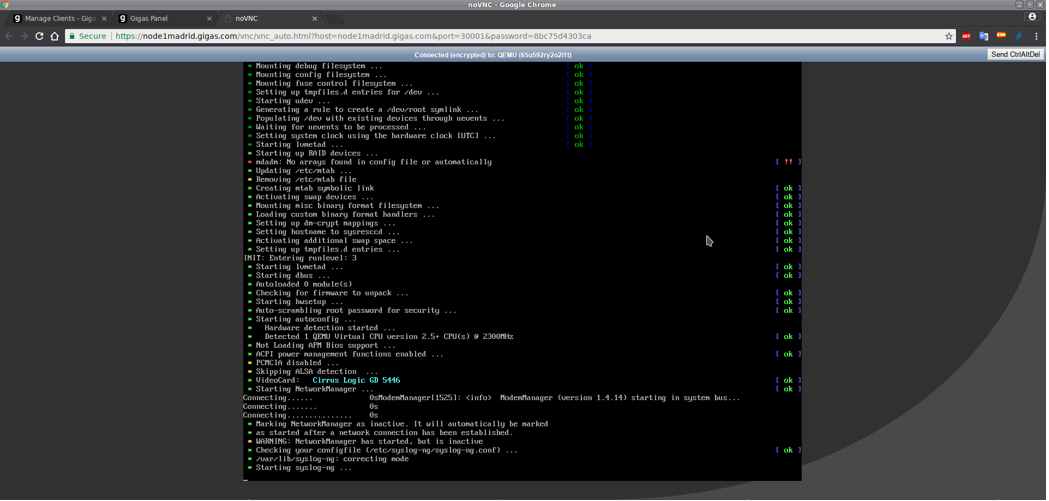
8. As we can see, SystemRescueCD will start booting ...
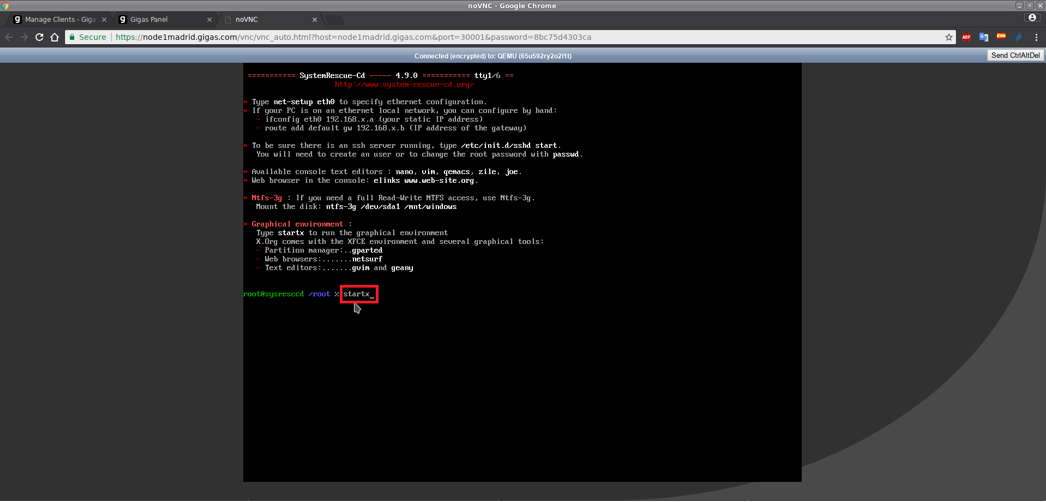
9. At the end of the load, we will see the following screen with the login prompt of the Linux shell, and we will write in it "startx" to start the graphical environment of it:
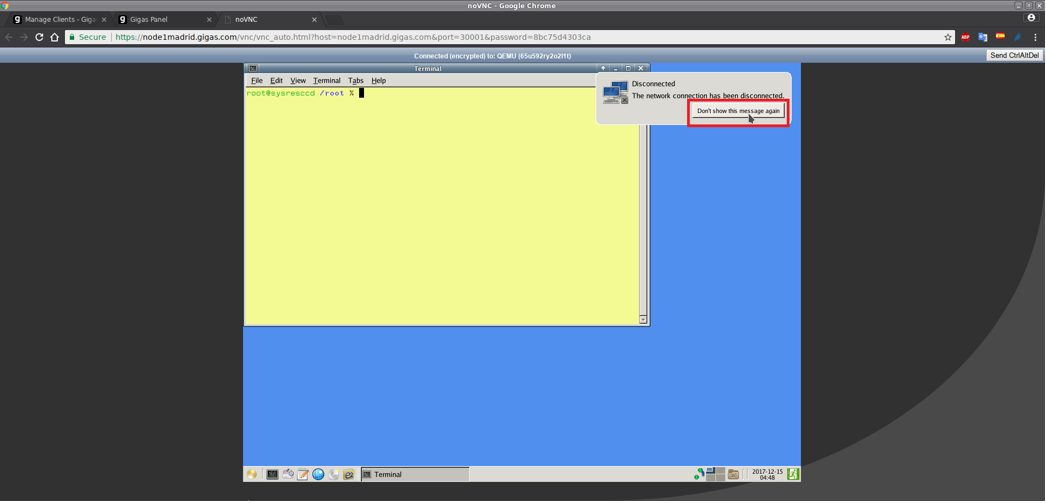
10. When you have fixed the graphic environment, we will see that we have a shell window with a yellow and open bottom, and that the second, we are at the top, a small window that will warn us that we have been disconnected from the network.
We can choose to ignore this message, but as it reappears in the next few seconds, our recommendation is to click on the "Do not show this message again" button, so that we stop bothering and distracting ourselves in an important process such as the manipulation of the systems in our hard disk that we are going to do next:
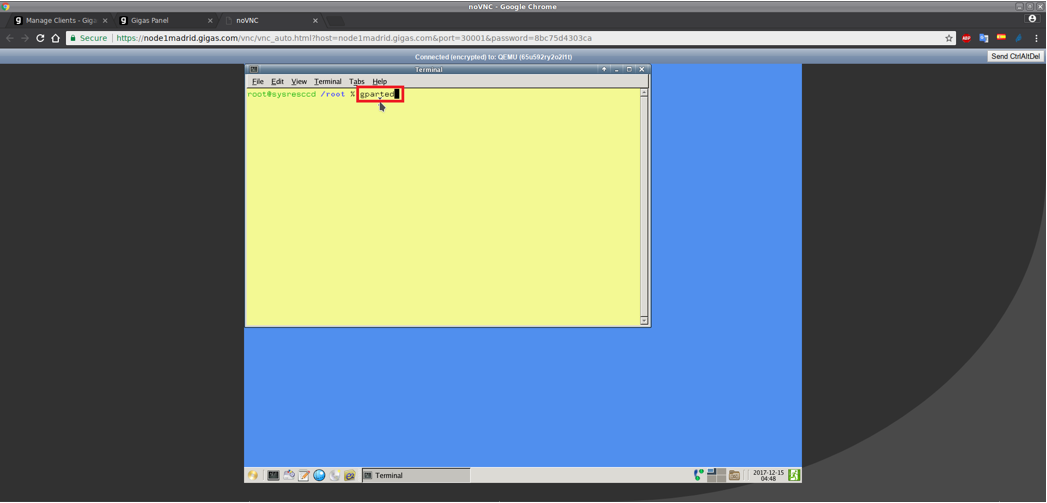
11. Now is the time to start the program called gParted, which will be responsible for helping us to manipulate partitions on our hard drive.
To do this, we will write in the yellow window with the Linux shell, the word "gparted" and press ENTER:
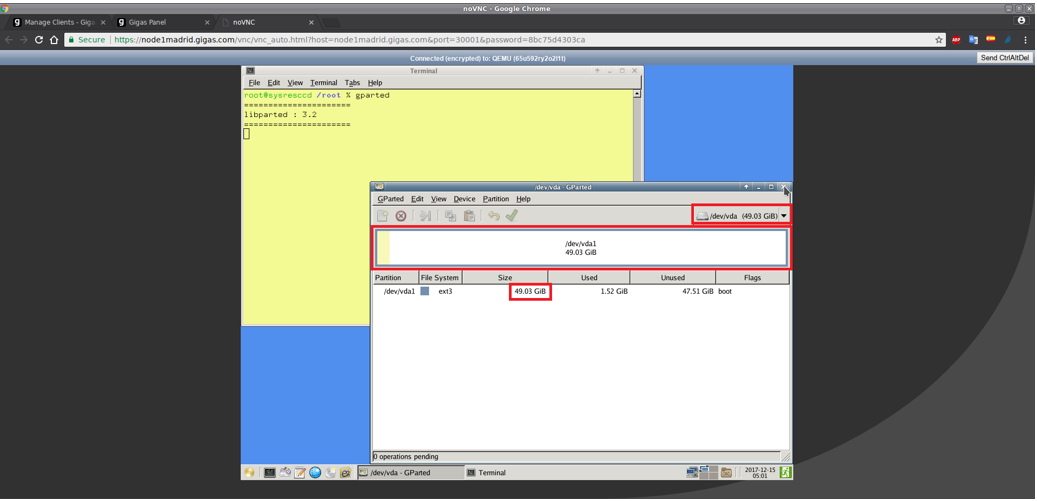
12. Once gParted has started, it will show us the status at the level of partitions and file systems of the hard disk that we have selected.
NOTE: In our example, the hard disk to be resized was the primary one (referenced as / dev / vda) and had a size of 24GB that was created when the server was provisioned with a Linux operating system, which is provisioned in Gigas with 2 hard drives: one for data (/ dev / vda) and another for SWAP or swap memory (/ dev / vdb); but later we will see how it would be done if the server was provisioned with a Windows operating system and a single disc recently resized to 50GB, from within the operating system itself and using the Disk Administrator tool. We will see this at the end of this guide.
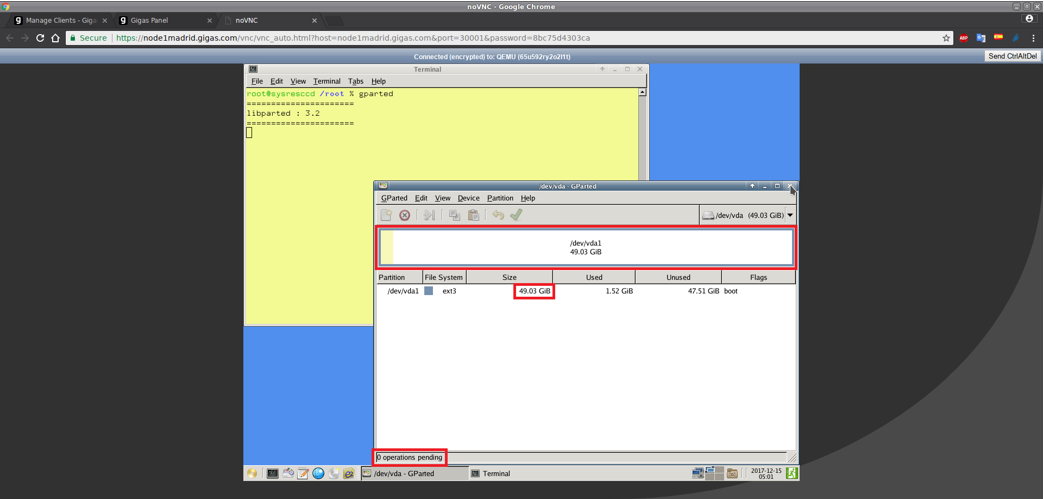
In the 1st Part of this guide, we made from the User Panel the disc resizing to 49GB, and generally and if everything went well, automatically and implicitly, I should have resized the partition and the file system until the end of the new disk size, something that has happened as we can see in the following screenshot
At this point, 2 situations can occur:
- That the disk resize has been correctly produced (as in the case of the previous screenshot), resizing not only the disk to the new size, but also the file system.
- Or that the disk resize has been correctly produced, but the resizing of the filesystem has not occurred, and it continues to have the size that the disk originally had.
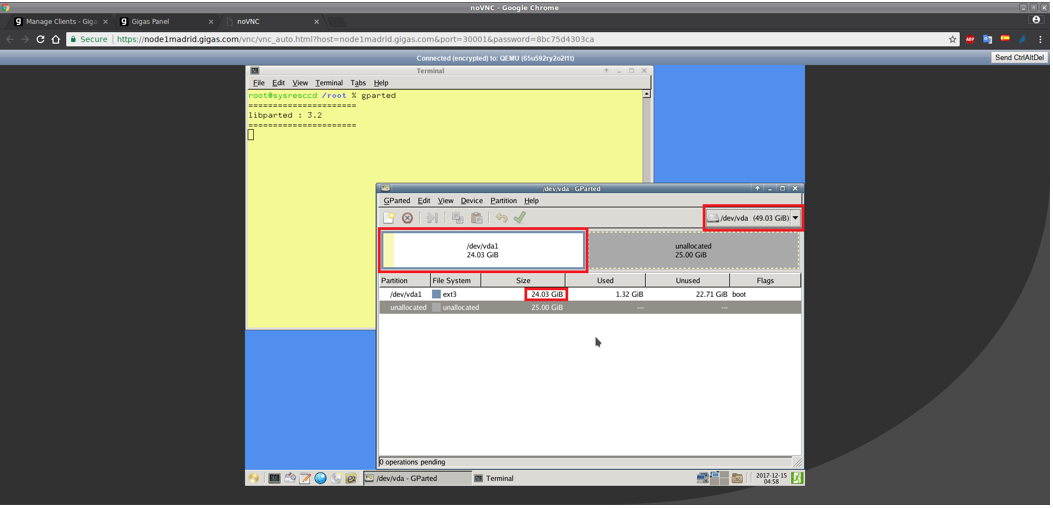
That case is precisely the reason for the creation of this guide, and that is what it tries to cover: manually resize the file system to the new disk size, using the gParted program. Therefore, let's imagine that when starting gParted, we find the following screen:
As we can see in the capture, the size of the disk is correct, but not that of the partition containing the file system, which still has a size in our example of 24GB and other 25GB appear just below as "unallocated". gParted will help us solve this problem manually.
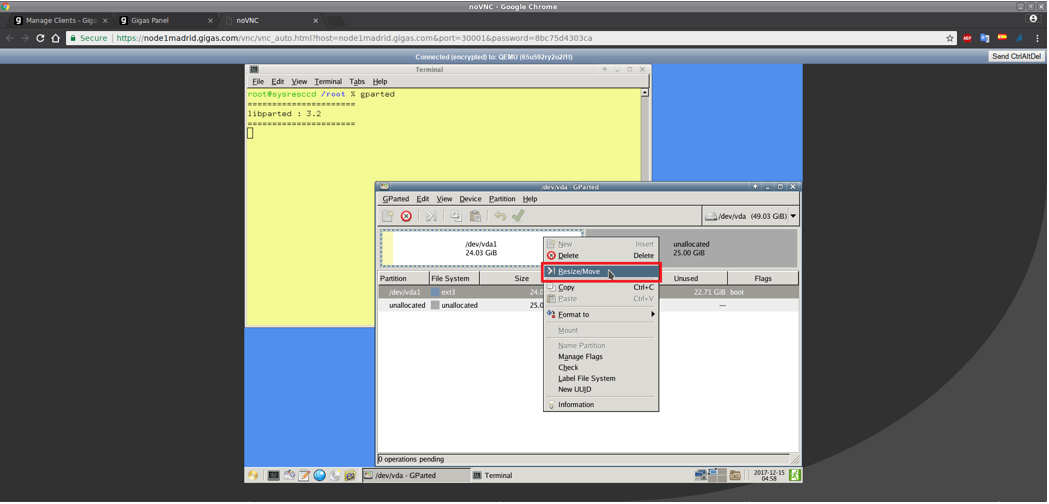
13. To resize the partition in question (referenced as / dev / vda1), what we will do first is to select it in blue, and putting the mouse cursor over, we will click with the right button. A pop-up menu will appear, and we will select "Resize / Move" as indicated by the following screenshot:
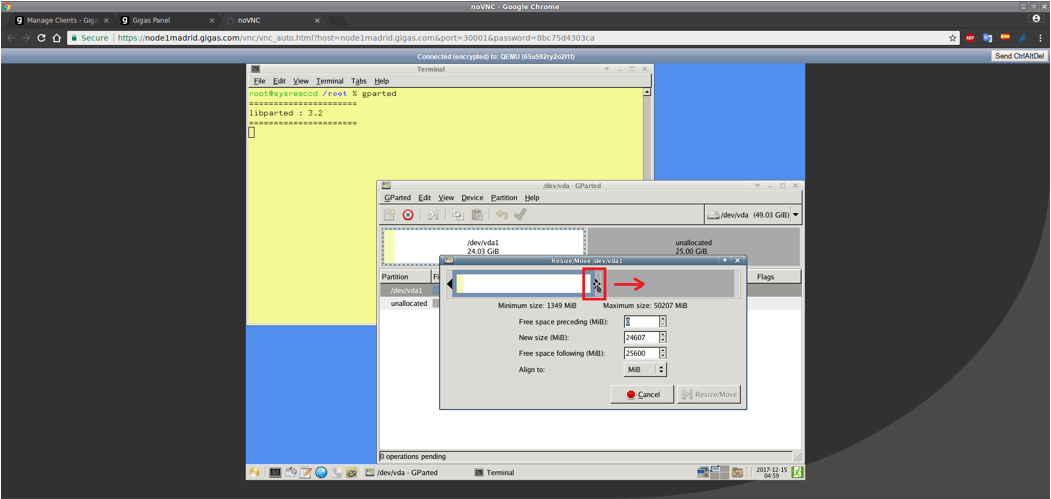
14. We will now open another small window, in which we can manually specify the number in MiB (Mebibytes) that we want to have the partition, but also allow you to do it more comfortably and interactively using the mouse. We will choose to do it using the mouse.
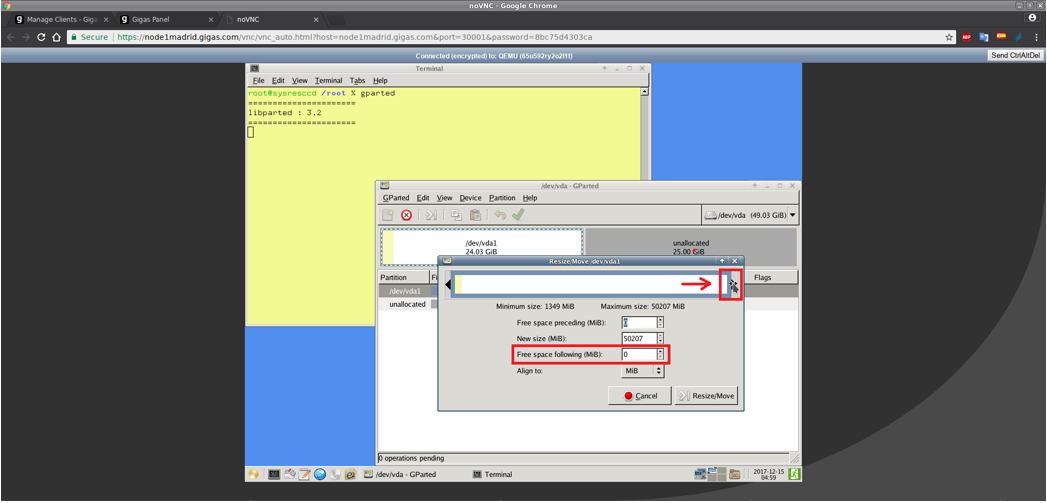
15. When the mouse cursor has reached the top of the right side and in the third cell of the window that says "Free space following (MiB)" has the value 0, we will release the left mouse button ...
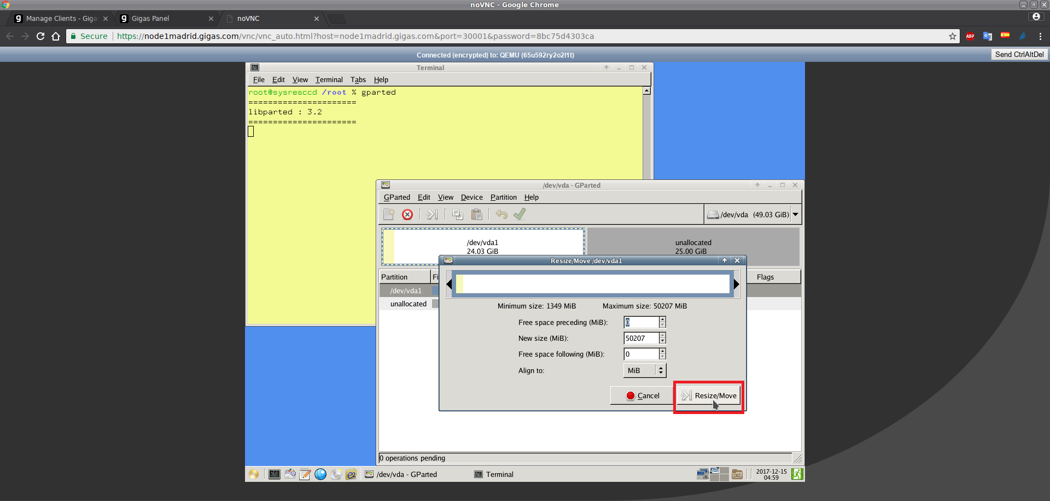
... and we will click on the "Resize / Move" button:
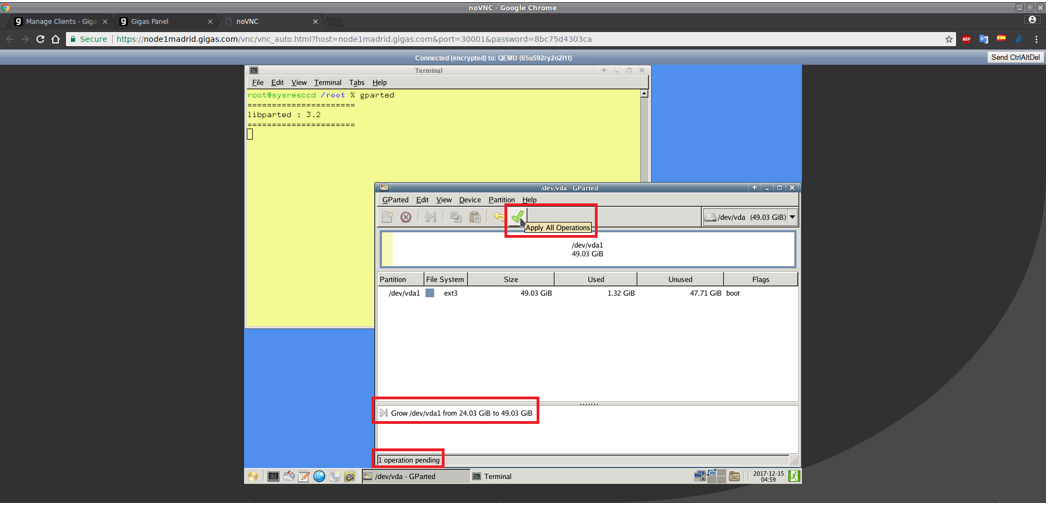
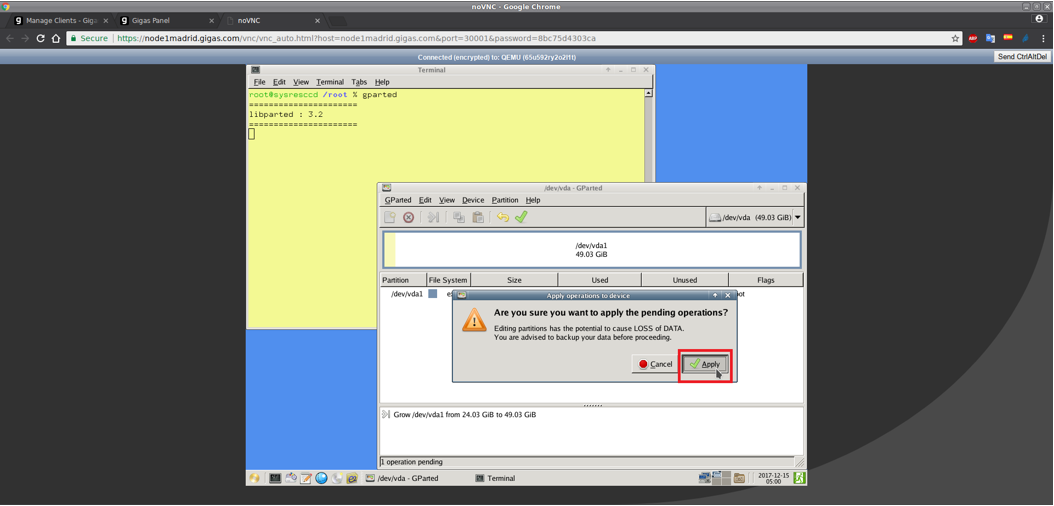
16. When clicking on the "Resize / Move" button, the small window will be closed, and the partition resizing operation will be glued but it will not be done until we click on the "Apply All Operations" button that is shown in the following screenshot:
In doing so, gParted will ask for confirmation, and we will authorize the same by clicking again on the "Apply" button:
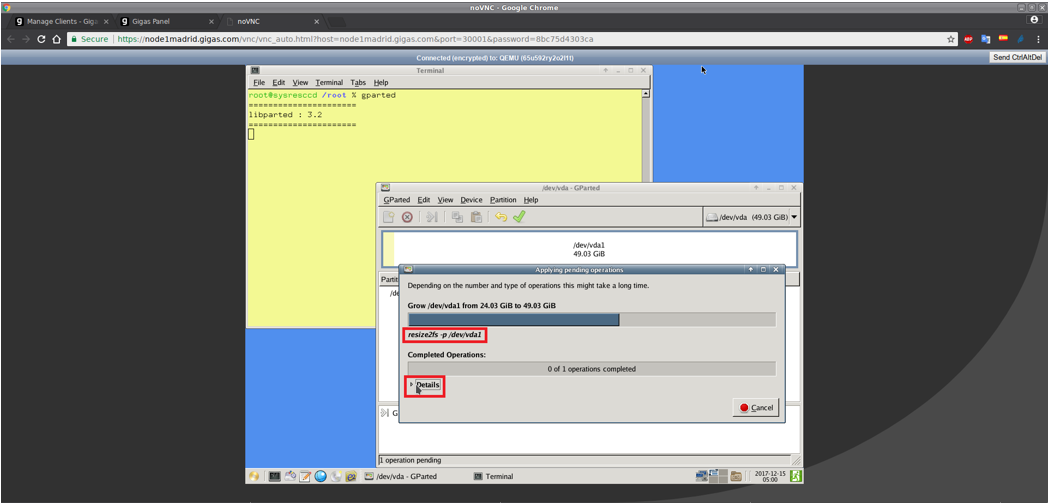
17. When you click on the "Apply" button, gParted will start with the resizing of the partition with the values that we indicate.
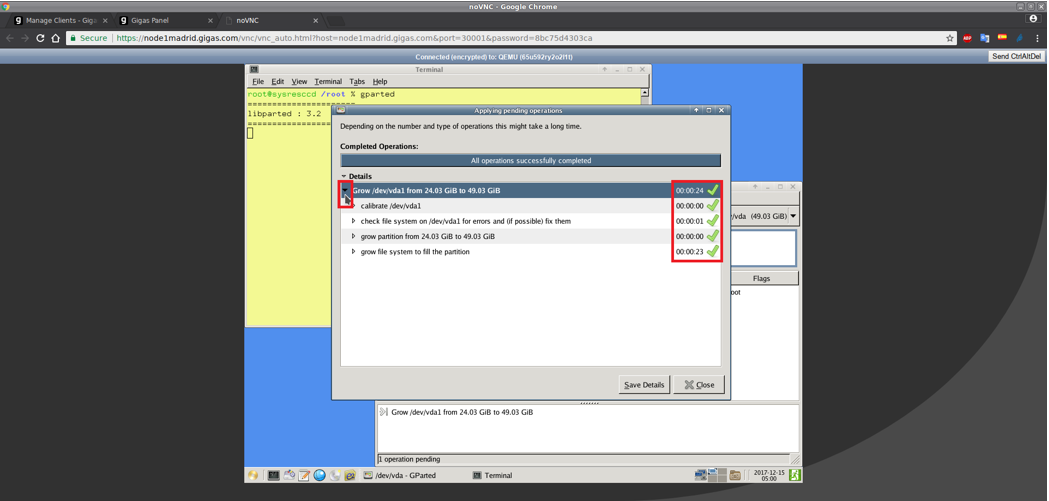
We can see the details while the process is done by clicking on "Details" ...
... of this mode we will be able to know if an error has occurred in any of the subprocesses, or if the whole process has finished correctly as is the case of the following screenshot:
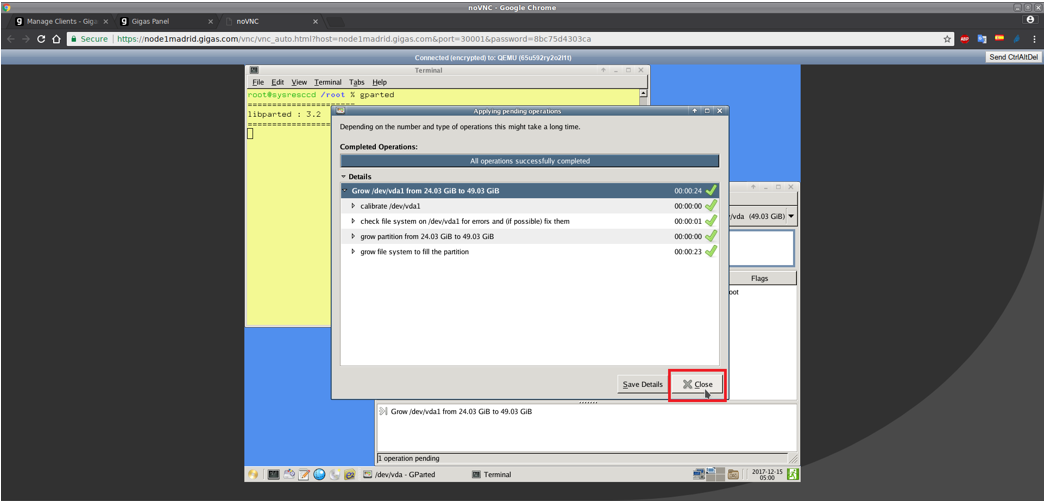
18. If the process has finished correctly, we will close the results window by clicking on the "Close" button ...
... and after verifying that our partition already occupies and has the correct size that we specified and there is no other task glued to run, we can only close the gParted application ...
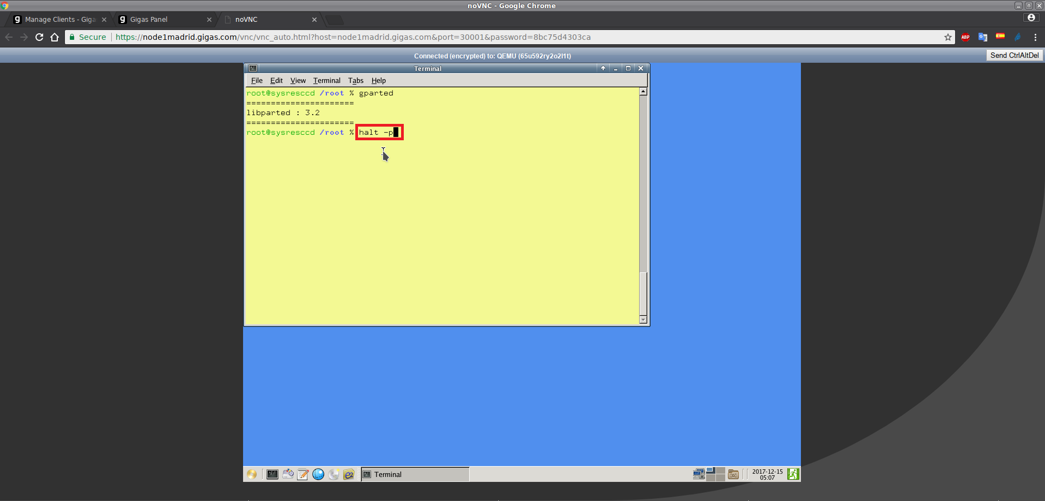
... and turn off the server by typing the command "halt -p" in the Linux shell window with yellow background:
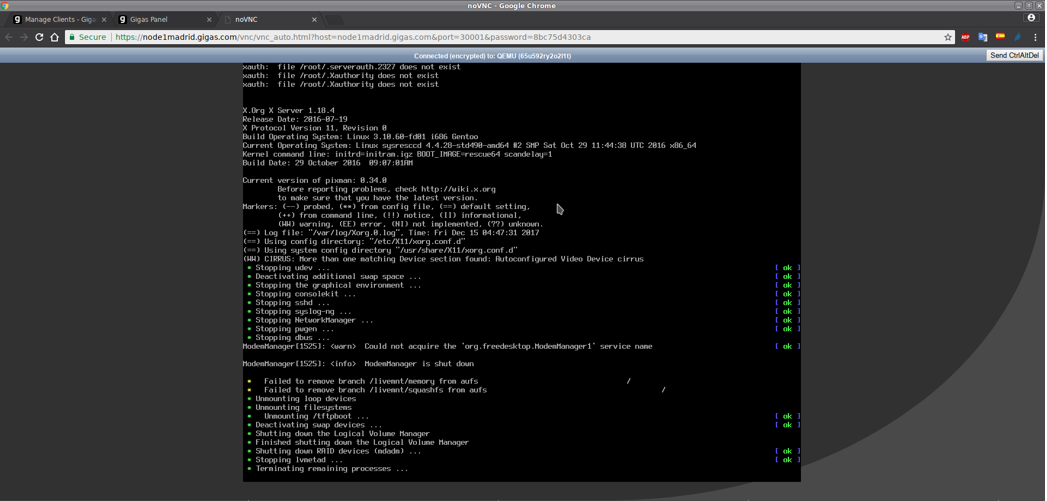
After executing the command, SystemRescueCD will stop the services that it loaded when the ISO image started, and our server will be completely shut down:
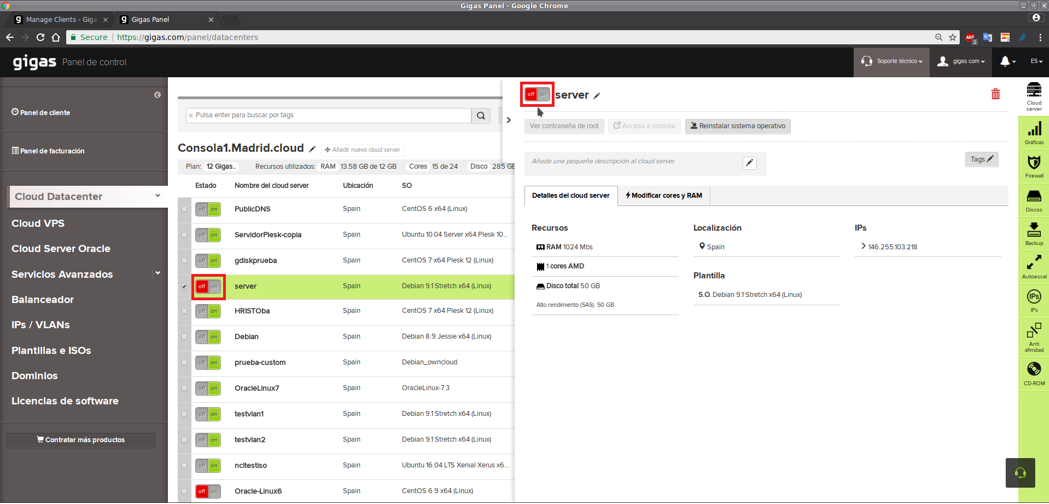
19. After having completed the resize process using gParted, we will return to the Gigas User Panel, and we can see how our server is turned off:
Therefore, now what we have left is to start the server, but before doing so, we must unassign the ISO image of the SystemRescueCD associated with our server.
To do this, we must go to the "CD-ROM" section of the right vertical menu ...
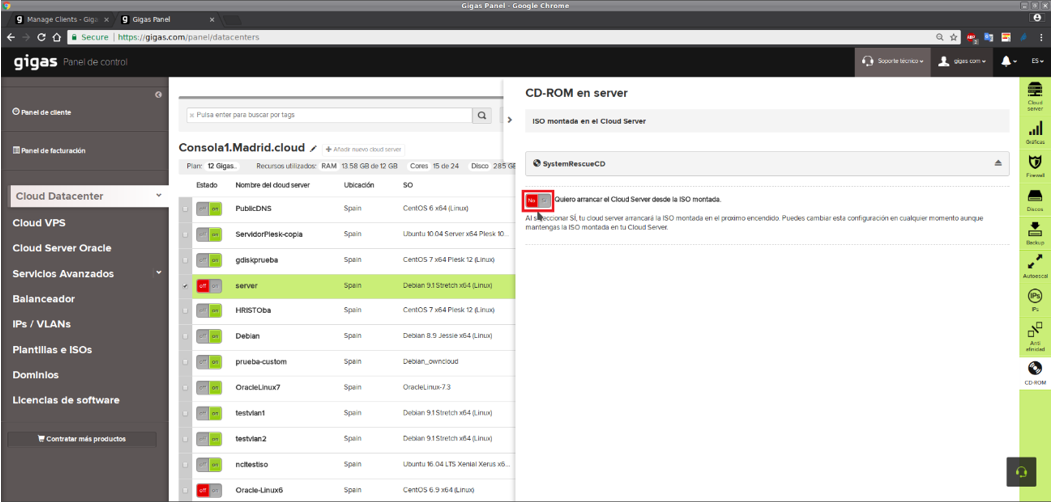
... specify that we no longer wish to start the server from the ISO image of the SystemRescueCD that is still mounted on it, by clicking on the "No" button ...
.. confirm that we do not really want to start our server from the ISO image ...
... and after confirming that the deactivation of the boot option from the ISO has been made and appears as "No" ...
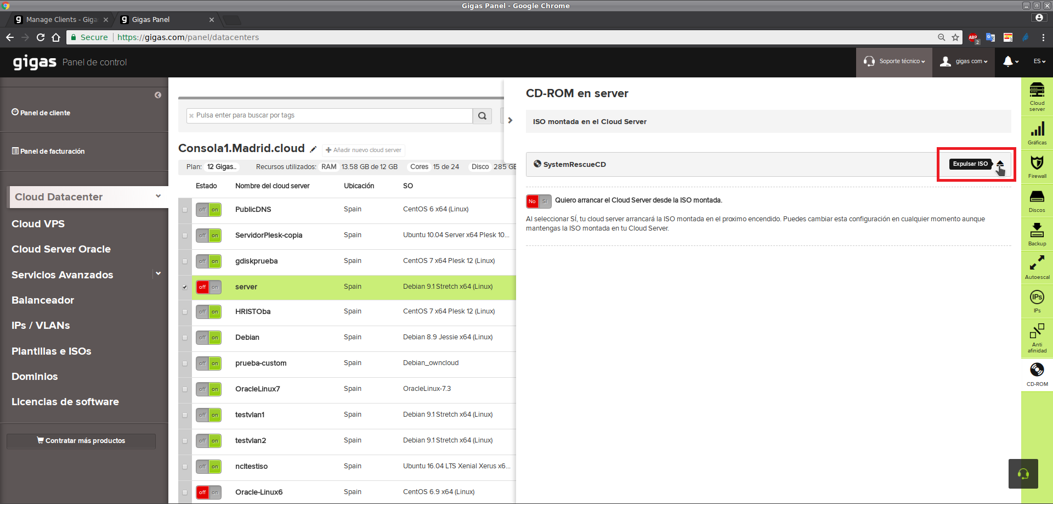
... then proceed to eject the ISO image of the SystemRescueCD, which is still mounted on our server. We will do it by clicking on the small button of the arrow that is shown in the following screenshot:
As always, it will ask for confirmation, so we will click on the "Accept" button so that the ISO image of the SystemRescueCD will be ejected / removed ...
And if everything went well, the Panel should show us the following green message confirming that the operation was successful ...
... and after a few seconds, no ISO image associated / already mounted on our server should be displayed.
20. Finally, we will only have to start the server and verify that it actually detects internally the new size of the partition.
