How to enjoy Plesk license
PROCEDURE VALID FOR THE PLESK LICENSE ACTIVATION.
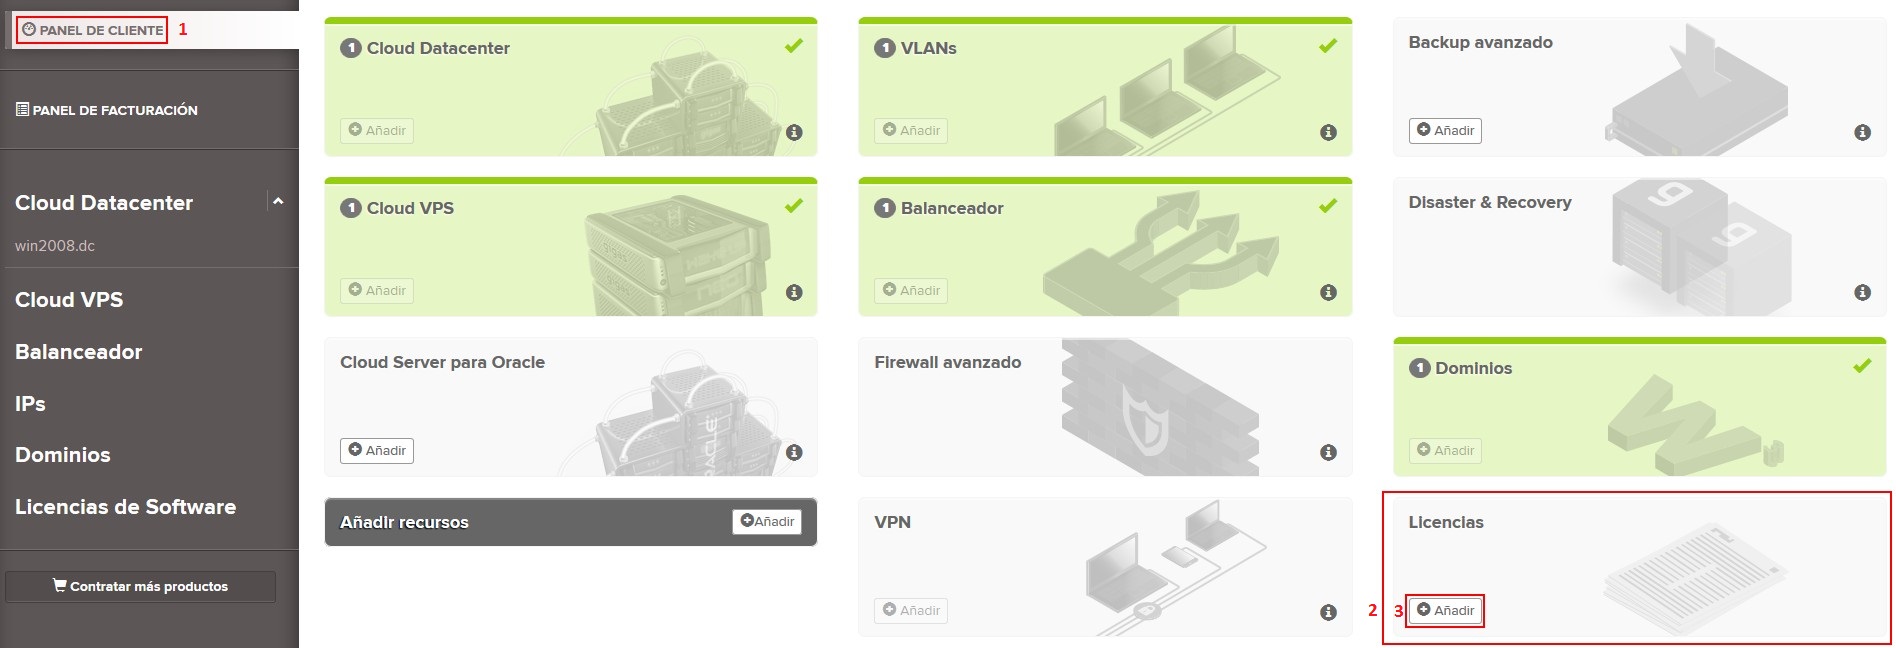
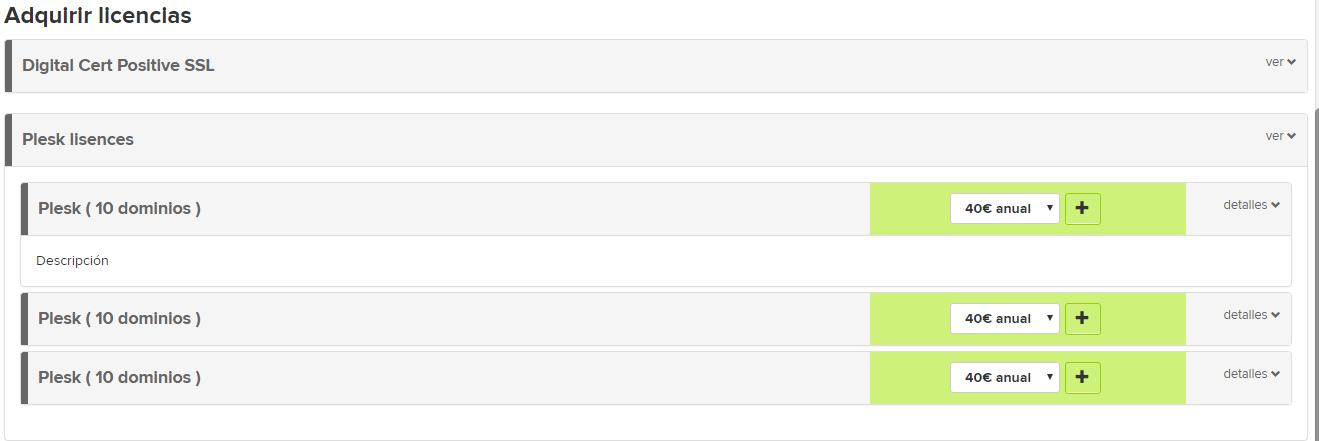
Once you have contracted any of Gigas´ Cloud Products,access your Gigas Control Panel, either clicking on the link provided in the above mentioned email, or directly through gigas.com. If you haven´t done so yet, enter your login credentials, accessing the Gigas Control Panel (1), Services menu (2), Licenses – Contract new service (3).
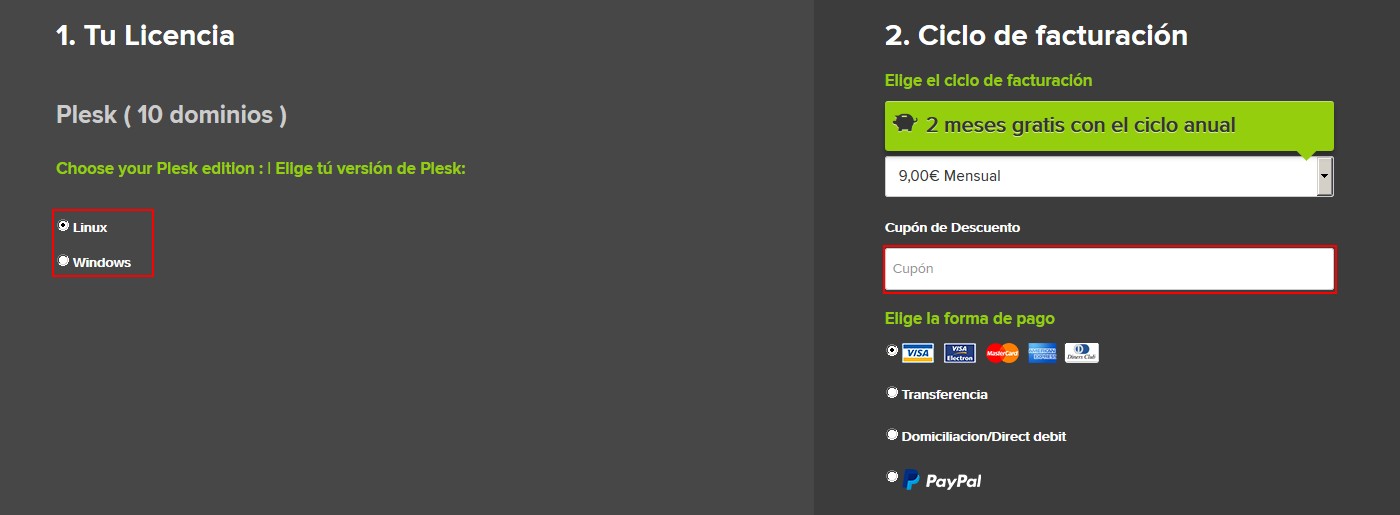
Once you have ascertained that the product and billing cycle you have selected are the ones you wish to purchase, click continue.
You now only have to accept the Terms and Conditions by marking the acceptance box (3), clicking “Checkout” (4) to finish.
The next screen confirms the order you just placed. You will shortly receive the Plesk license for its activation.
After a few minutes, you will receive an email with a direct link to the ticket issued in your client area.
Click on the provided link. If you are not currently logged in at Gigas, you will have to do so at the screen you will find.
You also may access the ticket directly from the Gigas Control Panel from within your client area.
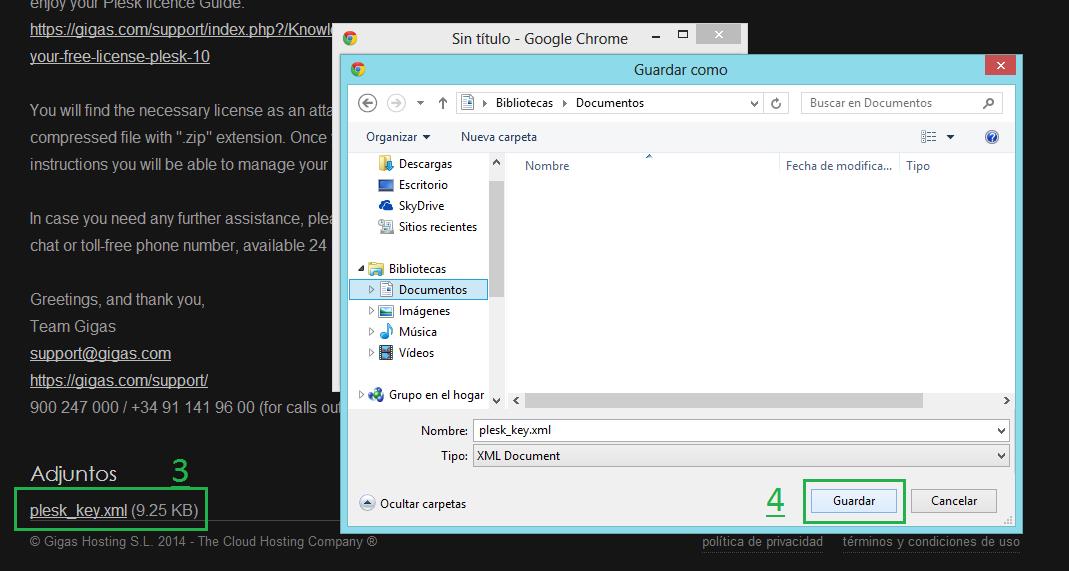
With the ticket you will find the attached license, which you may download. You will find the license as a XML file. You may download it by doing the following:
- Click on the file name in order to download it to your local computer.
- Store the XML file on your local hard drive. Remember where you store it since will have to load the file while performing later steps.
Access the Cloud Server´s “Details”. As long as you used a layout containing Plesk when creating the Virtual Server, there will be a link under the machine´s name (A).
Click on this link to access the Plesk administration screen. Take note that, in order to access this panel, you will have to identify yourself using the password defined during the Cloud Server´s creation: were you not to remember it, you may access it by clicking the “Show” button (B)
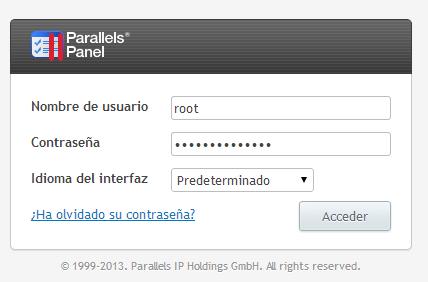
Under Username (A) enter the administrator account name: “root” if the server uses Linux, “Administrator” if it uses Windows.
Under Password (B), enter the chosen password during the Cloud Server´s creation, as mentioned in this Guide´s previous step.
The following page displays the Plesk License Agreement. If you agree, mark the check box indicating agreement with the terms (1), and click the “Accept” button (2).
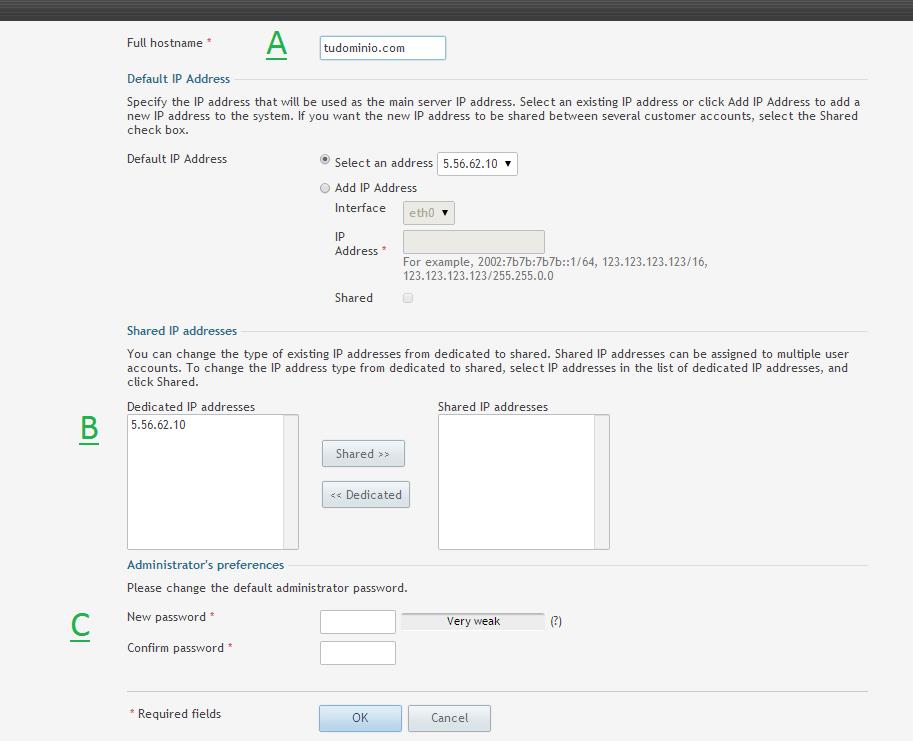
We enter the machine´s full hostname (server name + domain) (1), as well as a new password for the Plesk administration account (2), finishing by accepting (3).
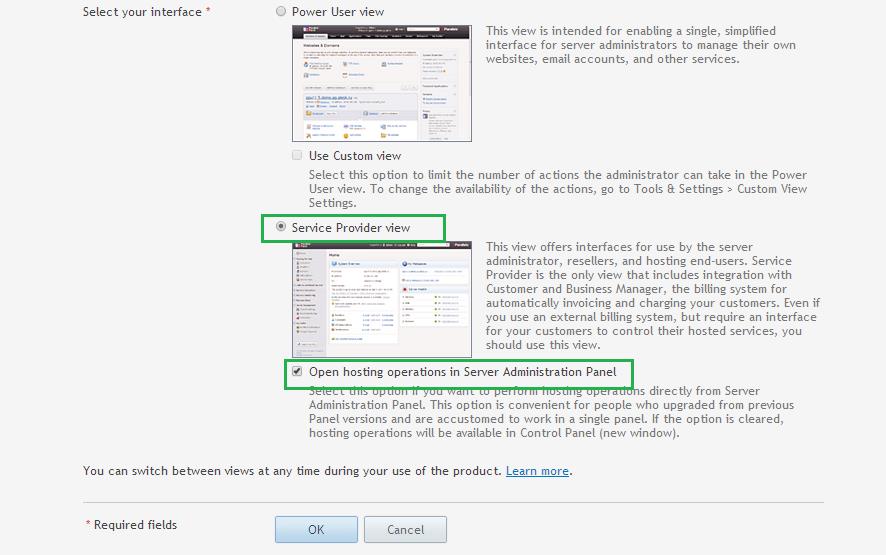
We select the condition that best describes the use you are going to give the Plesk panel (1),. Depending on this selection, the lower section on the page will unforld (2). Here we chose the view we wish to use under Plesk (for this Guide´s purposes we
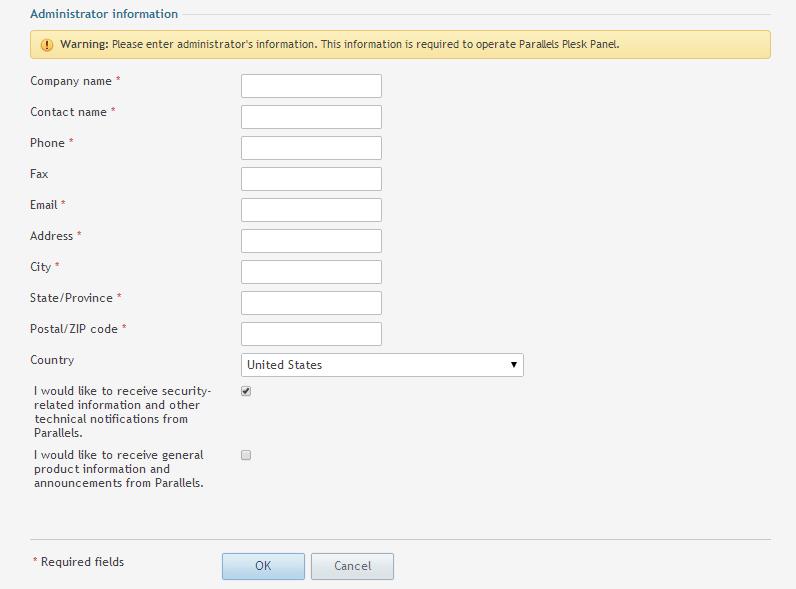
Next, fill out your data form, clicking “OK” to continue.
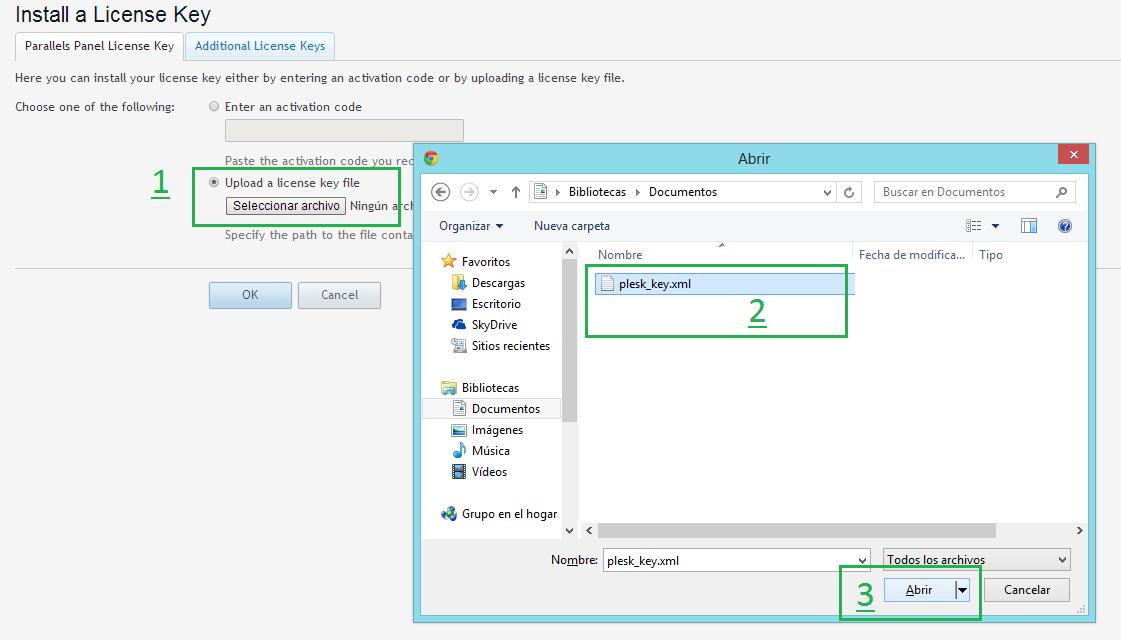
In the “License Management” screen, we select “Upload Key”
We select “Select file”
We chose the XML file (1) from where you decompressed. If you want to return to this step, pulse here. Remember to select the file with XML extension, and not the .zip extension file belonging to the compressed file. Both files may have the same name. Complete the selection by clicking “open” (2).
Back on the “License Key Upload” page, we mark “Replace the currently installed key with the selected one” (1), continuing by clicking “OK” (2).
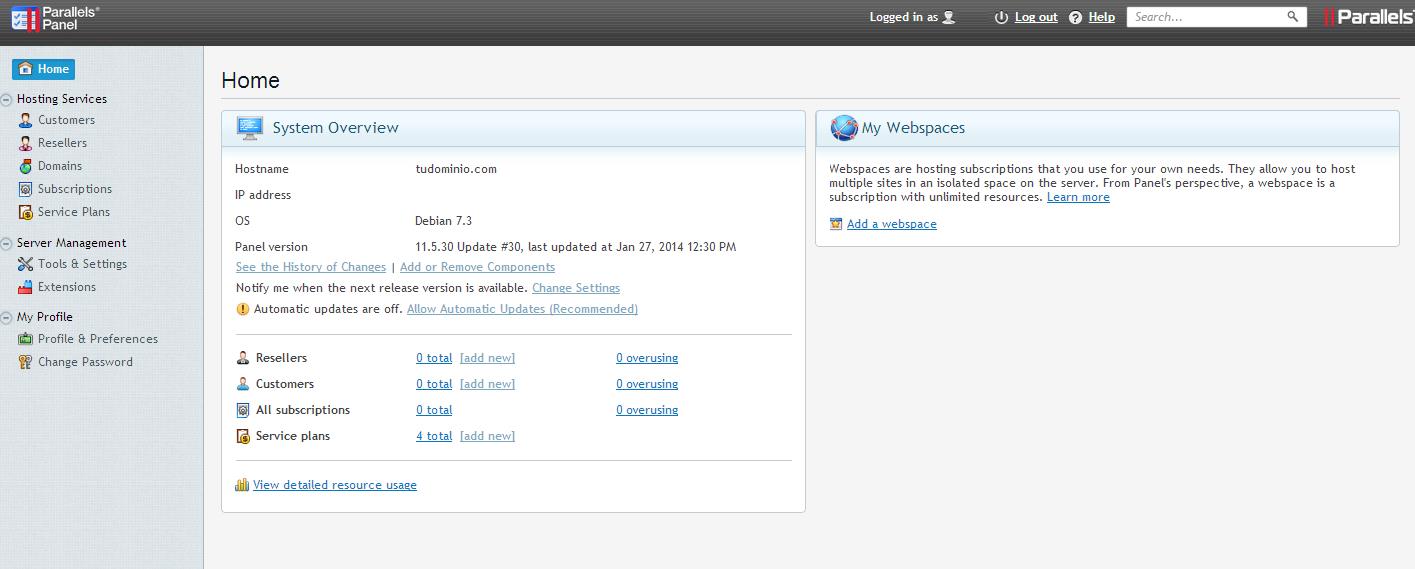
The resulting page reflects our free-of-charge Gigas Plesk 10.
From this point on your Plesk panel is active and you may start using it.
