Diferencia entre revisiones de «Gigas control panel guide»
(→Balancer (/loadbalancer)) |
(→Balancer (/loadbalancer)) |
||
| Línea 342: | Línea 342: | ||
After selecting it, and have accepted the settings, the following tabs will appear: | After selecting it, and have accepted the settings, the following tabs will appear: | ||
| − | [[Archivo: | + | [[Archivo:Guiapanelbalanceador4.png|link=]] |
#An instance allows you to create new instances for the load balancer | #An instance allows you to create new instances for the load balancer | ||
Revisión del 12:40 22 jun 2016
Contenido
- 1 Login
- 2 Client's panel
- 2.1 Cloud Datacenter (/datacenters)
- 2.2 VLANs (/ips)
- 2.3 Advanced backup (/advancedbackup)
- 2.4 Cloud VPS (/vps)
- 2.5 Balancer (/loadbalancer)
- 2.6 Cloud Server for Oracle
- 2.7 Add resources (/addons)
- 2.8 VPN
- 2.9 Licenses (/licenses)
- 2.10 Your tickets
- 2.11 Your latest invoices
- 2.12 Service status
- 2.13 Suspended or pending services
- 3 Invoice dashboard (/invoice-dashboard)
- 4 Invoices (/invoices)
- 5 Users (/contacts)
Login
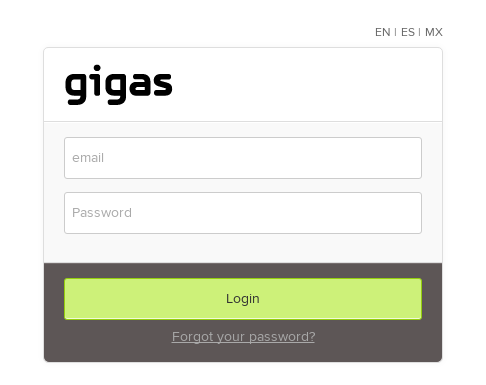
Clients can only access the control panel if they already have a client account. This is created immediately and as soon as a product has been contracted. To access the control panel simply fill in the login form with the email you have registered with Gigas and your password, then press “Enter”. If you do not remember your password, click on “Forgot your password?” Fill out the form with your email address and click on “Recover Password”. You will receive a message in your inbox with a link. Click on it
Client's panel
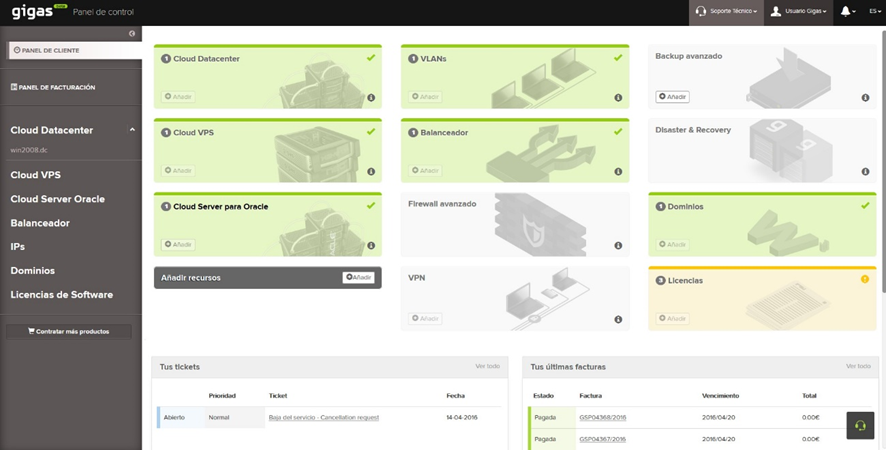
From this panel you can manage your contracted services and contract new services. For a quick client overview, a color code has been designed:
- White background: No service has been contracted
- Green background with green top bar: Contains one or more contracted services
- Yellow background with yellow top bar: Contains a contracted service where an incident has occurred
To access the contracted services contained in each product, simply click on it. This can also be done from the left sidebar.
Cloud Datacenter (/datacenters)

The number next to “Cloud Datacenter” indicates the number of products of this type that have been contracted. By clicking on:
- "Cloud Datacenter" you access the list of products of this type.
- "Add" you access the interface contracted.
- the "I" in the lower righthand corner you access the page with sales information about the product.
A) If you have a contracted product but have not created a Cloud Server, this screen will appear:

After clicking on "Add new cloud server" this screen will appear:
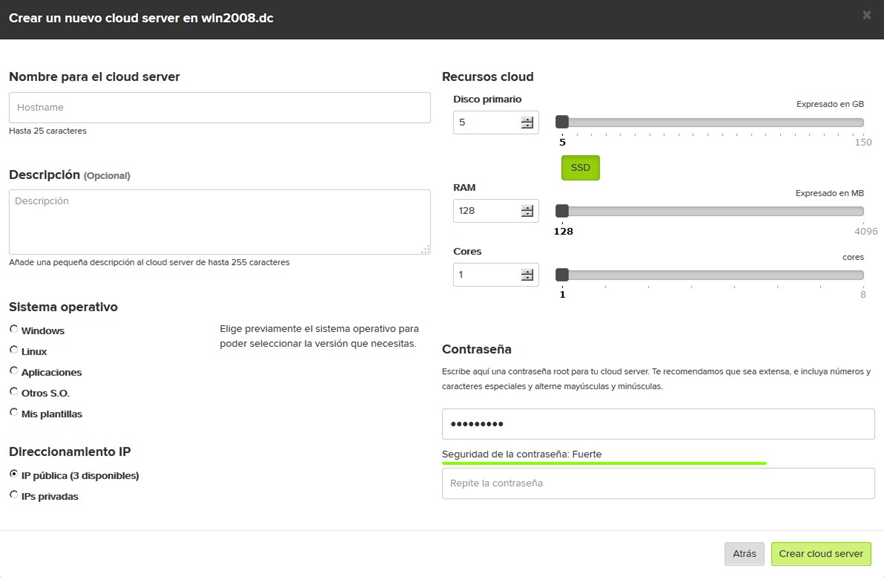
Introduce:
- The host name you want to give to the cloud server;
- Description (optional);
- Template: The operating system {Windows, Linux, Applications, other O.S., My Templates} you want to install for the Cloud Server. Some templates increase the minimum memory of the hard disk that will be assigned to the Cloud Server (template requirements);
- IP address: {Public IPs (with the number of available ones), private IPs}
- Cloud resources:
- Primary disk: Allows you to specify the space assigned to the primary disk system or to our Cloud Server. This can be adjusted using the up and down arrows on the left or the slider bar on the right. Some templates will increase the minimum memory of the disk selected to fit the template of the hard disk chosen;
- (Disk swap: Allows the size of the swap partition to be set. This is a requirement for some templates. This can be adjusted using the up and down arrows on the left or the slider bar on the right);
- RAM: Allows you to set the amount of RAM assigned to the Cloud Server for it to function. This can be adjusted using the up and down arrows on the left or the slider bar on the right. Some templates will increase the minimum RAM memory assignable to the Cloud Server;
- Cores: Allows you to set the number of cores you want to assign to the Cloud Server. This can be adjusted using the up and down arrows on the left or the slider bar on the right.
- Password and password confirmation: We recommend using a password that includes a combination of special characters, numbers and alternate uppercase and lowercase letters. Minimum length – 6 characters.
The Cloud Server will look as if it is loading...

- B) If you already have created a Cloud Server:*
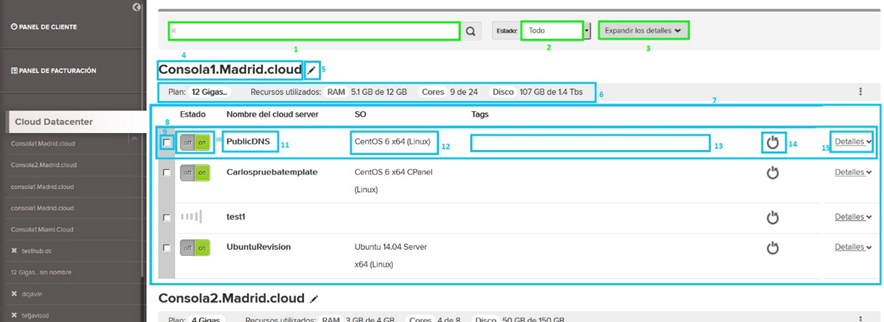
On this screen you can:
- Restrict by name;
- Restrict by status;
- Expand the details of all the Cloud Data Centers you have;
- See Cloud Datacenter product name;
- Rename the Cloud Datacenter;
- See plan: Assigned RAM and total, assigned cores and total, and assigned disk and total.
- See the various cloud servers of each Cloud Datacenter
- A specific cloud server
- Select to see advanced options
- Switch the cloud server on or off: Tidy shutdown does affect services
- Cloud Server host-name
- Operating System template installed;
- Tags assigned to the Cloud Server;
- Restart cloud server
- Show details

- Cloud Server resources (disk, RAM, cores, IP, operating system);
- Root password/Administrator (Click on “Show” to see it)
- By selecting Cloud Server, you can choose...
Cloud server
This allows you to:
a) See the root password/Administrator
b) Access the Cloud Server console via VNC on the web (opens new window)
c) Reinstall the operating system
d) Change the description of the cloud server
e) Add/manage cloud server tags
f) See the details about the Cloud Server
g) Modify cores and RAM
Graphs
Allows you to see usage graphs: a) CPU (last hour and last 30 days) b) Network (last hour, day, month, year)
Firewall Allows you to access the cloud server's standard firewall. You can modify options such as: a) Active firewall rules (add, edit, delete) b) Default rule for Public Network {ACCEPT, DROP}: If you ACCEPT, the rules should have DROP as an action and vice versa. c) VLAN default rule (if you have contracted a VLAN product) {ACCEPT, DROP}: If you ACCEPT, the rules should have DROP as an action and vice versa
Disks In this section you can: a) Add a disk: on unassigned space available on the product or pool
b) Contract more space: contact the purchasing department aka HostBill
c) See the space for backups and templates (total, busy, free)
d) By type of drive (SAS, SATA, SSD)
- Disk ID
- Size
- Type: {primary, swap, secondary}
- Date created (according time zone UTC + 1)
- Auto-backup Yes/NO: Turn on or off the auto-backup for this disk
- Edit: (Not available for Swap) Opens a new dialog box with field to specify the new size and bar for the same purpose.
- Backup: (Not available for Swap) Ask for confirmation before carrying it out.
- Delete: (Not available for Swap) Ask for confirmation before deleting it.
Backup From here you can : a) Contract "Advanced backup"
b) See the space for backups and templates (total, busy, free)
c) See the list of backups already created
- Date created (UTC + 1)
- Disk ID
- Space taken up the the backup
- Type: This indicates whether the backup has been launched by the user or done automatically.
- "Reset" button: Allows you to restore the backup, always on the same disk from which it was obtained.
- "Convert to template" button: Allows you to convert the backup to a template that can be installed on any machine of the Cloud Datacenter product.
- "Delete" button (red bin): Upon confirmation, it allows you to delete the backup in question.
d) See the list of templates already created: This list shows the available templates for all cloud data center products and not just for this cloud server.
- Date created (UTC + 1)
- Description
- Space taken up by the template
- "Create a machine with this template" button: Create a new machine in the Cloud Datacenter with this template.
- "Delete" button (red bin): Upon confirmation, it allows you to delete the template in question.
Autoscaling
Autoscaling needs to be contracted beforehand and a load balancer needs to have been configured.
Once it has been contracted, configure the autoscaling rules horizontally, i.e. parallel servers are installed to expand the functionality of one or more servers when the indicated rules need to be applied.
NB: The Cloud Datacenter must have free unassigned resources so that the autoscaler can install more parallel servers.
IPs
From this section you can:
a) "Contract new IPs"
b) See the IPs that have already been assigned:
- IP Address: xxx.xxx.xxx.xxx
- Netmask: xxx.xxx.xxx.xxx
- Gateway: xxx.xxx.xxx.xxx
- Type: {Public, VLANxxxx} If it is public "Public" will appear; if not, the name of the VLAN will appear.
- Port speed: Maximum port speed. If it is a VLAN, the maximum speed is unlimited {50 Mbps, 100 Mbps, Unlimited}
c) "Assign public IP (X available)": It allows you to assign up to X public addresses. X is the number of public IPs you have. Asks for confirmation before being allowed to choose. Generates restart.
d) "Assign private IP": This allows you to specify an IP (private) and the VLAN to be assigned.
e) "Apply Changes": Apply the changes once you have finished assigning, modifying or deleting IPs.
VLANs (/ips)
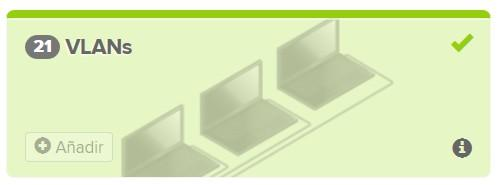
Indicates the number of VLANs that you have (in this case, 21). It allows you to add new ones (“Add”) and access sales information about the product ("I", bottom right corner).
When managing VLANs, the following sections are shown:
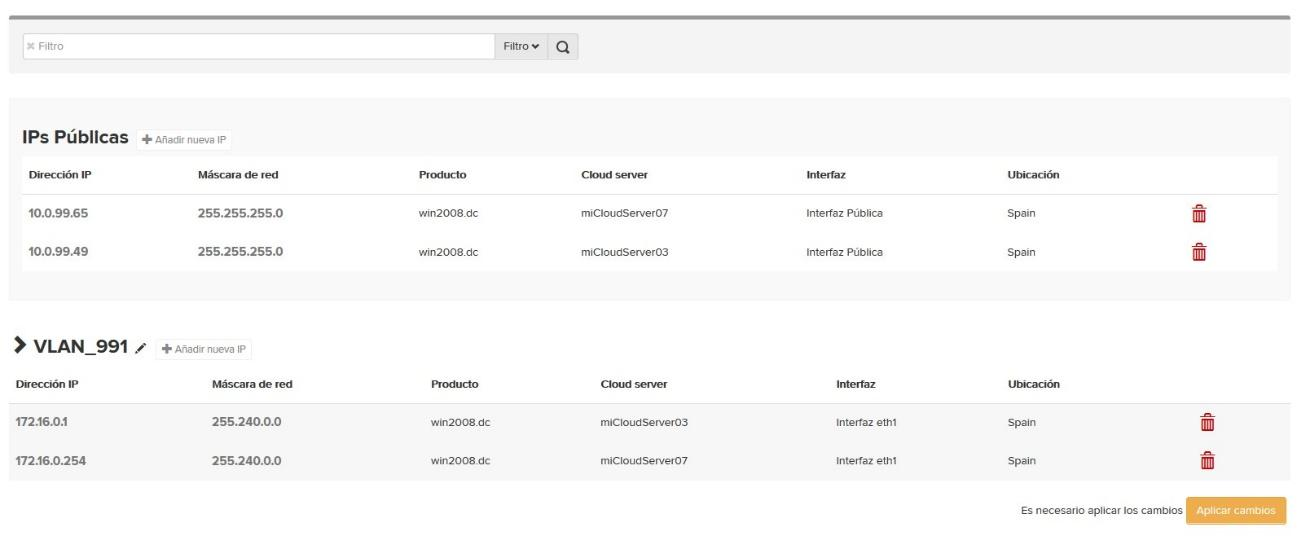
- Filters: This allows you to do a free text search and to refine the search by clicking on the drop-down menu. Here you can choose Filter by server name or Cloud Datacenter Server, as well as IP type and location.
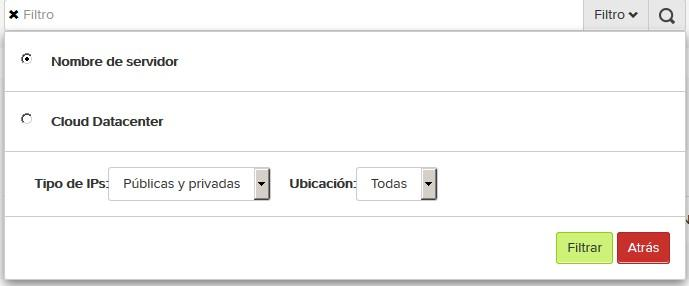
- Public IPs
a) This allows you to “Add a new IP”. Simply choose the Cloud Server that the public IP will be applied to.

It displays a list of public IPs with their parameters

b) IP address
c) Netmask
d) Product: Product where the cloud server is {Cloud Datacenter XXX, balanceadorXX.cloud}
e) Cloud Server: The product’s cloud server (datacenter or load balancer) seleccionado en «Producto»
f) Interface: Interface on the cloud server. This is automatically assigned.
g) Location: It will be the same location as the product from where the IP is taken {Spain, Miami, Chile}.
h) Delete: Allows you to delete the IP. This is very useful when you have added an IP but do not really want to add it: it can be deleted before you click on "Apply changes".
- Contracted VLANs, listed by name (for example: VLAN_991).
This allows you to "Adds a new IP".

Choose the "netmask" (/ 12 => 1,048,574 hosts, / 16 => 65534 hosts, / 8 => 16,777,214), assign the part of the IP that does not belong to the network, select the product and the server.
The list of VLANs will show:

a) IP address
b) Netmask
c) Product
d) Cloud server
e) (Cloud server's) interface
f) Location: It will be the same location as the product to which it has been applied
g) Delete: Allows you to delete the IP. This is very useful when you have added an IP but do not really want to add it: it can be deleted before you click on "Apply changes".
Advanced backup (/advancedbackup)
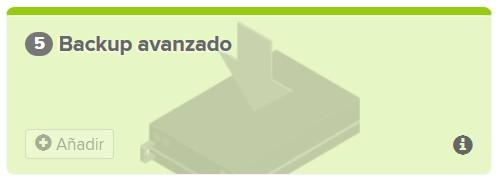
An advanced backup consists of a cloud server with a disk equal in size to the machine for which it has been contracted. It is managed via the web and allows incremental and full regular backups and is programmed while the website is in operation. It allows you to restore with one click. The backups are encrypted. When you access the advanced backup section you will see the page that allows you to manage your advanced backups. This includes options to access the manager and for displaying the access password; both technical and commercial information are shown.
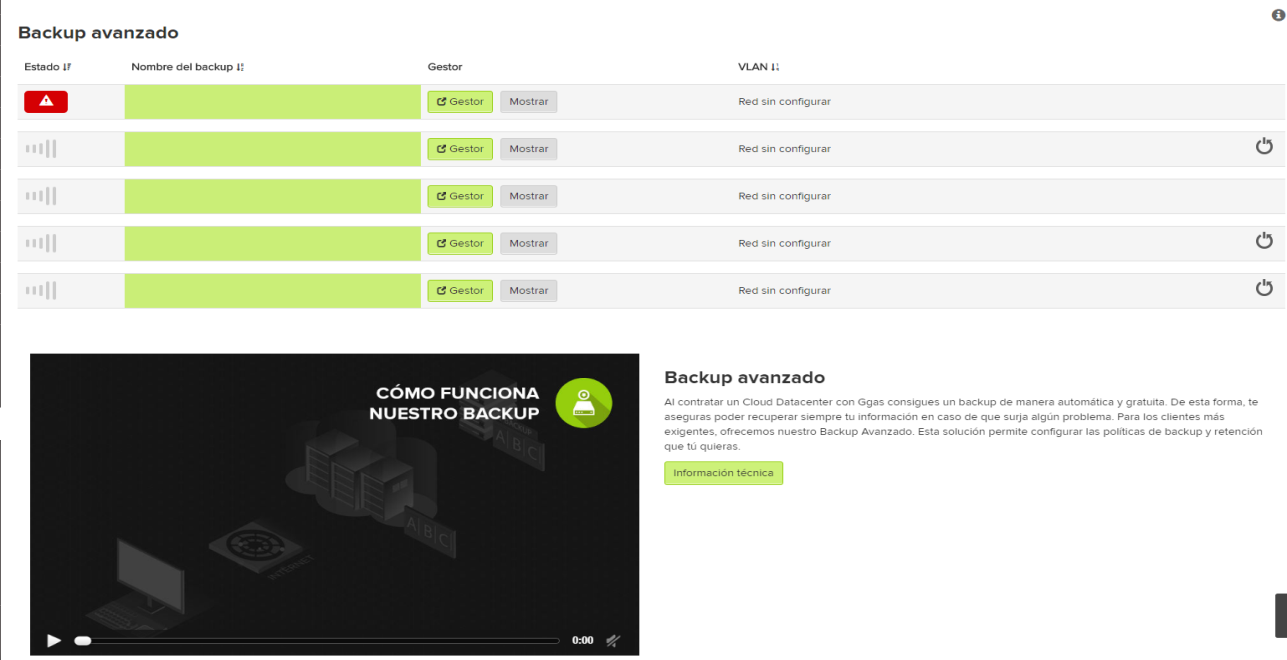
An administration manager for advanced backup in a single product.
Cloud VPS (/vps)
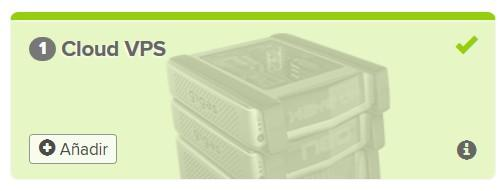
Indicates the number of VPS that have been contracted. It allows you to add “Add” and access sales information about the product ("I")

The first row consists of two controls (text search and status selector) that allow differentiating the VPSs shown below. The "Expand details" button expands all details of all the VPSs shown, so that everything can be seen at a glance.
Starting from the second row the list shows the VPSs; or all of them if they have not been filtered, as well as those that match the search criteria.
You can:
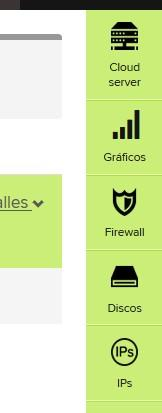
a) Select a specific VPS to access its advanced properties
b) See if it is turned on or off and change its status
c) See which plan the VPS is part of {nova, pro, elite, summum}
d) Upgrade the product
e) See the details of the resources (memory, cores, disk/s, transfer)
f) See the operating system template that has been installed on the VPS
g) See and assign tags
h) Restart the cloud server: carry out a tidy restart
i) "Details" link that displays additional details of the VPS:

- VPS resources: disk, RAM, cores, IP
- Operating System template
- Root password/Administrator (Click on "Show" to see it)
By selecting a specific VPS you can access the following tabs:
- Restart the cloud server: carry out a tidy restart
- "Details" link that displays additional details.
By selecting the Cloud Server you can access different tabs:
- Cloud server: This section allows you to
- See the root password/Administrator
- Access the VPS console
- Reinstall the operating system: You can choose the system and the version
- Description of the VPS
- VPS tags
- Details about the cloud server: Resources, Location, Template, IP.
- Modify cores and RAM: Allows you to reduce or increase the resources within the VPS resource pool.
- Graphs: Allows you to see CPU usage and Network in different sizes (last hour, last day, last month, last year)
- Firewall: Allows you to specify the overall behavior of a standard firewall (ACCEPT, DROP) and manage specific rules (source IP, destination port, protocol and action)
- Disks: Allows you to check the features and the status of your disks, sorted by type (disk ID, size, type, date created, activated auto-backup yes/no, edit)
- Backup: Only for Elite and Summum VPSs. Works in a similar way to standard Cloud Datacenter backup products.
- IPs: as this is a VPS, it only has one pre-assigned IP, that can only be deleted.
Balancer (/loadbalancer)

Gigas' load balancer is a virtual device that is connected to the front of a series of servers to assign or balance requests coming from clients.
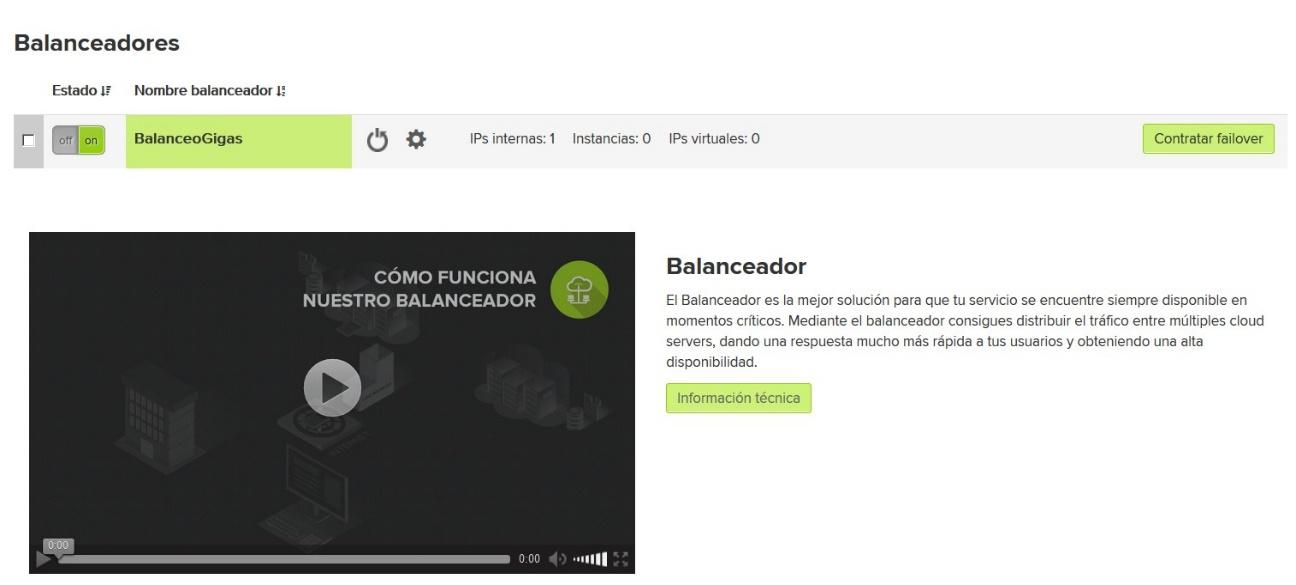
The "Load balancers" section displays a list of the balancers that have been contracted and shows the following information: status {on/off}, name of the balancer, reset button (tidy), internal IPs, instances, and virtual IPs. ToDo: Instance, Graphs, IPs.
If this is the first time you are setting the balancer, when you have selected it you must choose the VLAN which you want to connect it to:
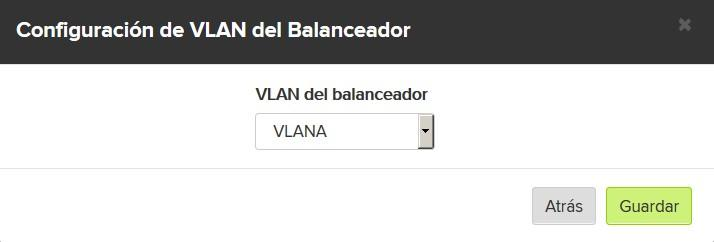
After selecting it, and have accepted the settings, the following tabs will appear:

- An instance allows you to create new instances for the load balancer
- Advanced mode for more options: in normal mode only b, c, d and j will appear.
- Instance name
- IPs
- Port
- TCP or HTTP protocol
- Consistent hashing
- Enable http-server-close
- JSESSIONID cookie
- Keepalive time
- Select backends
- Graphs showing load balancer statistics
- Load balancer IP address
- Physical address
- Service address (VIP)
Cloud Server for Oracle
At the moment Oracle Cloud Server products are not available, although managing and configuring them is exactly the same as for a Cloud Datacenter.
Add resources (/addons)
In this section clients can contract addons for their products: disks and cores, backup, transfers, and IPs.
VPN
Gigas' VPN service allows clients to access their cloud environment – which stays protected as it is not accessible from the internet – via a private address. Not available for Cloud VPS products as they do not have a VLAN. These are based on Cisco routers.
- "Add"
- The purchase process requires tunnel configuration data (fields in bold type must be filled out by the client when contracting the product):
- Peer IP address: IP address of the endpoint with which the client will create the tunnel.
- Pre-shared Key: Shared tunnel key. The password that encrypts the tunnel.
- Encryption Scheme
- Diffie-Hellman Group
- Encryption Algoritm
- Hash Algoritm
- Main or Aggresive Mode
- Lifetime
- Encapsulation
- Encryption Algoritm
- Authentication Algoritm
- Mode
- Perfect Forward Secrecy
- Lifetime
- Encryption Domain – Gigas CLOUD: the client's VLAN Gigas address. For example: 172.20.0.0/16
- Encryption Domain – Remote LAN: the client's address at their office (the other end of the tunnel). For example: 192.168.0.0/24
- "VPN": Displays a list on the invoice dashboard of the VPNs that have been contracted
- Name
- Type (=VPN)
- Expiry date
- Cost
- In addition, you can see the configuration data for each contracted VPN.
Licenses (/licenses)
The screen is divided into:
- "Licenses", which lists those that have already been purchased, by type and with a number indicating how many you have of each. It also allows you to purchase new ones of each type by selecting the type of invoicing and clicking on “+”. Clicking on “Details” of each type lists the licenses (the code, expiry date, cost, and status) as well as a description of said type of license.
- "Contracting licenses", allows you to contract new licenses, also by type, by selecting the type of invoicing and clicking on “+”. Clicking on “Details” displays a description of the type of license.
Your tickets
This section allows you to see the tickets clients have in their system.
Your latest invoices
Allows you to see your latest invoices: status, invoice ID, expiry date, and total cost of the invoice.
Service status
Displays messages saying the service is temporarily unavailable, the reason why, and information about it.
Suspended or pending services
Allows you to see what services have been suspended (allowing you to “Pay for the service”) or are pending (it will say "Processing request").
Invoice dashboard (/invoice-dashboard)
The invoice dashboard consists of:
- Filters: allows you to do a free text search, specify status {all, active, pending, suspended} and the type.
- Contracted products: Displays a list of products with their name, type, expiry date, total and button to “Unsubscribe”.
- Monthly expense.
- Product details: Displays details of the selected product such as, for example, VLAN IP range; name, plan, location; cost.
- Related addons: Displays a list of addons related to the selected product.
- Add addons: Allows addons to be contracted.
Invoices (/invoices)
Displays a list of invoices with status columns {pro forma, paid}, invoice ID {PF, GSP}, issue date, expiry date, total amount. If there are more than 10, a pager appears.
By clicking on an invoice, you can see its details:
- Invoice ID: If it begins with PF, it is proforma (not yet paid). If it starts with GSP, the invoice has already been paid.
- Type: Pro forma invoice/Paid
- Bank details: account number, BAN, SWIFT/BIC.
- Invoicing details:
- Invoice ID.
- Receiver: Name. ID document, postal address.
- Sender: “Gigas Hosting S.A.”, Gigas' tax ID number, Gigas' postal address.
- Issue date (“Date”).
- Expiry date.
- Description of the products, quantity and cost.
- Subtotal, applicable taxes, and total amount to be paid.
Users (/contacts)
Using this option, clients can create contacts with restricted access to products that contain their account and can manage said accesses and permission. The control panel allows users to perform the following operations, taking into account that it only allows specific permissions for products that clients have already contracted. When choosing permissions, you can choose to permit the entire product (by clicking on the box next to the product name) or any of its characteristics (by clicking the product name and checking the appropriate box):
- Manage users
- "Add new user"
- Information: Allows you to “Select a predefined role” or enter data by hand on the following tab (“No role”). If you create a role in “Manage roles” you can select it here.
- Customer information:
- Name: Username. Only letters, spaces, hyphen. Maximum length – 20 characters.
- Surname: User's name and surname. Only letters, spaces, hyphen. Maximum length – 20 characters.
- Email address: This must be a valid email address (e.g. user@mydomain.net).
- Password: Minimum length – 8 characters.
- Password confirmation: It must be the same as the previous one. Minimum length – 8 characters.
- "Common": "Invoicing" or "Other options"
- "Products": For example, "Cloud VPS", "Cloud Datacenter", etc.
- "Licenses": For example, "License – Plesk (10 domains)", "Advanced client backup".
- "VLAN": Allows you to specify permissions to manage each VLAN or specific details within each VLAN.
- "Advanced backups": Allows you to specify permissions to manage each advanced backup or its characteristics.
- "Load balancers": Allows you to set permissions for a load balancer in general or for its specific characteristics.
- "Domains": Allows you to specify permissions for each TLD: .com, .net, .es, etc.
- Manage users: Existing users are sorted in a list from left to right:
- "Name and surname": User's name and surname. Only letters, spaces, hyphen. Maximum length – 20 characters.
- "Email address": User's email address. Only letters, spaces, hyphen. Maximum length – 20 characters.
- "Latest access (UTC +1)": Date and time of last access in time zone UTC +1. If you have never accessed, "No access" will appear.
- "Role": If the user has a predefined assigned role, it will appear here. If not, "-" will appear.
- "Edit" (gray pencil): By clicking on it, a dialog opens that allows you to edit the user.
- "Delete" (red bin): By clicking on it, after confirming it in a dialog, the user is removed.
- "Manage roles": Remember that it will only allow you to manage permissions for products that have contracted.
- "Details of the role": Allows the name and description to be specified.
- "Common": "Invoicing" or "Other options".
- "Products": For example, "Cloud VPS", "Cloud Datacenter", etc.
- "Licenses": For example, "License – Plesk (10 domains)", "Advanced client backup".
- "VLAN": Allows you to specify permissions to manage each VLAN or specific details within each VLAN.
- "Advanced backups": Allows you to specify permissions to manage each advanced backup or its characteristics.
- "Load balancers": Allows you to set permissions for a load balancer in general or for its specific characteristics.
- "Domains": Allows you to specify permissions for each TLD: .com, .net, .es, etc.
- "Add new user"