How to enjoy your Plesk license
Contenido
How to buy your Plesk license
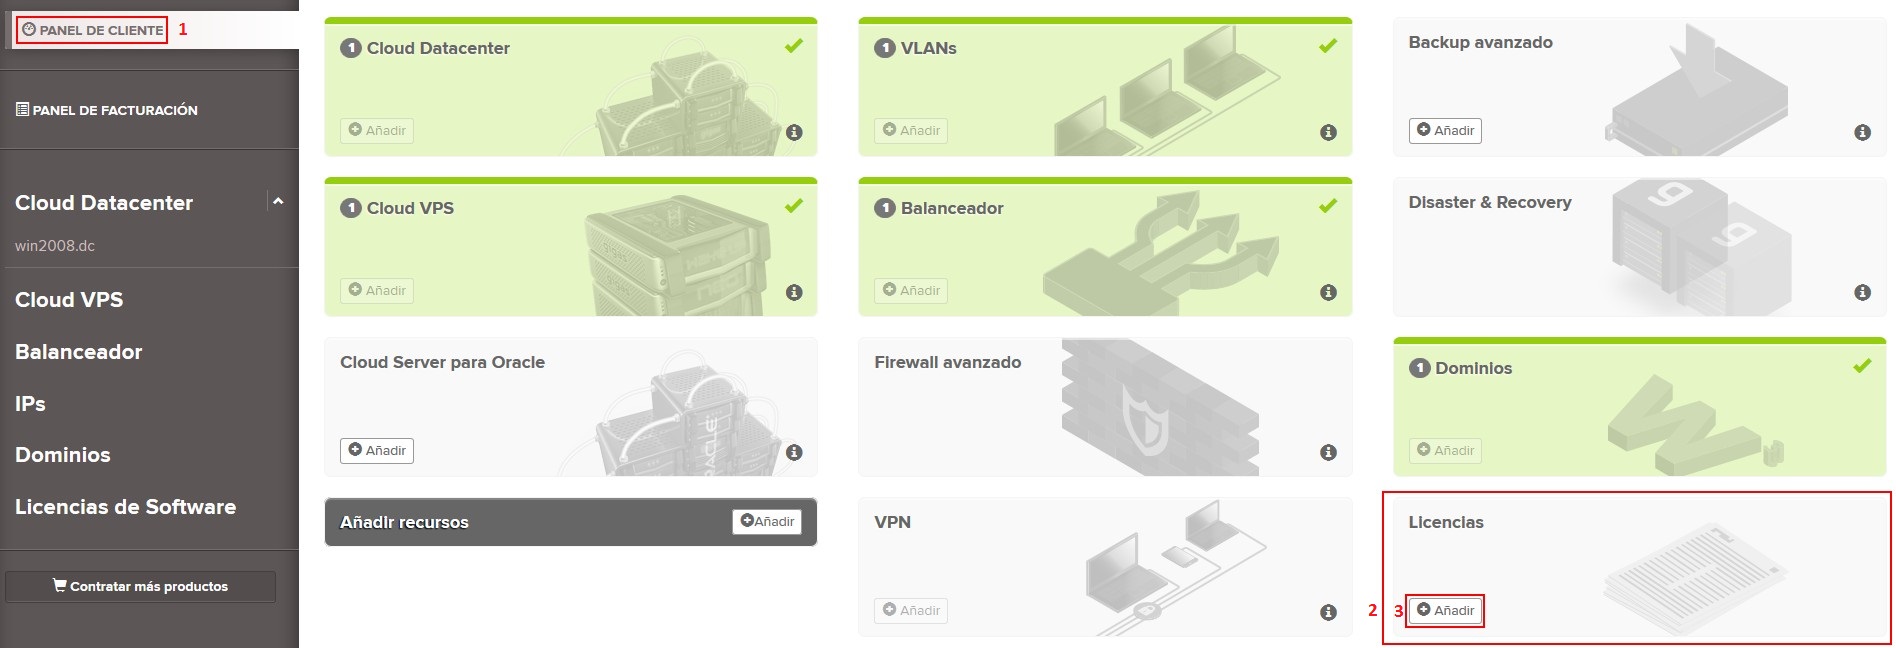
Once you have purchease any of Gigas Cloud Products, access your Client Dashboard from gigas.com. You can buy the license that best suits what you need.
1. Client Dashboard
2. Licenses
3. Add
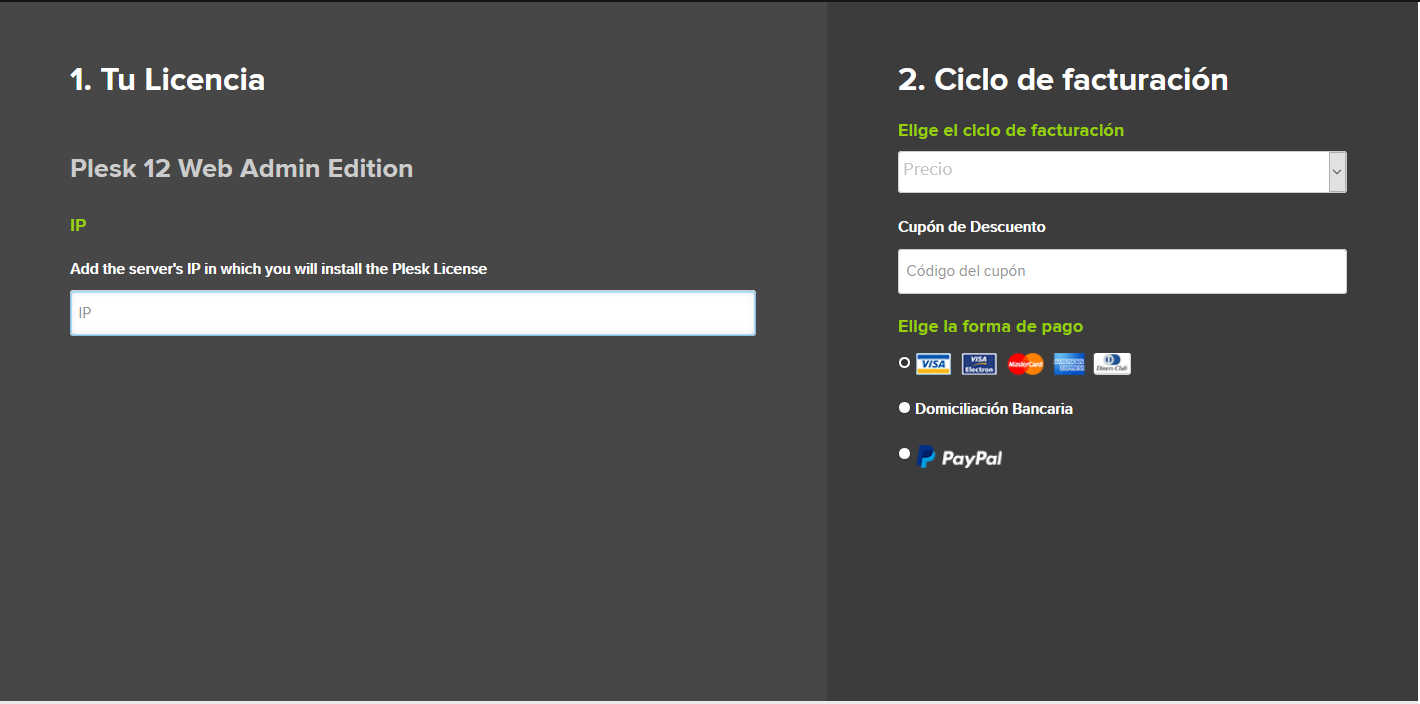
- There are the different licenses that we can provide:
| Web Admin Edition | Web Pro Edition | Web Host Edition |
| 10 Domains
Wordpress Toolkit SE |
30 Domains
Wordpress Toolkit SE Developer Pack Subscription Management Account Management |
Unlimited Domains
Wordpress Toolkit SE Developer Pack Subscription Management Account Management Reseller Management |
| 5€/month | 8€/month | 10€/month |
Once you have ascertained that the product and billing cycle you have selected are the ones you wish to purchase, click continue.
Now, you have to accept the Terms and Conditions by marking the acceptance box (3), clicking “Checkout” (4) to finish.
Download your Plesk license
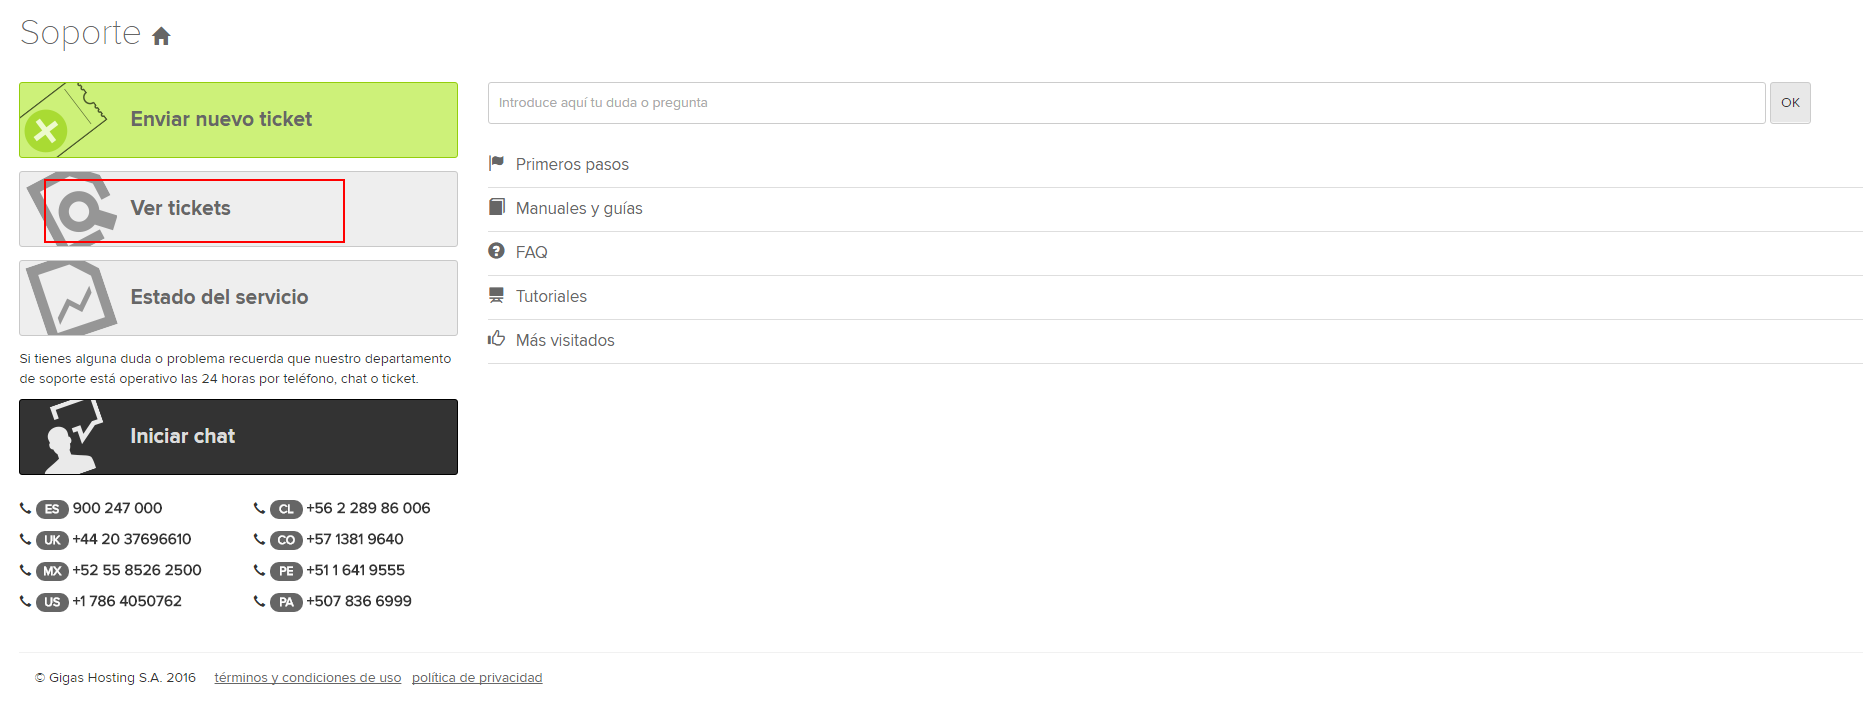
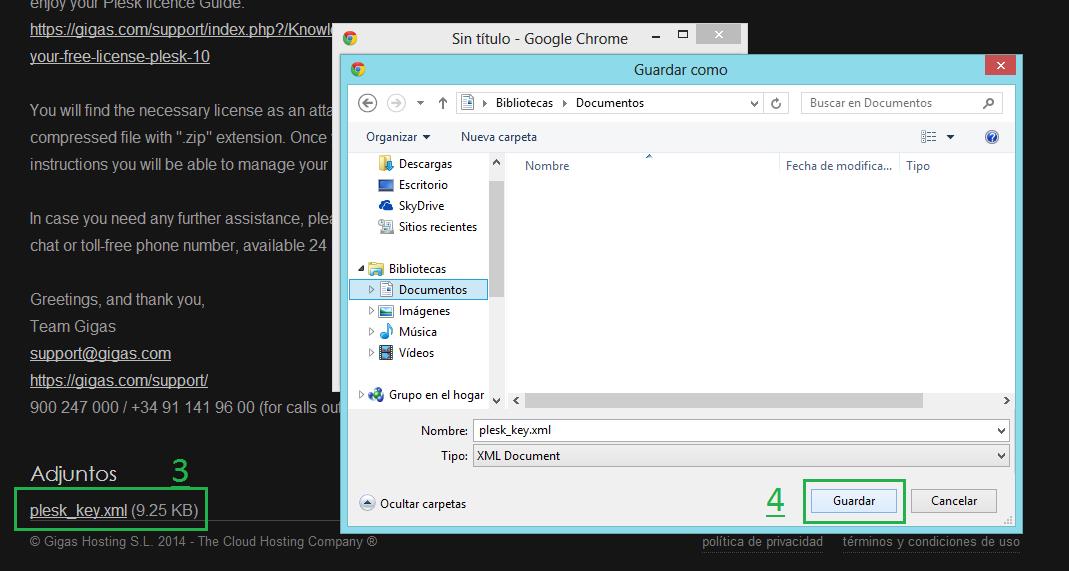
Once you have purchased your Plesk license, you will receive an email with an * .xml file attached. This is the license that you must upload to the cloud server. IMPORTANT: If the file was not attached, you can access the Support Centre panel on gigas.com and log in as client (Control Panel and Support are two independent panels so, probably you will have to re-log in. Select "View tickets" and click on "New Plesk license order" and download the license below by clicking on the name.
Now you have the license on your computer. Remember the location, later you will need it to activate Plesk.
Activating Plesk
In the next step you will perform the initial configuration of Plesk and its activation. For this you must go to the Control Panel of gigas.com.
1.Services
2.VPS
3.Click on the server name
You are now in the cloud server management panel, from here we can, turn on, turn off, restart the server, configure the Firewall, Reinstall OS ... we will focus on the button that indicates "Access your Plesk panel" IMPORTANT: The name "Plesk" of the template does not appear in my panel or Access your Plesk Panel is missing? Why? This happens if the template you have installed on the cloud server does not have Plesk installed by default, in this case, you have to go to the "Re-Install OS" button and select a template that does have it installed by default.
Select the type of Operating System and the distribution that we want to install, for example ”Ubuntu 18.04 with Plesk Obsidian", is important to have a SO name + Plesk Version, that indicates Plesk panel is instaled. Once you are sure that you have Plesk installed on the cloud server, right click on "Access your Plesk panel" and open it in a new tab, you will need to stay on gigas.com, you can access your Plesk panel on https://serverIP:8443 where serverIP is your IP adress.
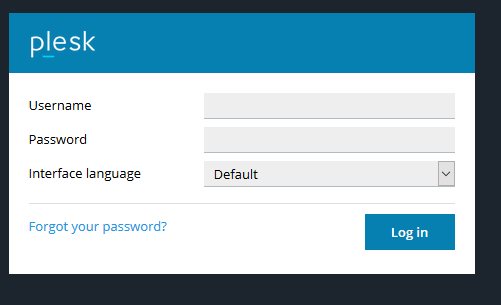
Log in on Plesk with: A) 'root' for Linux and root password B) 'Administrator' for Windows and administrator password
You have the password in the details tab of the cloud server, in the button that indicates "Initial root password: Show"
Once inside Plesk, accept the terms so that it does not appear again.
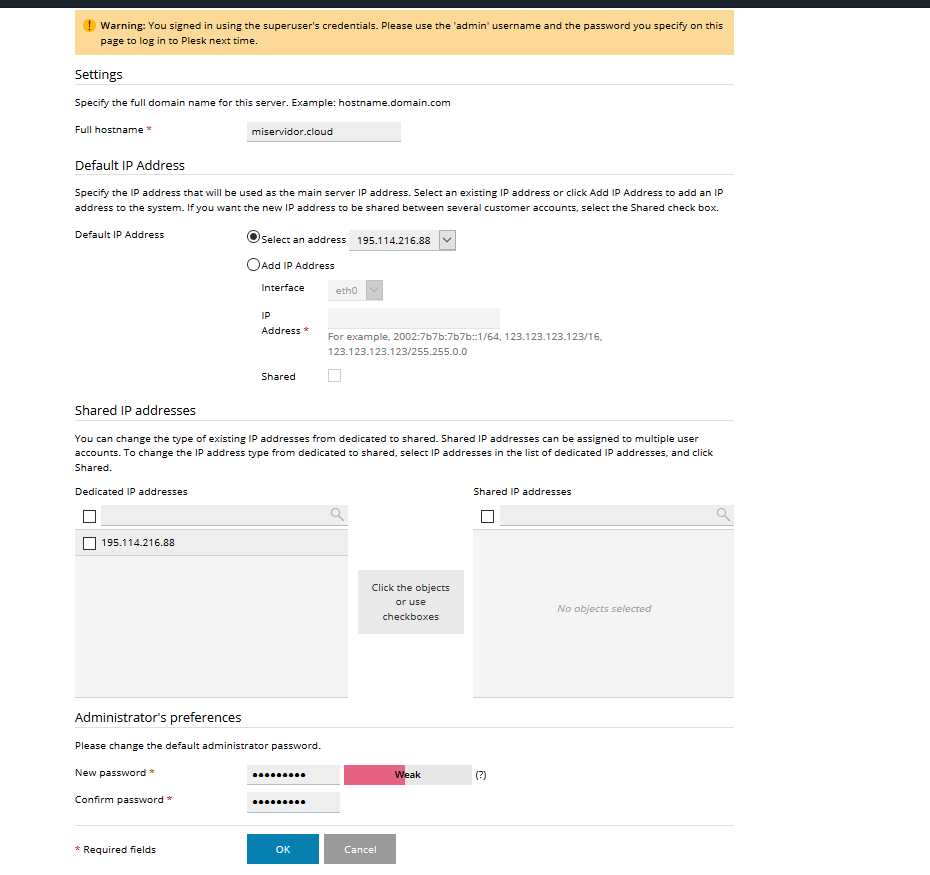
In the next step we will configure the hostname of the server.
'(A) VERY IMPORTANT: This note is very important, if you do not give it a correct hostname and use this cloud server as a mail server, you may have problems with spam lists in the future due to bad configuration, is important that the hostname resolves against the IP of the server, so it is convenient to put yourdomain.com or mail.yourdomain.com, (Changing yourdomain.com for the domain you are going to use on this server, no matter that it is not in Gigas or not pointing to this cloud server yet) but it is important that when you launch a query about this hostname, it will resolve against the IP of your cloud server. If you have questions about this point, please contact our Technical Support . '
(B) Select the IP as shared or dedicated, if it will be used by one domain or by several.
(C) You must give a password for Administrator user.
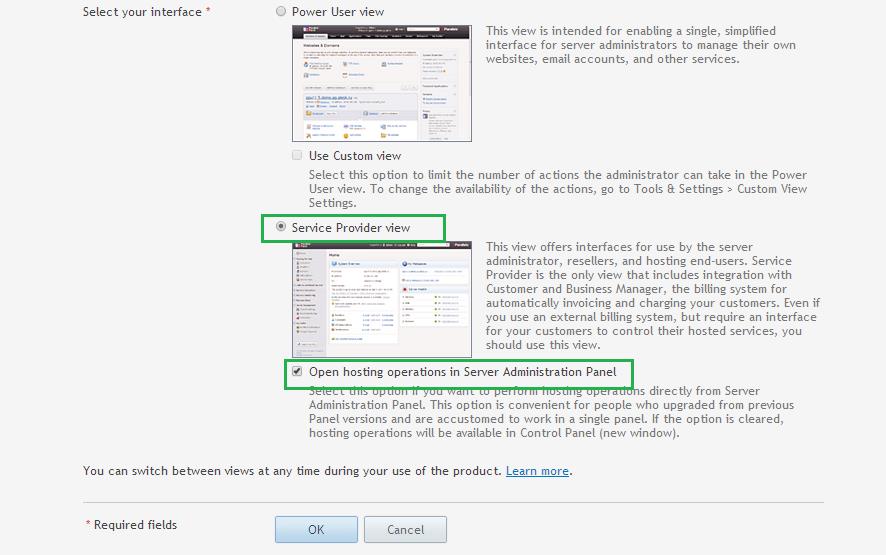
Next point; select the view or interface that your Plesk will use. This point is to the liking of each client, for those who have never used Plesk, we recommend "Other", "Service Provider View" with "Open hosting operations in Server Administration Panel", because it seems to us the clearest and simplest.
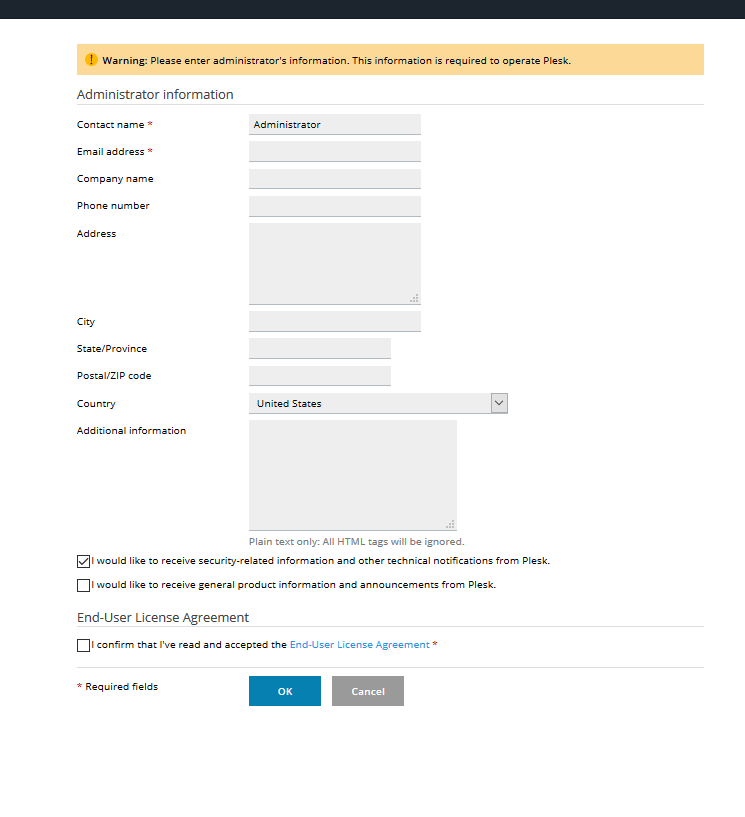
Press OK and continue, a registration form will appear, which you must fill in with your data or those of your company.
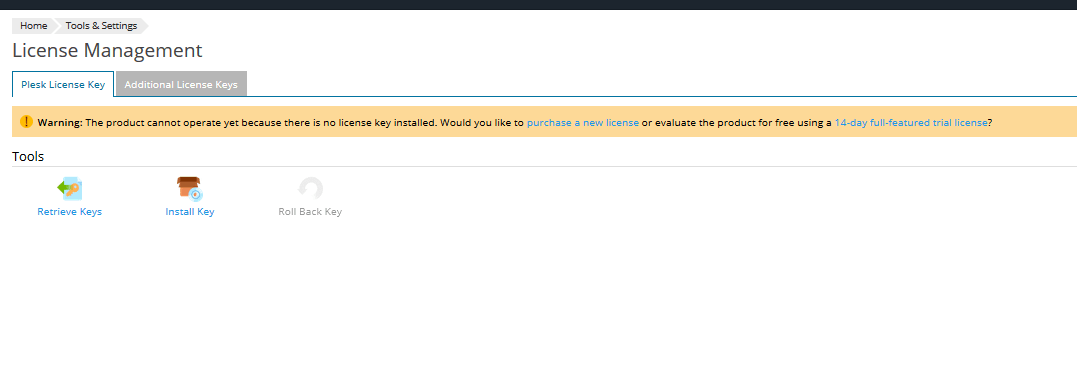
Press OK, now all you need to do is upload the license to the server, the * .xml file that you have previously downloaded.
Click on the "Install Key" button
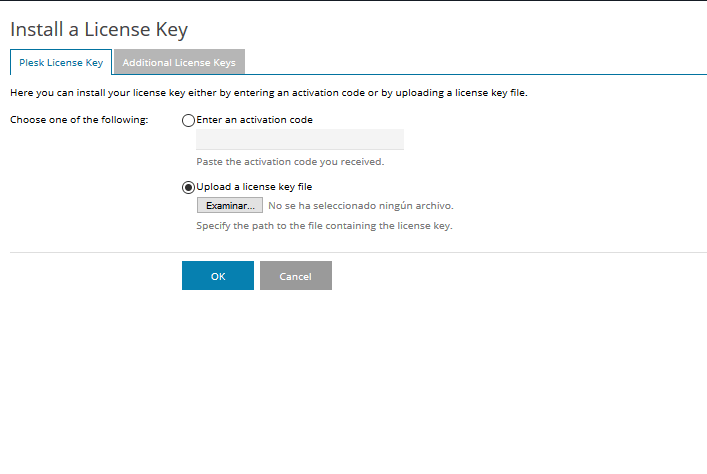
Click "Upload a license key file" and "Browse". Upload the * .xml file to the server to activate Plesk.
Press OK and you already have Plesk activated.
How to enable .xml file option
Sometimes due to Plesk configuration issues this file upload option does not appear available but this has a very simple solution:
1 - First of all we will have to connect by SSH to our server, if you do not know how to do it you can follow these simple step[1]
2 - Once inside we go to the following route:
Linux: /usr/local/psa/admin/conf/panel.ini Windows: plesk_dir\admin\conf\panel.ini
- In case "panel.ini" does not exist, "panel.ini.sample" may exist, renaming this file to panel.ini would be sufficient.
3- We modify the file adding the following content at the end of the document:
[license]
fileUpload = on
- Linux: we can modify it by writing "vi panel.ini" if we are in the file path or "vi /usr/local/psa/admin/conf/panel.ini" from the system root, at the end, we press the key "I" (Insert) and paste the previous text. To exit and save the changes, press "Escape" and then ": wq" + Enter.
- Windows: you can open the file with any text editor, such as notepad, add the previous text to the end of the file and save in the same place.
