Cloud Backup Pro EN
Welcome to the exciting world of Backup Advanced Plus (BAP)! If you're reading this, chances are you're on a noble mission to protect your company's data (or that of your clients) and ensure everything is properly backed up, available, and ready to restore when needed. And for that, you've come to the right place.
This manual is designed to guide you step-by-step through the initial configuration of the BAP console, a powerful tool that centralizes and simplifies the management of backups for your systems, applications, and databases. Whether it's your first time using BAP or you've already experimented with other backup solutions, we'll give you the keys to getting started with confidence and without any hassle.
Throughout this document, we'll cover the essential points for getting your backup environment up and running, functional, and secure from the start. We'll start with the basics: how to access the console and get it ready to go. Then, we'll dive into VLAN configuration, an important step if you want to keep everything well segmented and under control on your network.
Next, we'll show you how to add machines to the console—because a backup system without machines is like a car without wheels—and we'll move on to the most exciting options: advanced Backup Job configurations, where you can define custom strategies to protect your data the way it deserves.
Do you have critical applications or databases that can't be left out? Perfect. We'll cover how to integrate your systems with BAP so that backups are consistent and tailored to the specific needs of your environment. You'll also learn how to launch the Veeam agent installation directly from the console, so you don't have to manually install them one by one on each machine.
And to top it all off, we'll launch your first backup together. Because it's one thing to have everything ready... and another to see it actually start working.
This manual isn't meant to be a technical primer filled with incomprehensible jargon. We want you to find it useful, practical, and straightforward, as if a colleague were explaining it to you over a cup of coffee. So feel free to follow the steps at your own pace, consult whenever you need, and, above all, experiment.
Let's get down to business!
Contenido
Configuration and Initial Access to BAP
At this point, the first thing we need to do is log into the Gigas Control Panel using the username and password you have for this step.
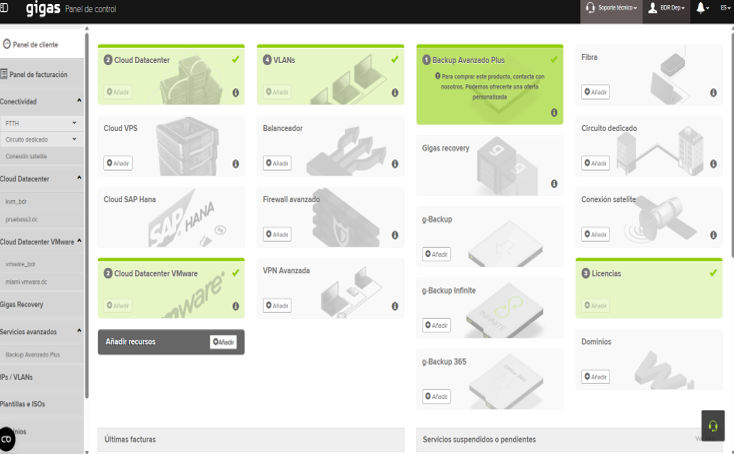
Once inside the Gigas Control Panel we will locate the Advanced Backup Plus (BAP) option, we will click on this option as seen in the image:
Once inside the Advanced Backup Plus (BAP) option, we will have the option to enter using two methods, which will be explained below:
First Access Option:
Using non-VNC Console “Console Access”:
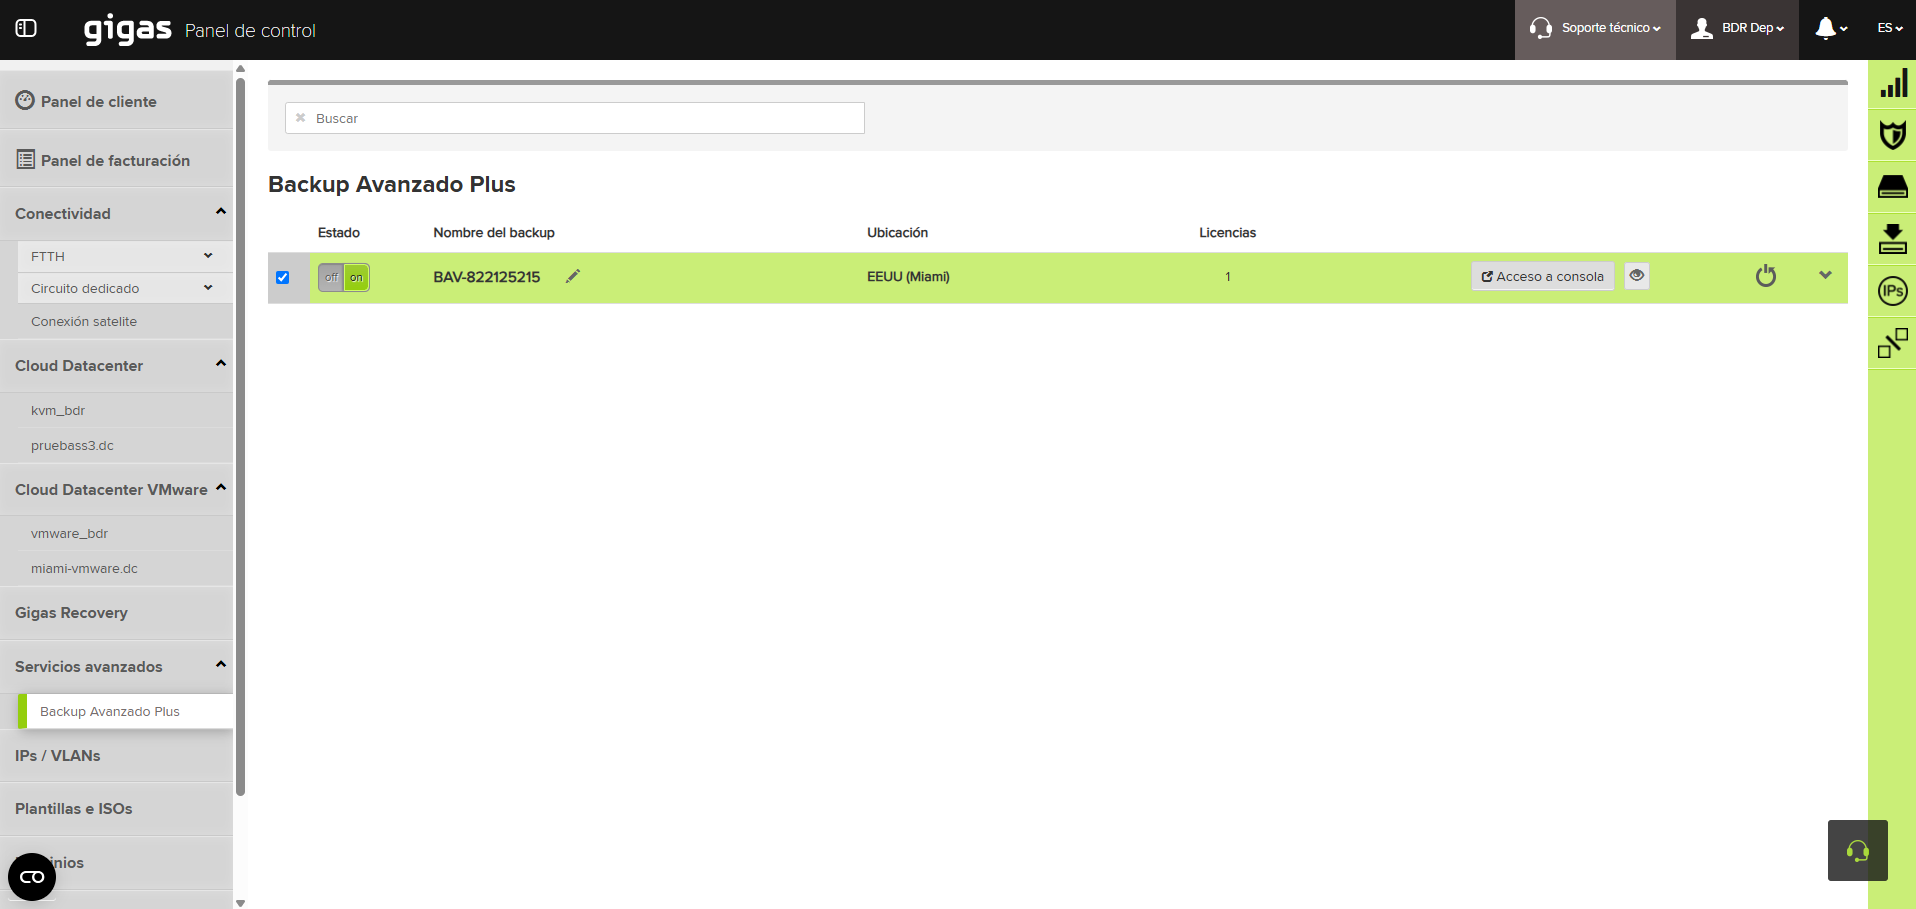
In this section we can access the Advanced Backup Plus (BAP) console via the Gigas Control Panel using a VNC console through the browser, as can be seen in the following images:
To obtain the access credentials to the Advanced Backup Plus (BAP) console, we can go to the Eye-shaped button:
Once there, a pop-up window will open informing us that the data to enter this console will be the following:
User:Administrator
Password:Password that is indicated when accessing the manager.
Second Option:
Configure with Basic Firewall, access via RDP
For this part we can go to the basic firewall offered by the same Gigas Control Panel where we can configure the access rule through the RDP port that is configured by default in Windows Systems which is “3389” as can be seen in the following image:
Recommendations and best practices
Below are some steps to strengthen security regarding RDP access to your Advanced Backup Plus (BAP) service:
- Keep the default policy set to drop for the public interface to prevent your BAP console from being exposed to the Internet.
- Use only the source IP from which the connection will be made, in order to avoid unauthorized external access.
- Change the default RDP port “3389” to another “XXXX” that does not affect any important service used by the Operating System or, failing that, the Advanced Backup Plus Console (BAP) service in the following link you will be able to check the ports used by the Backup software.
VLAN Configuration
If you have come this far, it indicates that you are doing well with the initial configuration procedure of the Advanced Backup Plus (BAP) console. Now we are going to configure the VLAN that is configured with your server(s) which are in the Cloud Data Center (KVM and/or VMware).
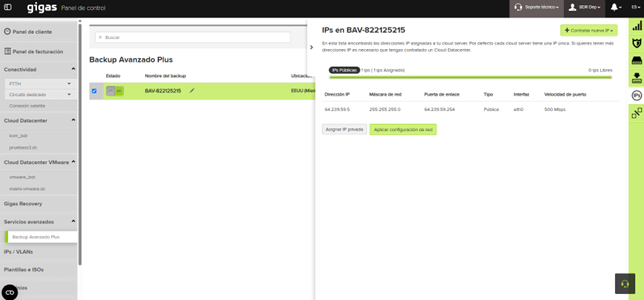
In the same Gigas Control Panel on the right side we will see a circle and inside it it says IPs, we select it and the options will be displayed to configure the assignment of a private IP and that the Advanced Backup Plus (BAP) console can have a connection through the internal network that you have configured on your Cloud Data Center server(s) as we can see in the following image:
We select the “Assign private IP” button and a new pop-up window will open where we can do the following:
- Select VLAN(verify the VLAN you want to assign to your BAP console).
- Assign IP(verify an available IP within your configured network segment to be able to assign it to the BAP console).
- Range(here we must place a 2-digit number which will indicate the range we have configured in the network segment).
Once we click on the “Assign IP” button, the pop-up window will close and this will leave us in the main window where we must click on the “Apply network configuration” button. This action will restart the Cloud Server of the Advanced Backup Plus (BAP) console in order to apply the new configuration that has been assigned to the new network interface.
Adding machines to the BAP console
In this section, we'll walk through the steps to configure the backup job and successfully add the servers we'll be protecting.
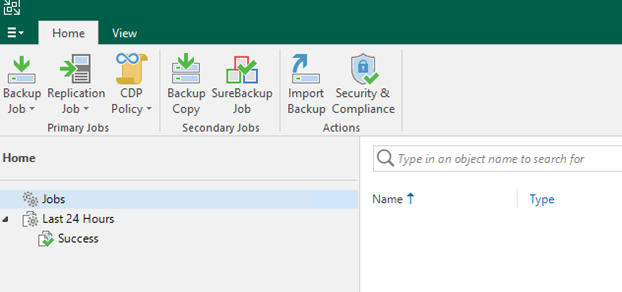
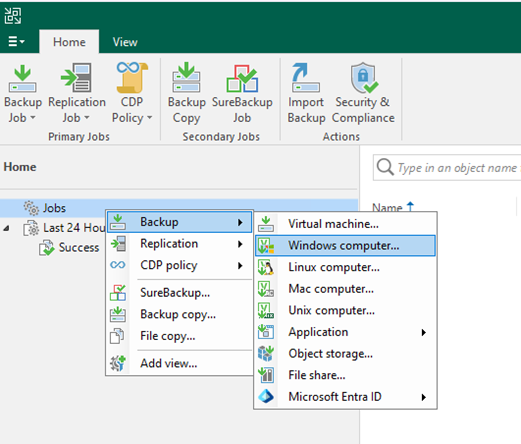
First we go to the Home section:
Then, right-clicking on Jobs, we will create a Backup of the type of machine we want to protect (Windows and/or Linux):
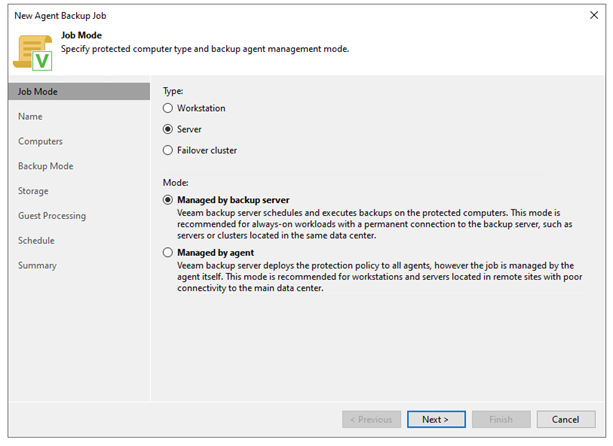
The configuration wizard for creating the backup job will appear. Select "Server" and "Managed by backup server" and click Next:
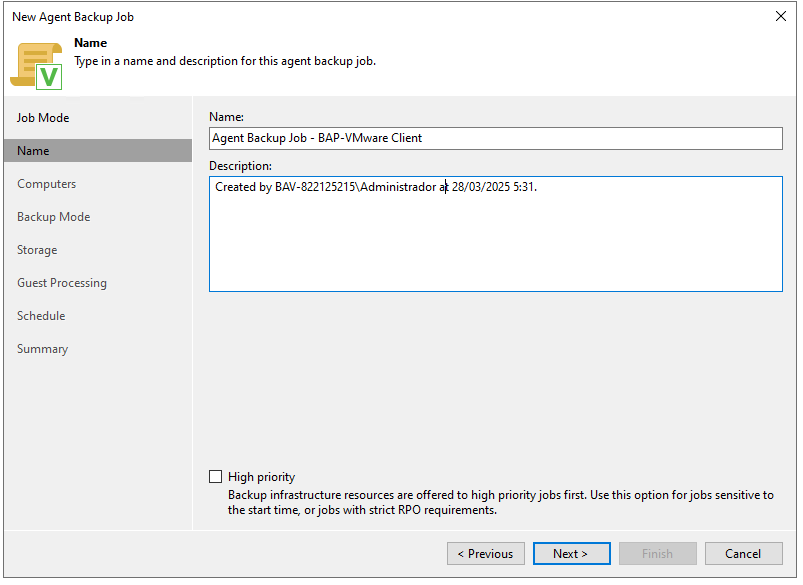
We enter an identifying name for the backup job and click next:
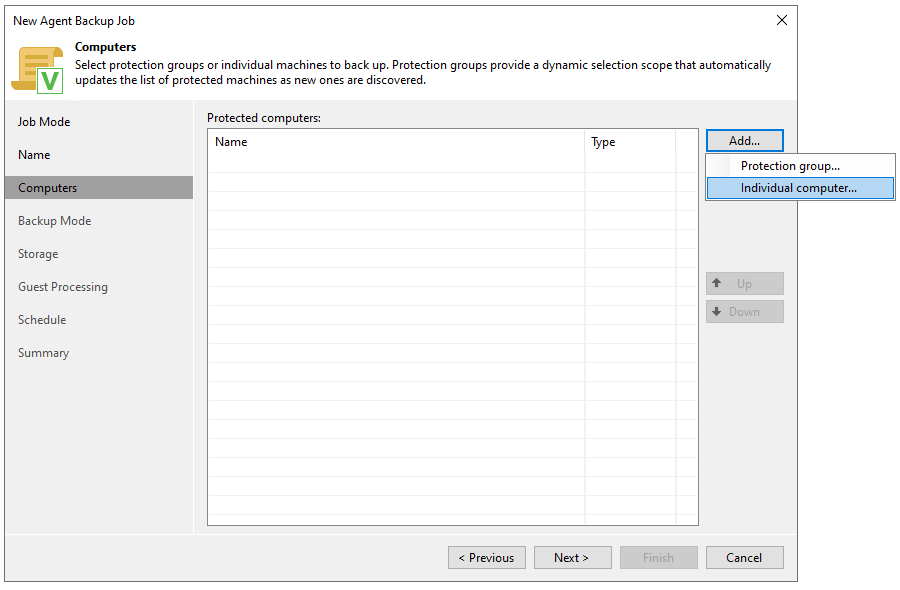
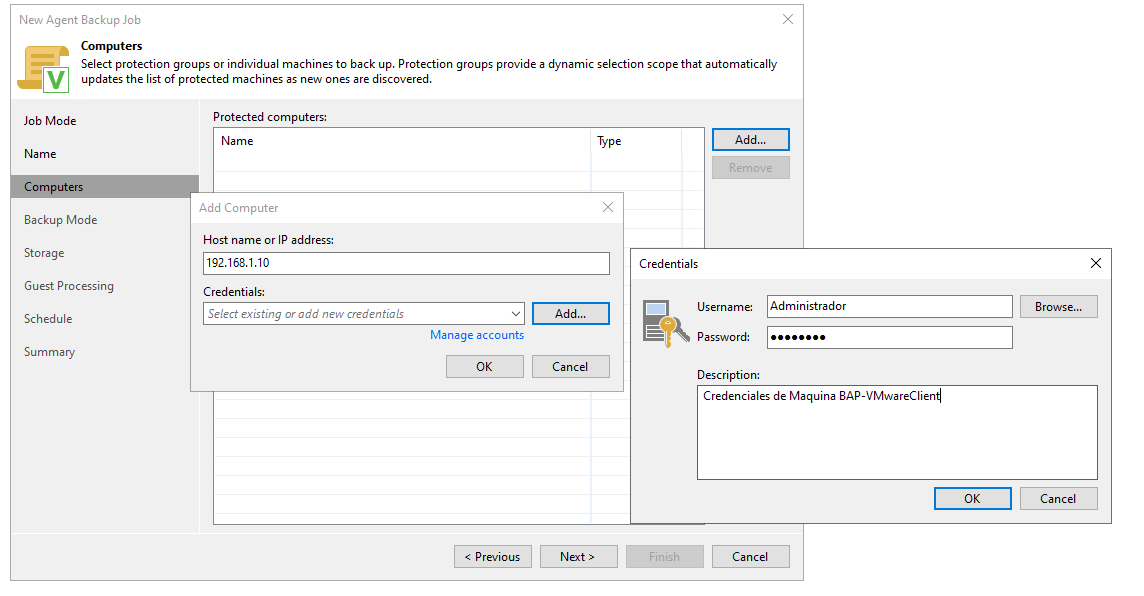
In this step, we'll add the machine we want to protect. One server per job is recommended.
We enter the IP or DNS address of the server to be protected followed by the credentials to be used. It is recommended that it be a user with full Administrator permissions on the server since it must have access to the shared resource \\ADMIN$:
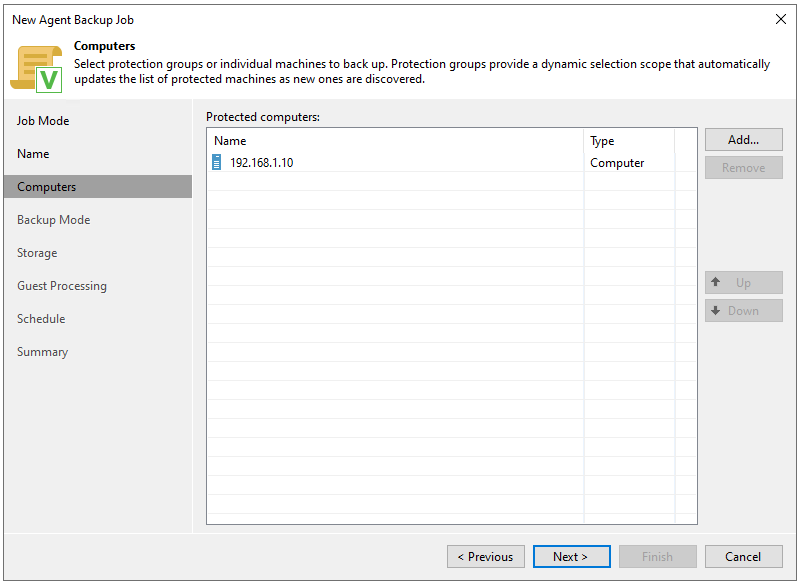
We click next once the server is added:
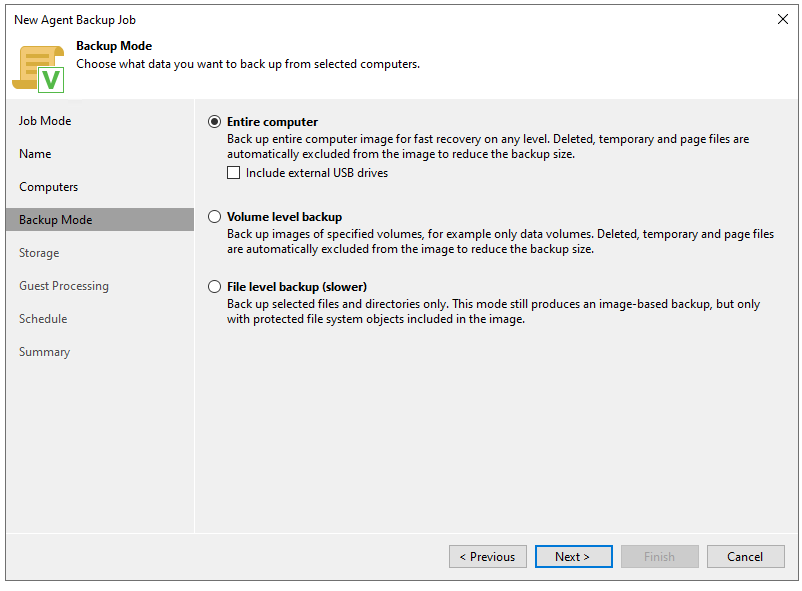
We choose the type of backup we're going to perform. We recommend "Entire Computer." Click Next.
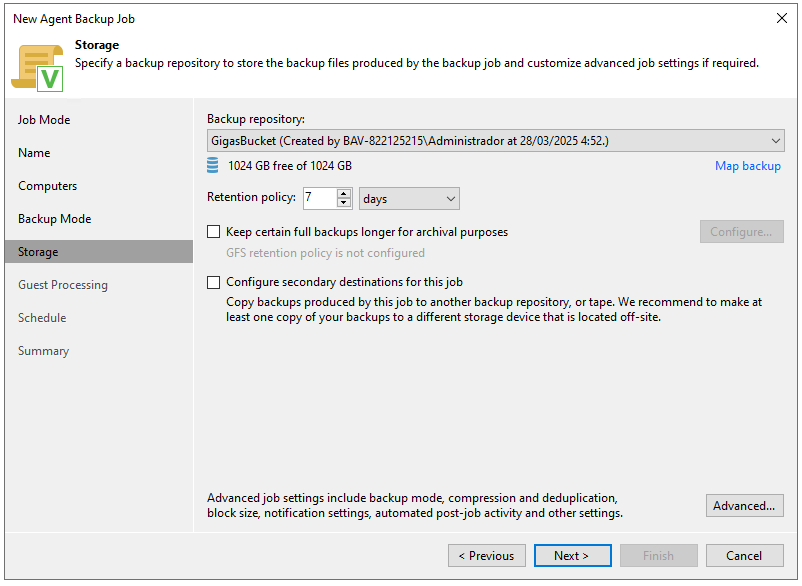
In this next step, we'll choose the storage for backups, retention, and additional notification settings.
To choose the Storage (Backup Repository) we display the drop-down menu and choose the one we need.
Advanced Settings in Backup Jobs
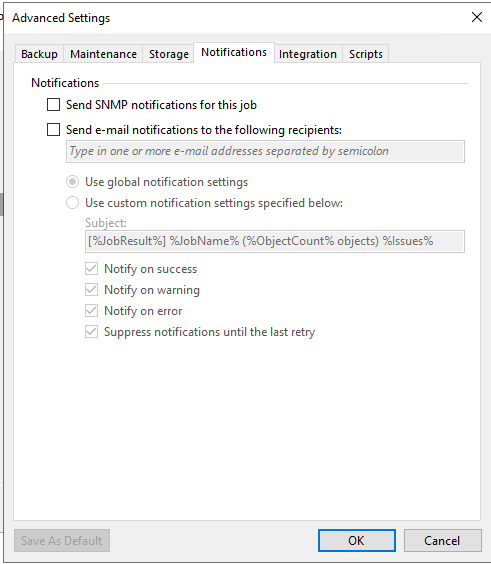
In the “Advanced Settings” section, we can configure backup notifications to receive by email.
Application and/or Database Integration Configuration
SQL Server Database Backup Configuration (Simple)
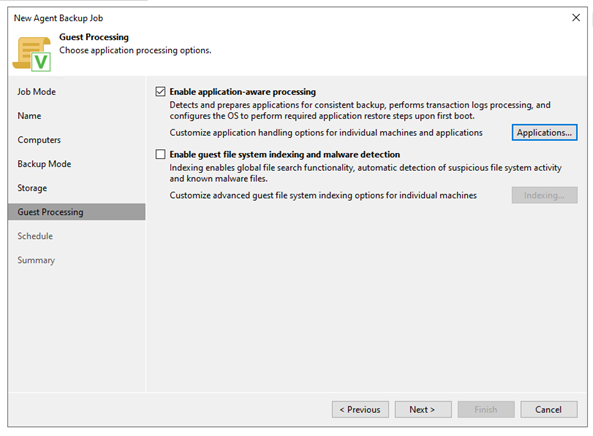
In the next step, we can configure “Guest Processing.” This is necessary if the machine to be protected has a database or another application such as SQL Server, Oracle, or Sharepoint.
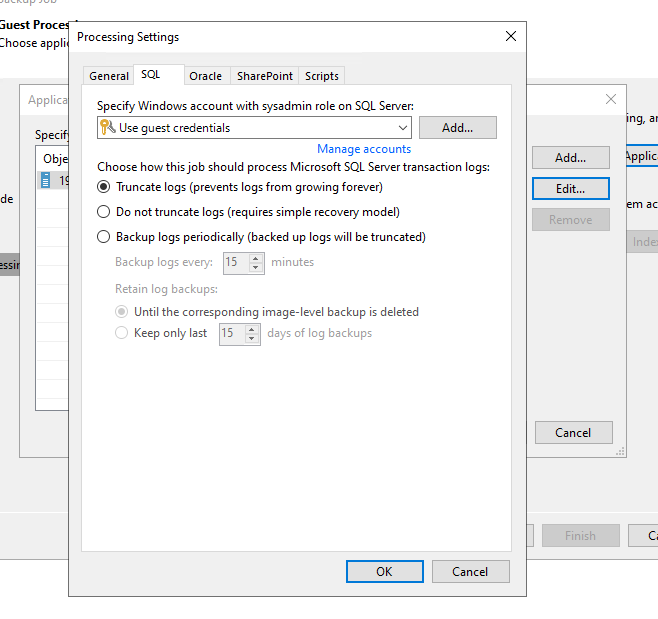
In “Applications” we can configure credentials and other options to back up databases (SQL, Oracle, SharePoint):
SQL Server Database Backup Configuration (Full)
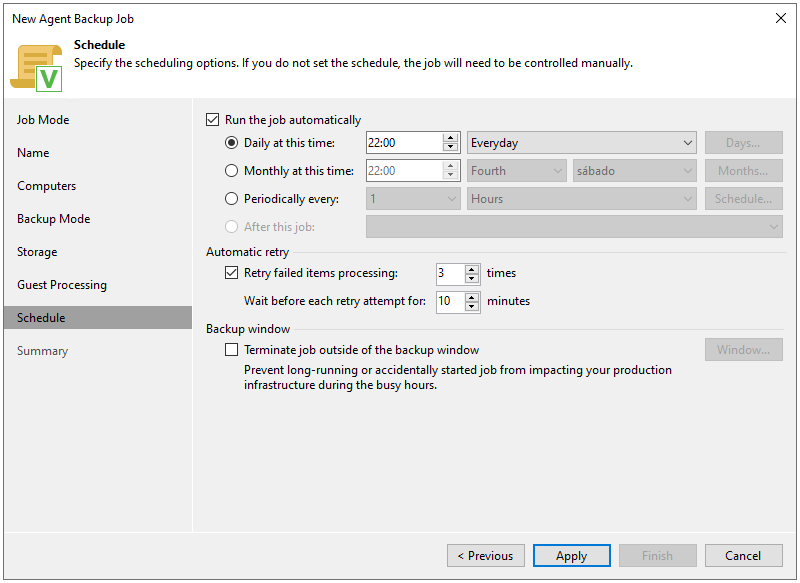
In the next step we will configure the backup job execution schedule:
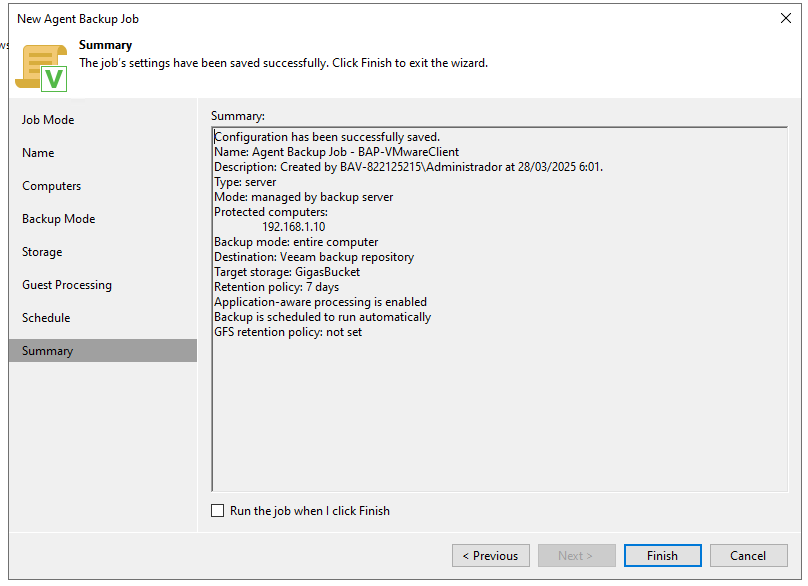
We click on “Apply” and it will give us a summary of what has been configured:
Click “Finish” to exit this wizard.
Launch Veeam Agent installation from the BAP console
How to install the Veeam agent from the Advanced Backup Plus Console for the machines we have configured in backup jobs.
In this section we can have two options that you can freely choose depending on which is the best option you want to choose.
Configuring automatic installation of the CBT “Change Block Tracking” in the Manually Added group in the Inventory section of our Backup Advanced Plus (BAP) console
A brief explanation of how CBT (Change Block Tracking) technology works in Veeam is like a "good helper" installed alongside the Backup Agent. Basically, it keeps track of which disk blocks change between backups. This way, when you perform incremental backups, it only copies what changed, not the entire disk again. The result: faster and lighter backups. And without disturbing the system!
CBT Configuration:
We go to the “Inventory” section in the lower left corner.
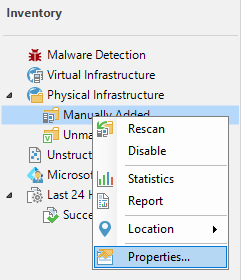
We right-click on “Manually Added” and choose “Properties”
The following configuration window will appear where we will click “Next”:
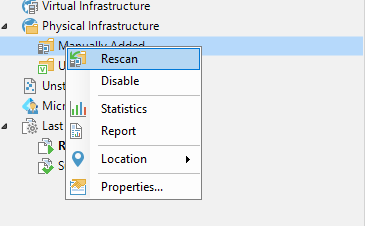
We right-click on “Manually Added” and choose “Rescan”
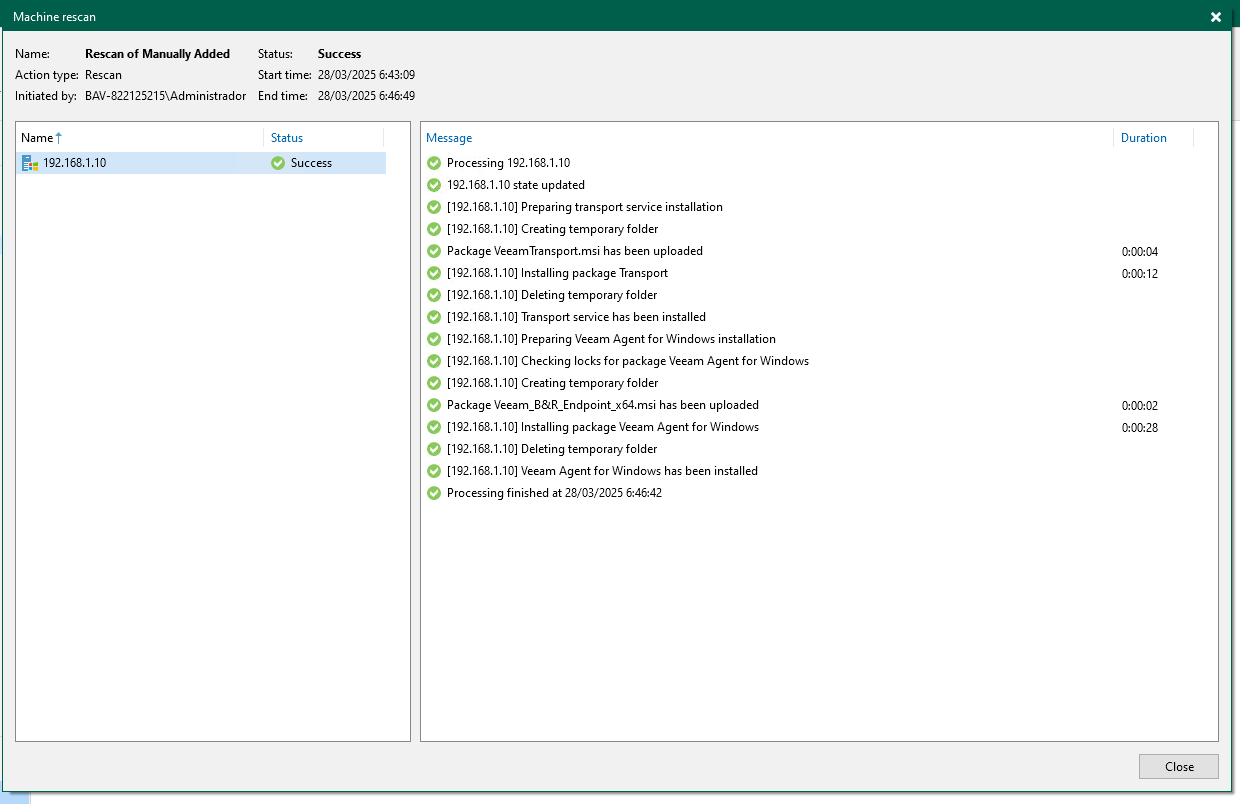
Veeam B&R will begin the process of reviewing and installing the agents on the machines where we created the backup jobs:
Launch of the first Backup
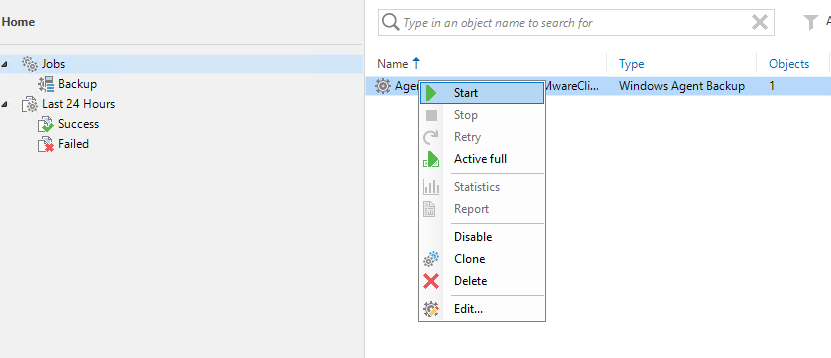
Once completed successfully, we can return to Home > Jobs > Backup, right-click on the backup job created, and start it to obtain the first backup.
