Gigas offers its clients the pssibility of adding disk space to the Cloud Datacenter product. You can follow these steps:
- Access your cloud product from the Control Panel through the upper bar on Gigas site login.

- Click the product you wish to add disc to.

- Select the Cloud Server

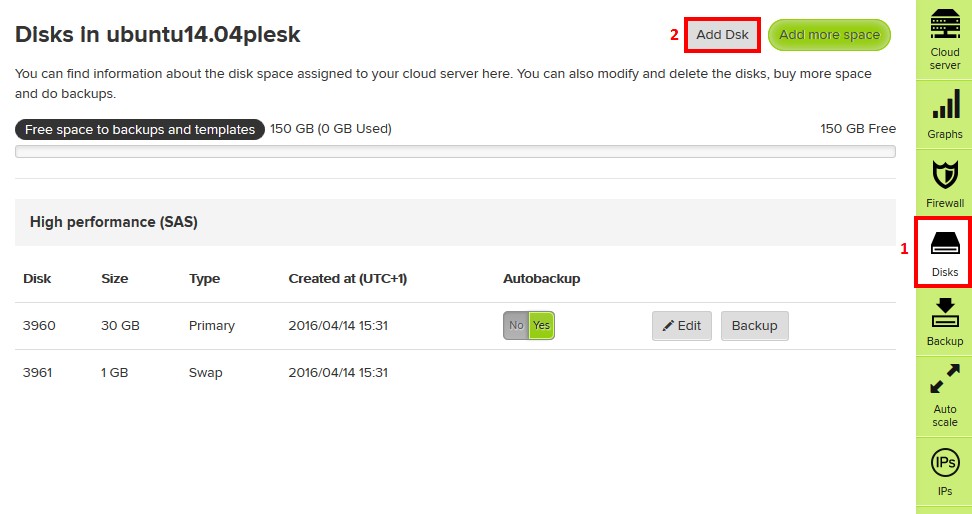
- Click on "Disks" in the Cloud Server administration page.
- Click "Add disk"

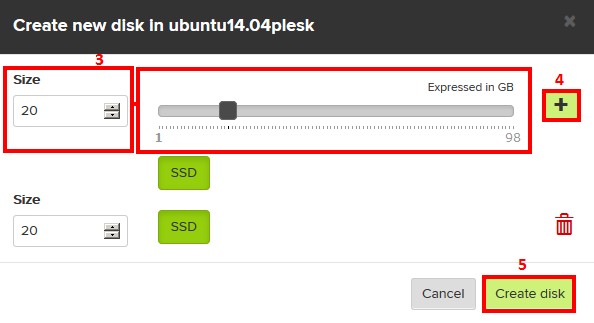
- In the new dialog, choose wanted space: slide the selector or, on the left, input the desired amount.
- Press "[+]" button.
- Click "Add disk"

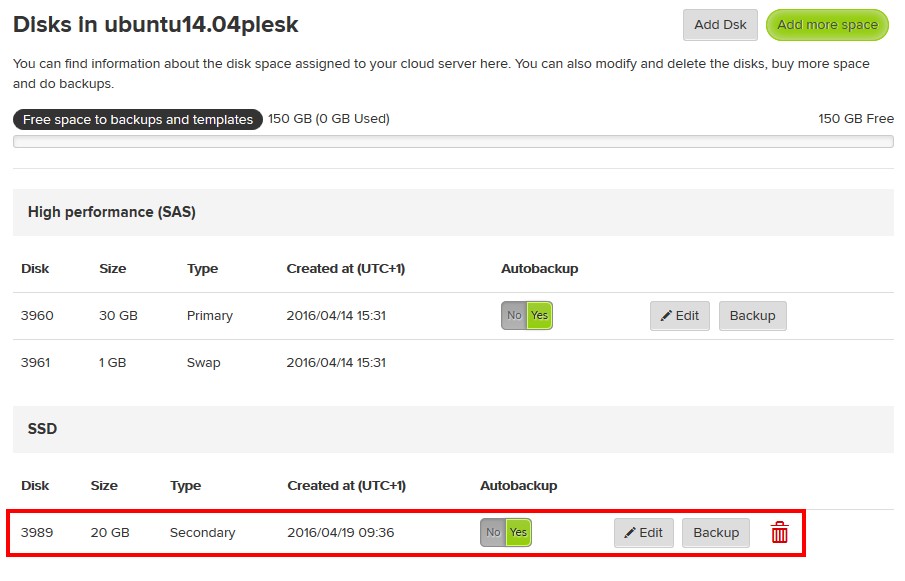
- While in the disk section you should be able to view the new disk. Refresh the page, your disk should be ready for use.

If you have doubts or need further information remember we are available 24x7, 365 days
chat,
phone and
ticket.