How can I make use of my Gigas DNS if my domain is in another registrar
It is very common in the hosting sector to have diversified server domains. This can sometimes suppose a problem if your domain registrar is limited when configuring namesevers or creating NS records. What is the solution to this? Use your own VPS as domain name server (DNS).
Gigas has developed a system by which every VPS server has two NameServers assigned pointing to the VPS IP address so you can use these two NS in your domains so they use your VPS DNS.
Contenido
What NS may I use?
NS assigned to every IP are:
- Primary NS: <IP>.dnsgigas.es
- Secondary NS: <IP>.ns2.dnsgigas.es
<IP> must be replaced by the IP address of the VPS server you want to use as DNS Server.
Example:
- IP: 5.56.18.23
- Primary NameServer: 5.56.18.23.dnsgigas.es
- Secondary NameServer: 5.56.18.23.ns2.dnsgigas.es
How to know my server IP address
When you have successfully ordered a Gigas VPS server, you receive an email with your server details, your IP address being amongst them.
You can also find your server IP address in Gigas Control Panel, VPS Server section, making a click on your server name.
Once you have your NS configured, we are going to show you how to configure them in some of the most frequent domain registrars.
Frequent domain registrars
1and1
In order to configure these NS in a domain registered in 1and1 you have to first access your 1and control panel.
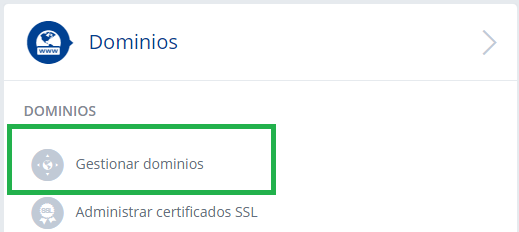
In the "Domains" section you have to click on "Manage Domains"
Afterwards, click on "Modify domain configuration"
In the next screen, scroll down and click on the button next to "DNS configration", titled "Editar" in order to change NameServers that will manage this domain.
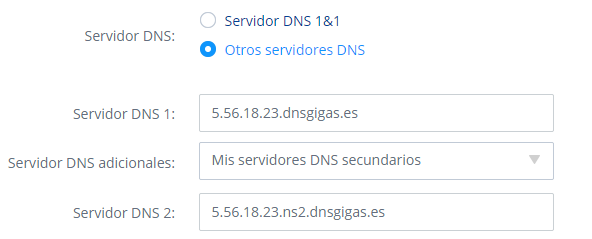
Tick the checkmark next to "Other DNS servers" and add DNS Server 1 (Gigas Primary NameServer) and DNS Server 2 (Gigas Secondary NameServer).
A bogus IP address has been used as an example. You should use the IP address matching your Gigas Cloud Server.
Click on "Save" and...
Arsys
In order to configure these NS in a domain registered in Arsys first access your Arsys control panel.
In that panel, on the left will appear the domains we own. Click the one you want to do the NS change on.
Afterwards, click "Manage domain"
On the next screen, to the bottom, click on the button "Modify data" and then unfold "Name Servers (DNS)" section.
Configure the NS so they are like in this screenshot:
A bogus IP address has been used as an example. You should use the IP address matching your Gigas Cloud Server.
Click on "Save" and...
GoDaddy
In order to configure these NS in a domain registered in GoDaddy first access your Godaddy control panel.
In your principal panel click on the "+" in the "Domains" section, so the whole section containing our registered domains is unfolded. On the right of the domain you want to change the NS of, click on the "Manage" button.
In this section you can find several things. Anyway, access "Configurations" tab, go to "Name Servers" section and click on "Manage".
Click...
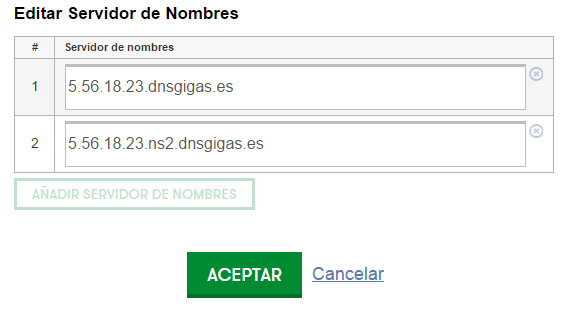
Fill the form in this way:
A bogus IP address has been used as an example. You should use the IP address matching your Gigas Cloud Server.
Click on "Accept and Save". A popup will appear telling you that changes will be applied within some minutes.
Once the NS are configured, where can I manage DNS records?
Answer is easy: in your Gigas server. In this example, we have a server with Plesk installed:
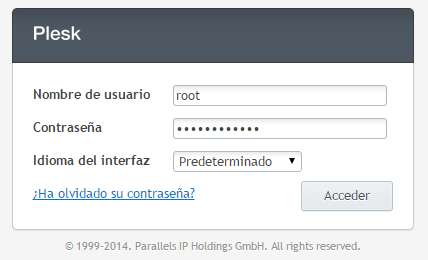
Access our server Plesk Control panel:
In the case that you access Plesk for the first time and you need help with the initial configuration, you can follow this manual:
Si es la primera vez que accedes a Plesk y necesitas ayuda con la configuración inicial puedes seguir este manual: How to enjoy your free Plesk license.
Access the migration whose DNS you want to modify.
(Depending on the interfac you have configured in your Plesk, the screenshot might not be accurate).
Websites and Domains tab -> Unfold every domain option -> Click on "DNS configuration".
On this screen you can find the DNS records used by your domain. It is here, in Gigas "DNS Records" where you must do any DNS modification as NS in your domain registrar point to your Gigas server.
By default, Plesk creates some basic DNS records from a template that you may adjust from Plesk "Tools and configuration".
Remember not to block 53/UDP port as it is used by the DNS service.


